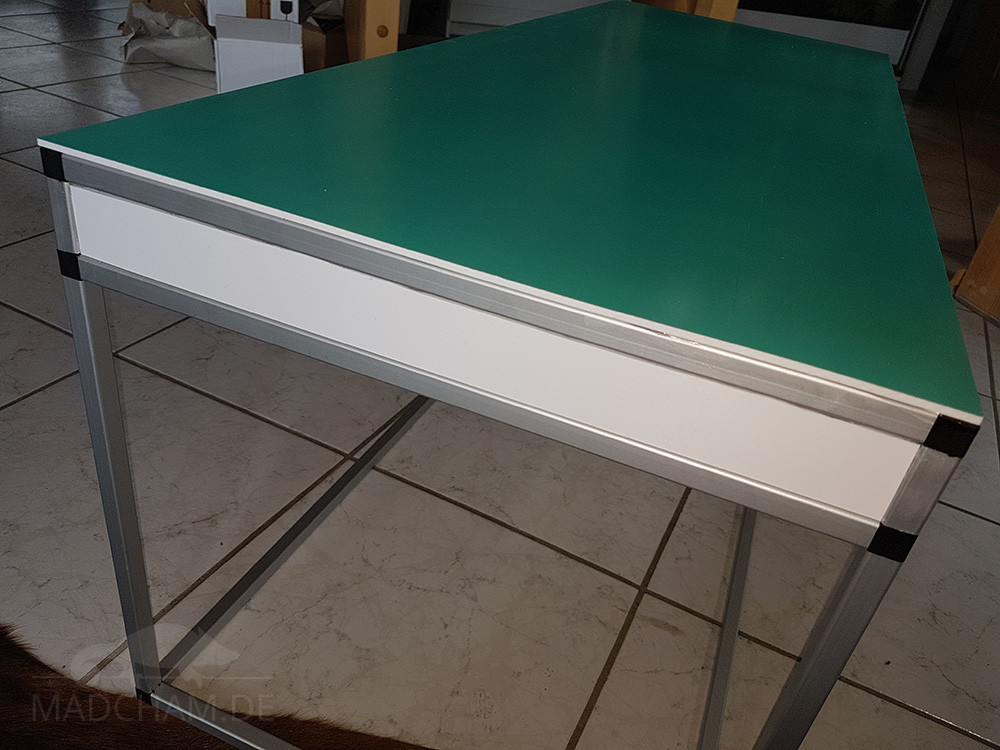
This construction manual is from our own cages and designed for Calumma parsonii parsonii offspring. We planned and built them by ourselves. We assume no liability for mistakes in lengths or sizes. 😉 In this cage, three smaller cages build one unit. For smaller chameleon species, you can of course install more partition walls and smaller doors, so you get six smaller cages instead of three bigger ones. The outer dimensions of this chameleon cage is 105 cm width, 40 cm depth and 40 cm height.
Costs for one thee-cages-unit are about 150 € to 200 € in Germany depending on your sources. The doors are simple lightweight sliding doors. They do not reach the bottom so you can fill in soil if necessary.
Necessary material:
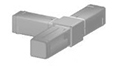
 8 x connectors 13,5 x 13,5 mm (schwarz)
 2x connectors 13,5 mm x 13,5 mm 4er (schwarz)
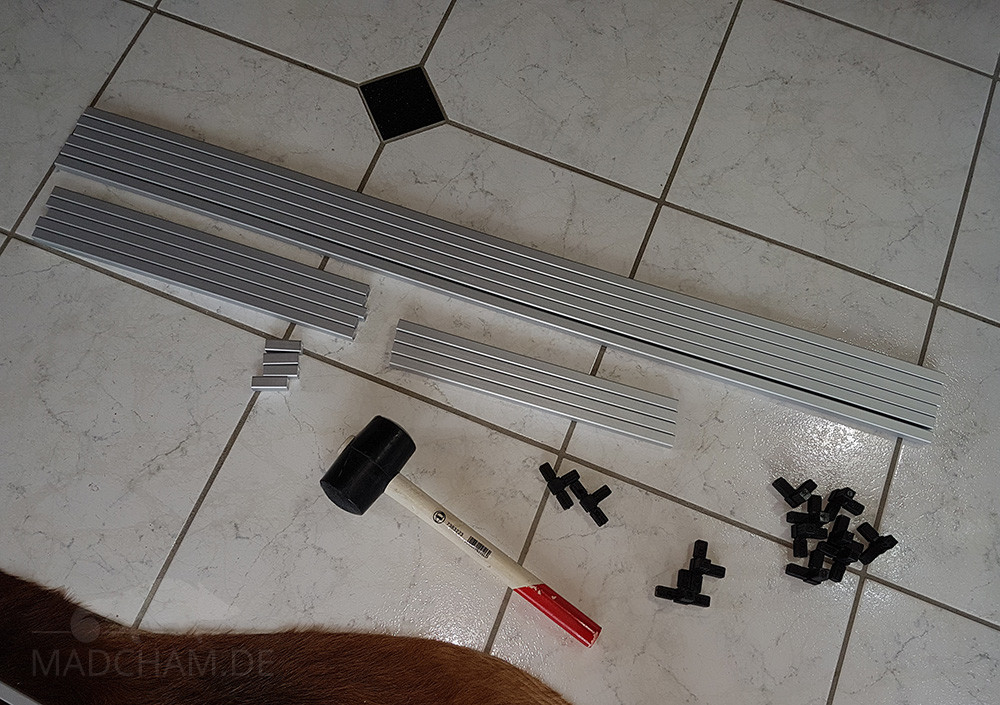
Aluminium profiles and connectors
 2x connectors 13,5 x 3,5 mm (schwarz)
- 5x Aluminium profiles 13,5 x 13,5 mm length 102,3 cm (a)
- 6x Aluminium profiles 13,5 x 13,5 mm length 37,3 cm (b)
- 4x Aluminium profiles 13,5 x 13,5 mm length 3,65 cm (c)
- 4x Aluminium profiles 13,5 x 13,5 mm length 32,3 cm (d)
- 3x 2 mm Forex panel 105 x 40 cm (bottom, back and top)
- 2x 2 mm Forex panel 37,3 x 3,7 cm (bottom sides)
- 1x 2 mm Forex panel 102,3 x 3,7 cm (bottom front)
- 2x 2 mm Forex panel 32,3 x 37,3 cm (sides)
- 3x 2 mm Forex panel 35 x 31,3 cm (doors)
- 3x 2mm Forex panel 41 x 40 cm (partition walls)
- black aluminium gauze 1x 40 x 100 cm (top)
- black aluminium gauze 2x 35 x 30 cm (sides)
- black aluminium gauze 3x 35 x 6 cm (doors)
- aquarium silicone
- double-sided tape
- hot-glue gun
- Knife
- Glass guiding profiles (white) for top and bottom, for 4 mm glass, 105 cm long
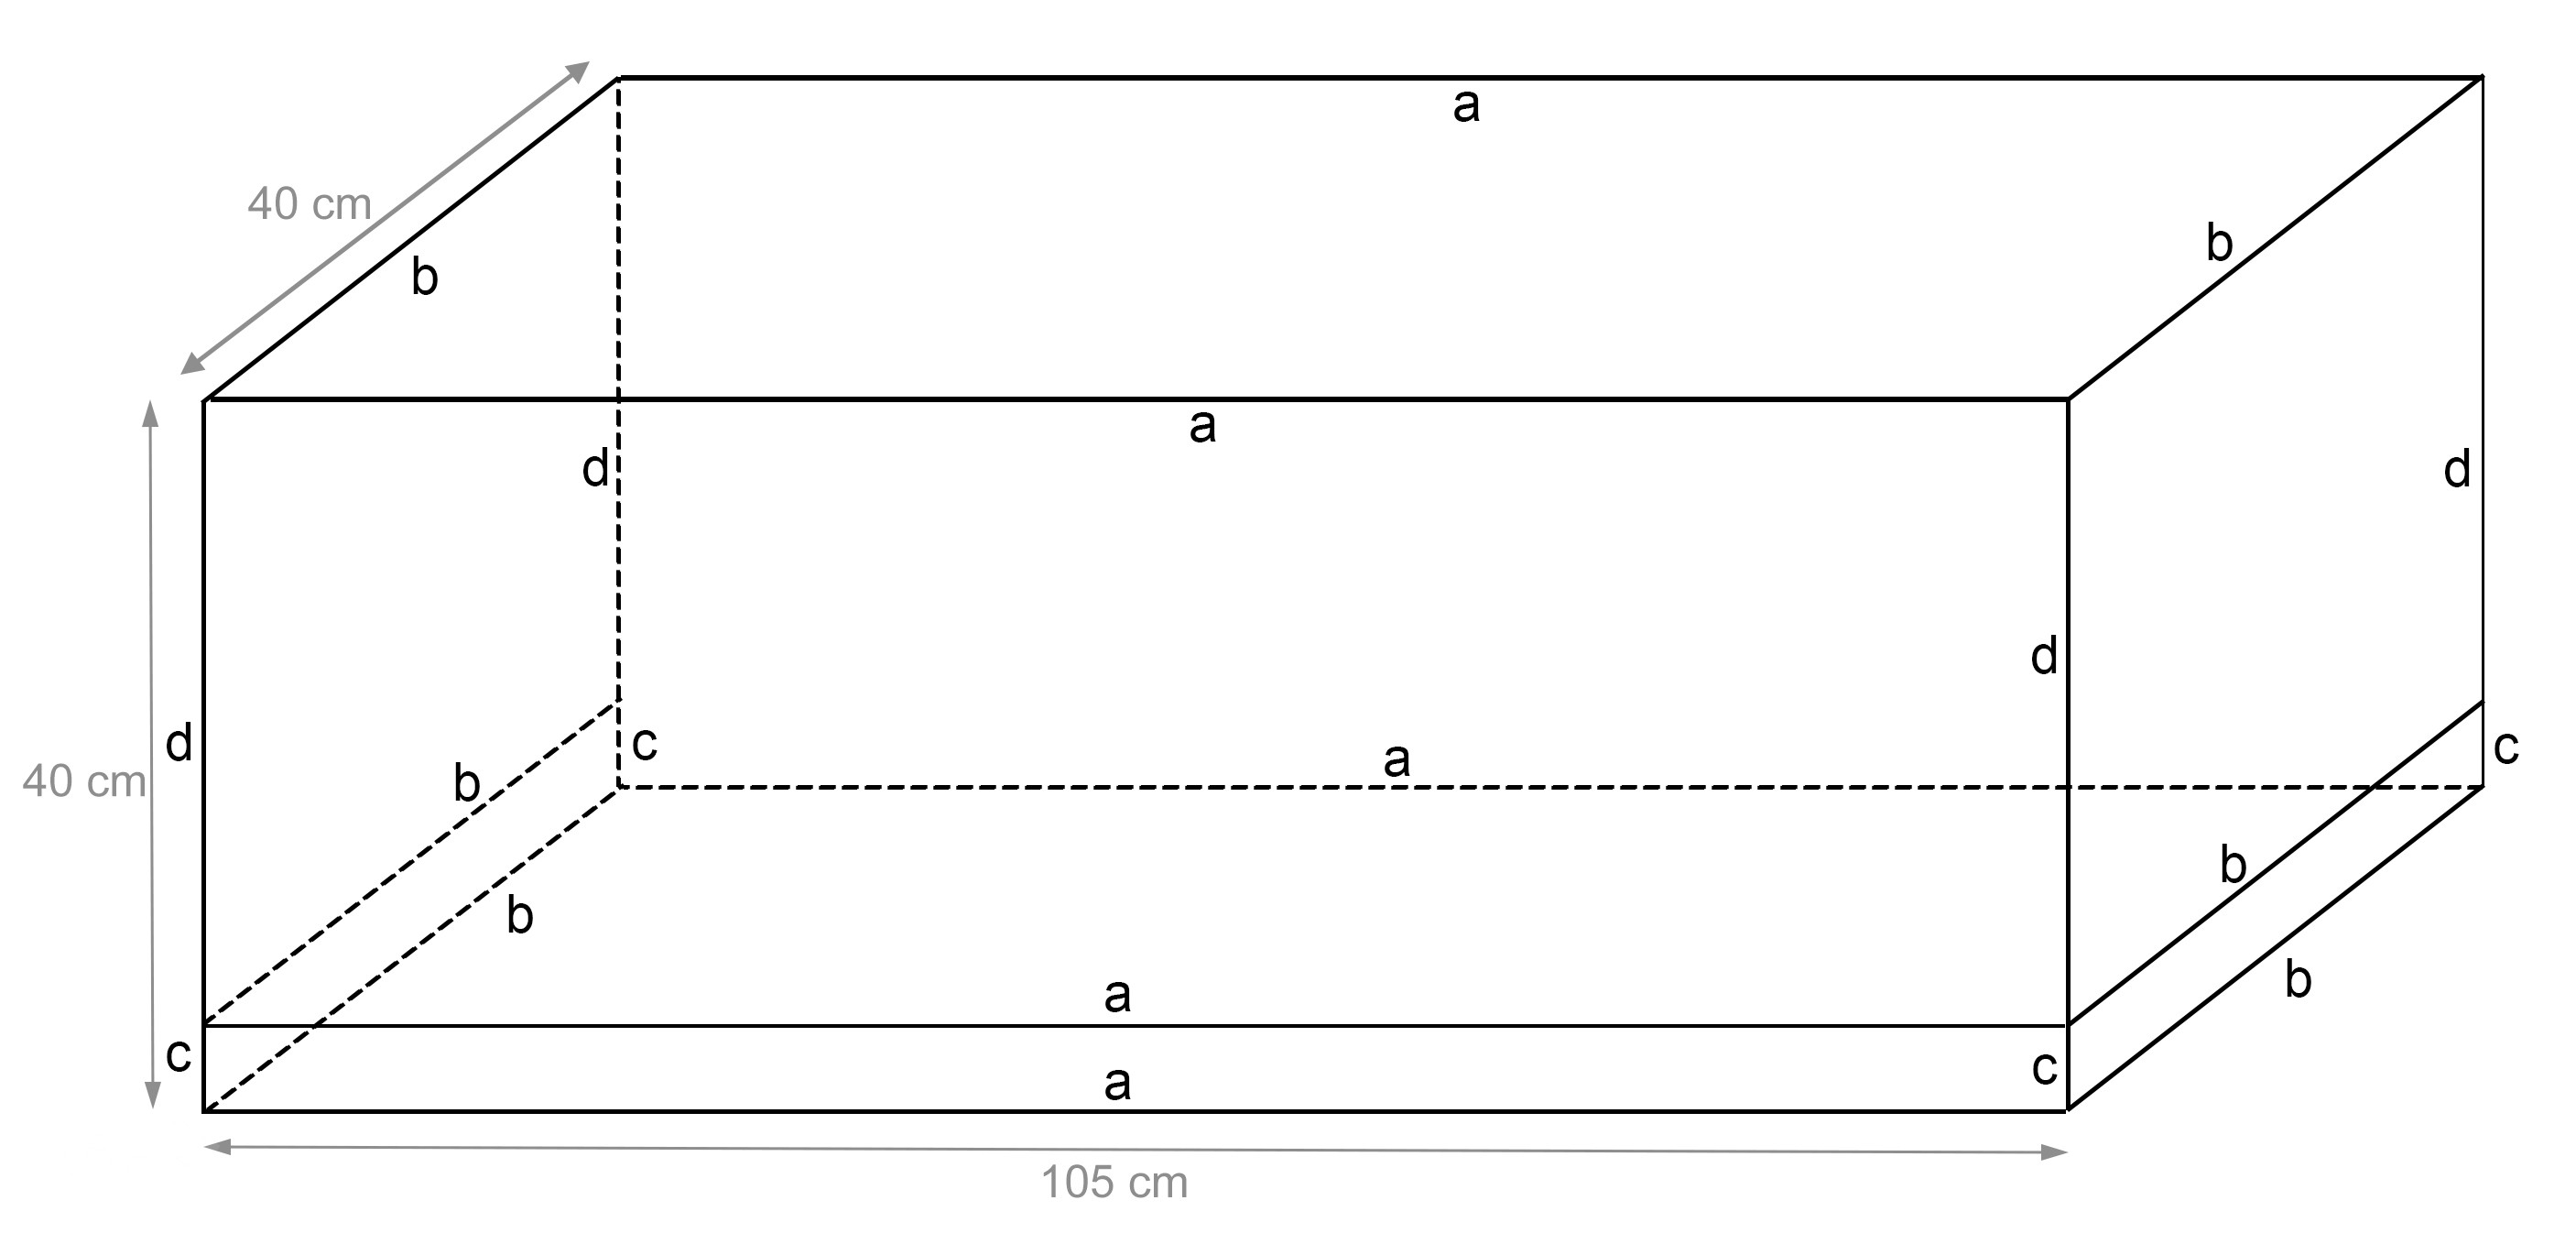
Installation sketch
And that’s how to assemble it:
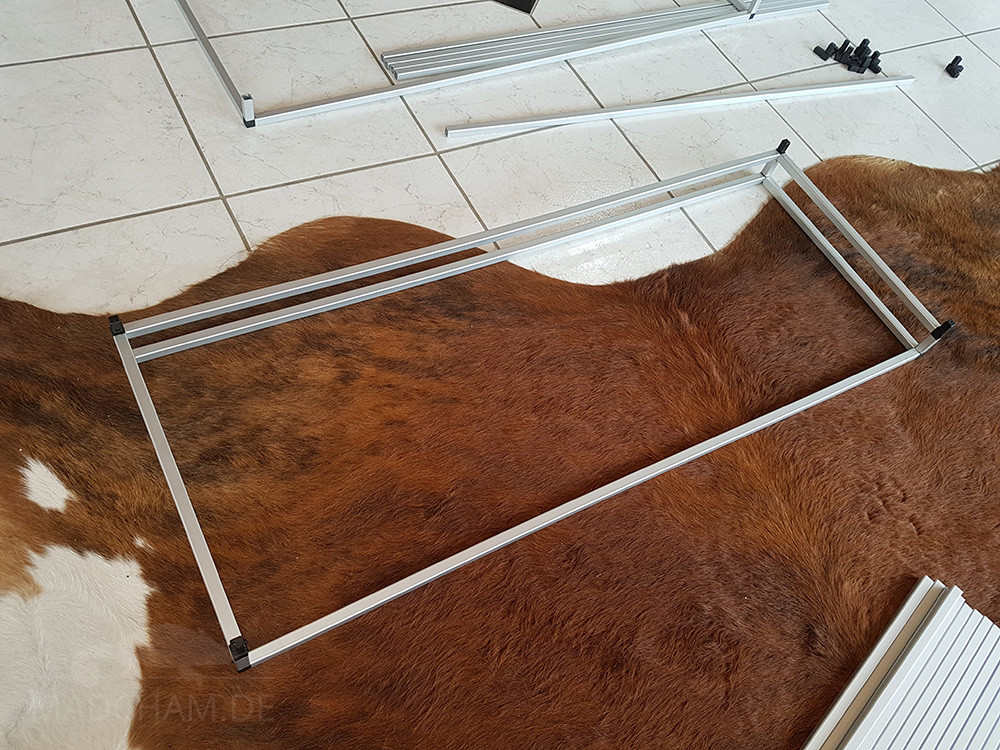
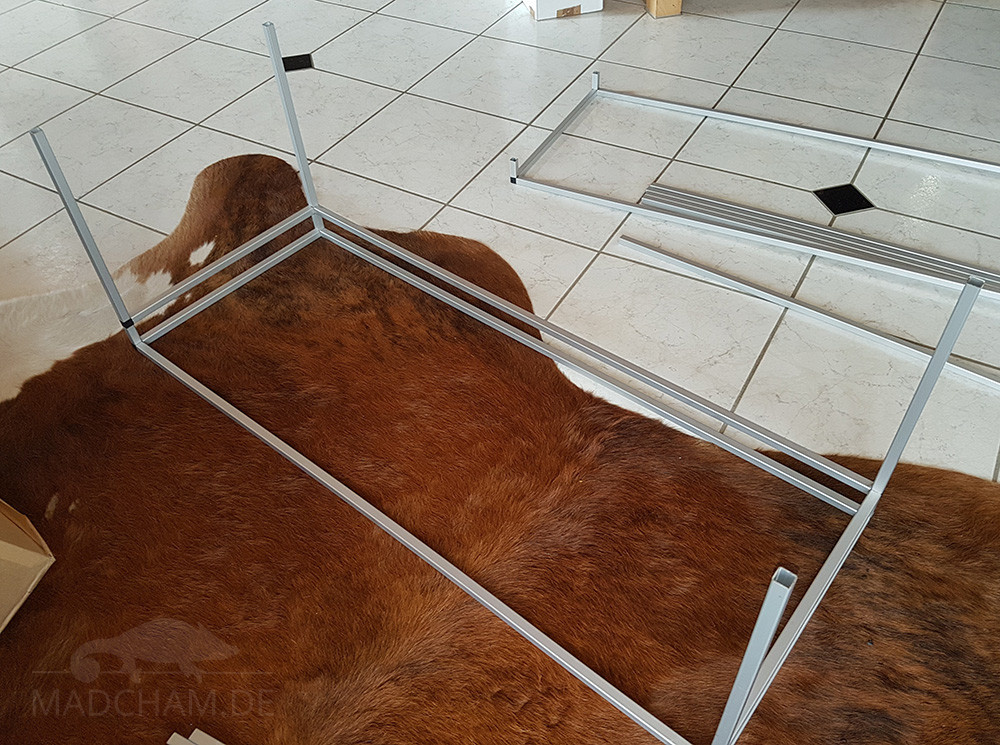
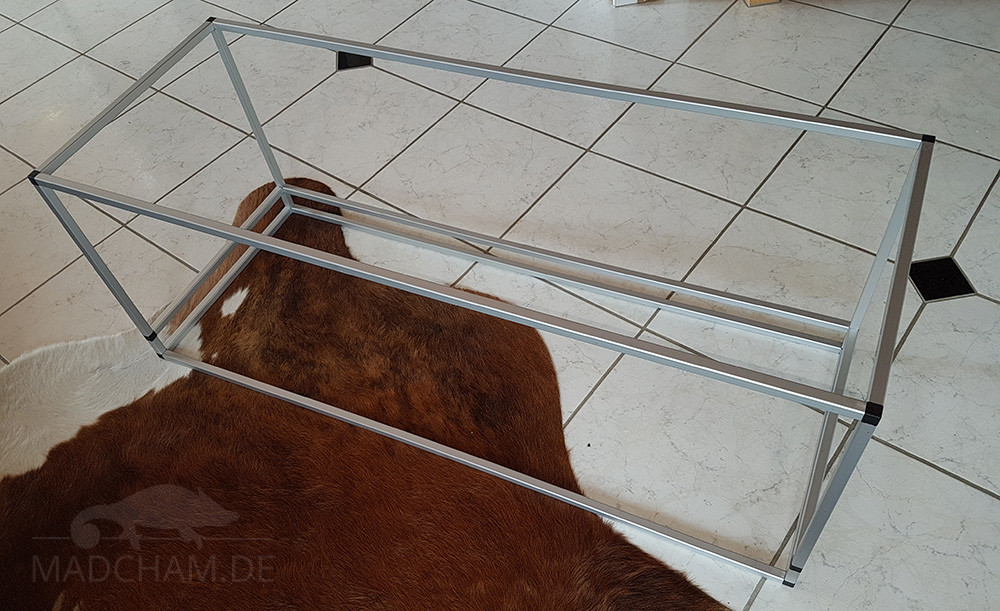
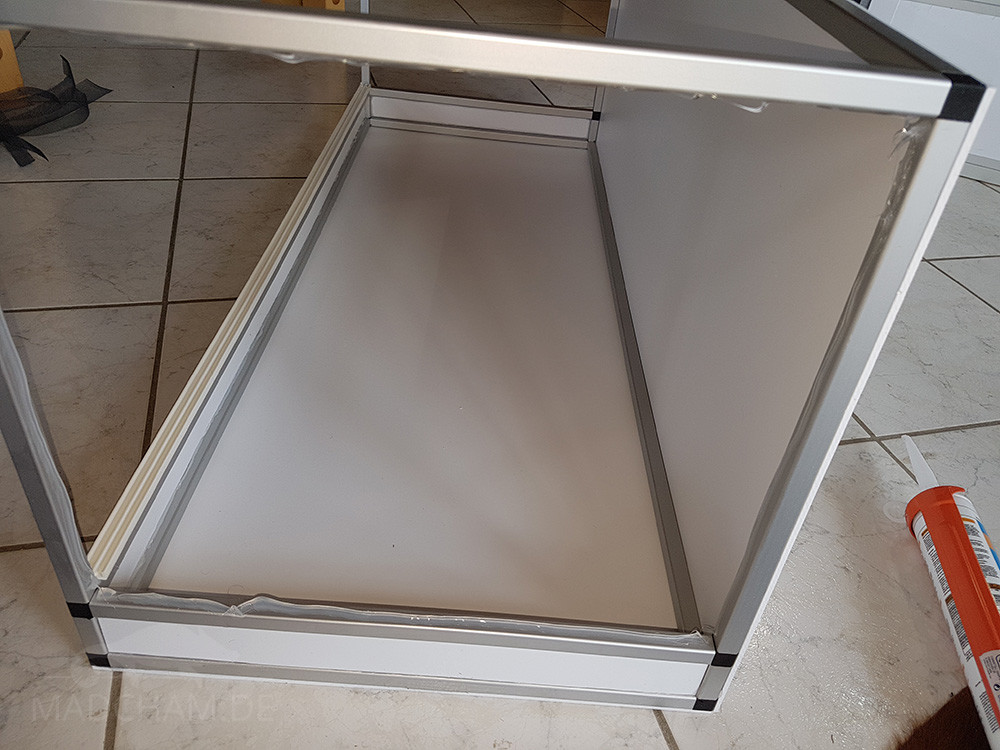
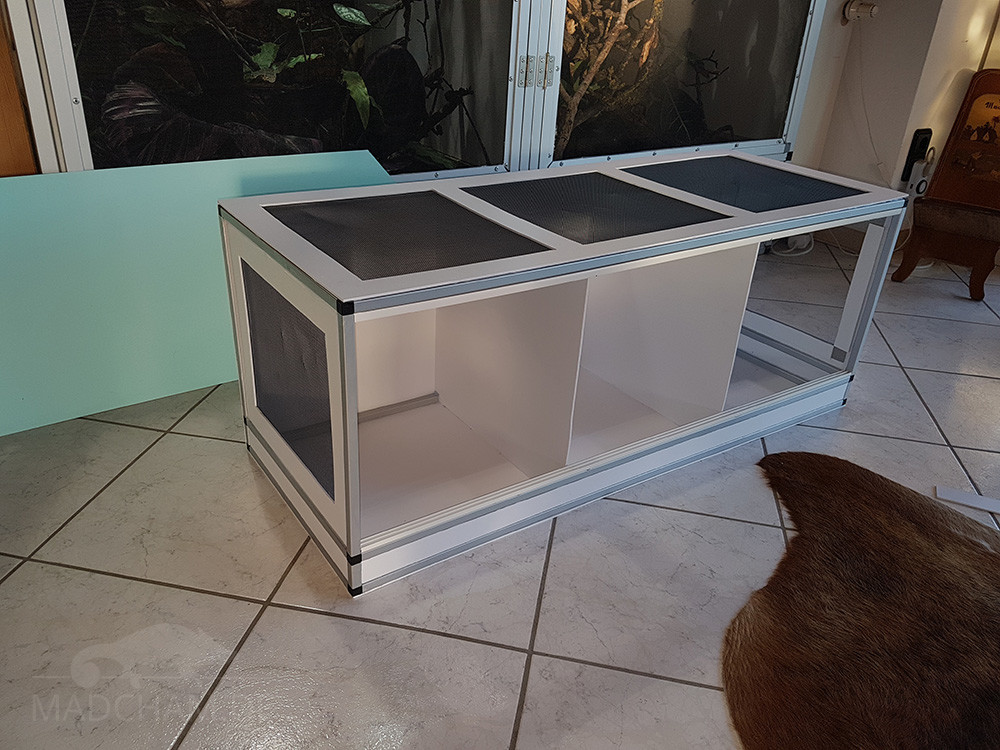
The first step is to build a framework from aluminium profiles by the help of the connectors (see the sketch and the material list for a view of the right place for each profile). If you did not get deburred profiles, you have to do it yourself: Simply use a file/rasp to remove the sharp edges and aluminium residues at the inner sides of the profiles. Then rub your connectors with soap so it will be easier to plug them together with the profiles. Take a rubber hammer to connect profiles and connectors, and put a towel under the profiles to avoid scratches on the floor.
Attention: When using the measurements written above, you have to shorten those connectors that link the smallest aluminium profiles 0,5 cm each. Otherwise the connectors will be too long for the small profile in between. You can easily shorten the plastic connectors with a saw. The shortened connectors also keep the profiles in place without a problem.
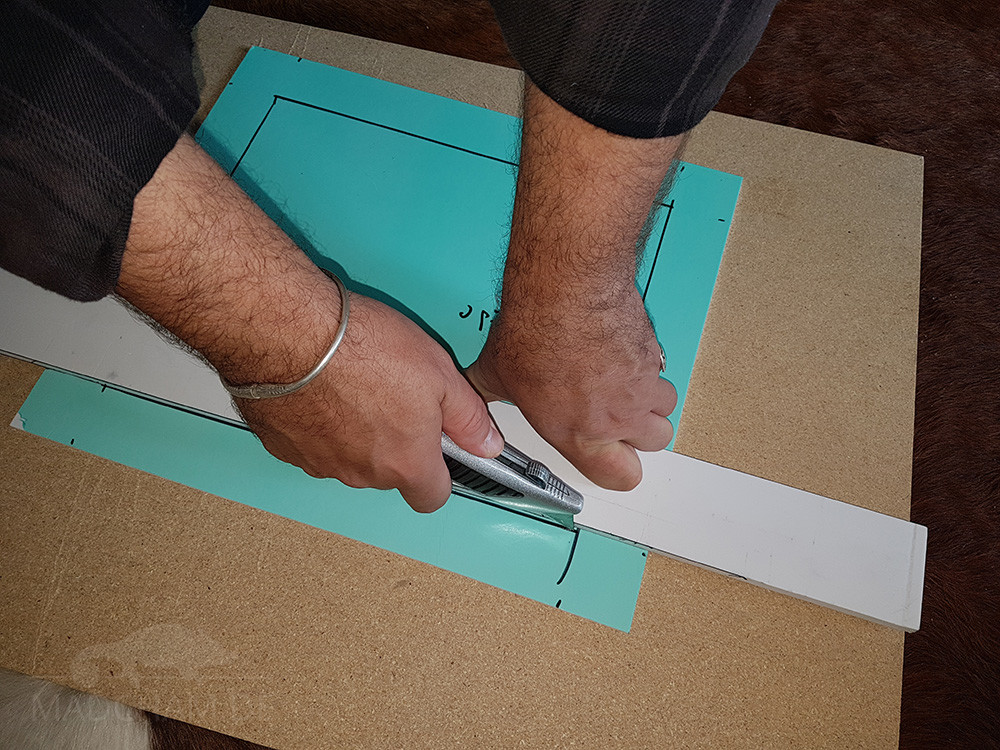
Now it is time for the forex panels. We get our forex panels readily cut with protective foil on both sides – this is the turquoise foil that you can see in our pictures. We always remove them when necessary, if possible not before everything is finished. You can perfectly use the protective foil to draw your sketches on it, mark sides and tops to avoid confusing panels and keep a better overview. We begin with the bottom panel. Turn the complete aluminium framwork upside down. Put silicone on all profiles pointing towards the ceiling. Then remove the protective foil from one side of the bottom panel and place it exactly on top of the profiles. Gently press the panel to the profiles. Please remove too much squeezed out silicone immediately with a soft tissue. As soon as the bottom panel sits in place, you can insert the three long and small parts of the bottom front and sides in the next step. Put silicone on the inner sides of the aluminium profiles and carefully place the panels in between the profiles. Let dry over night.
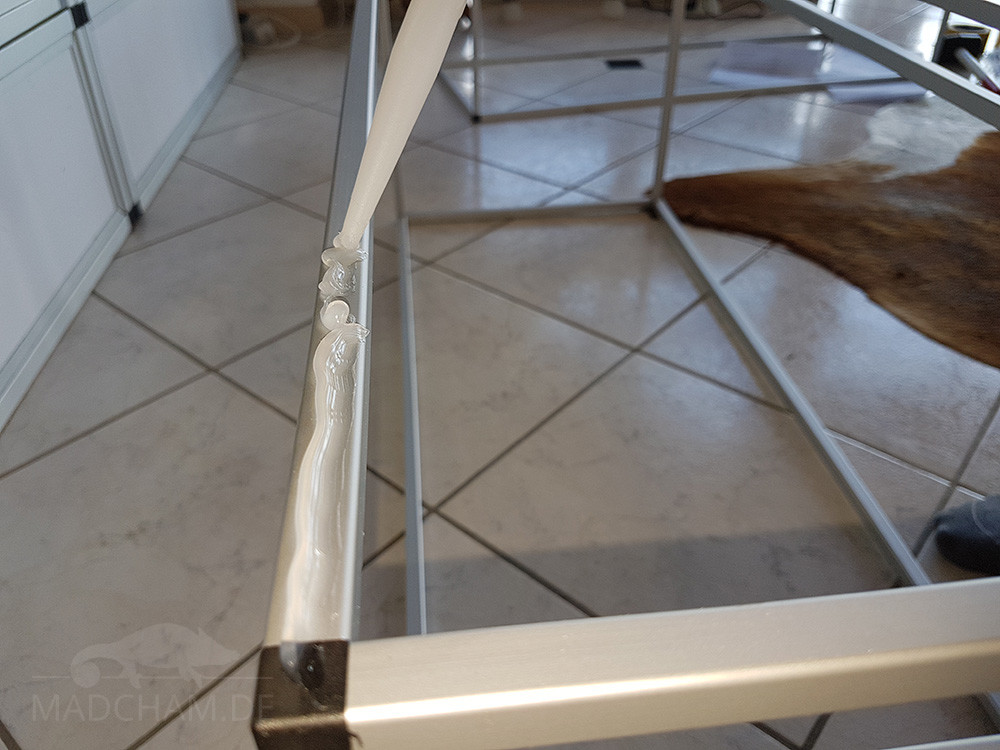

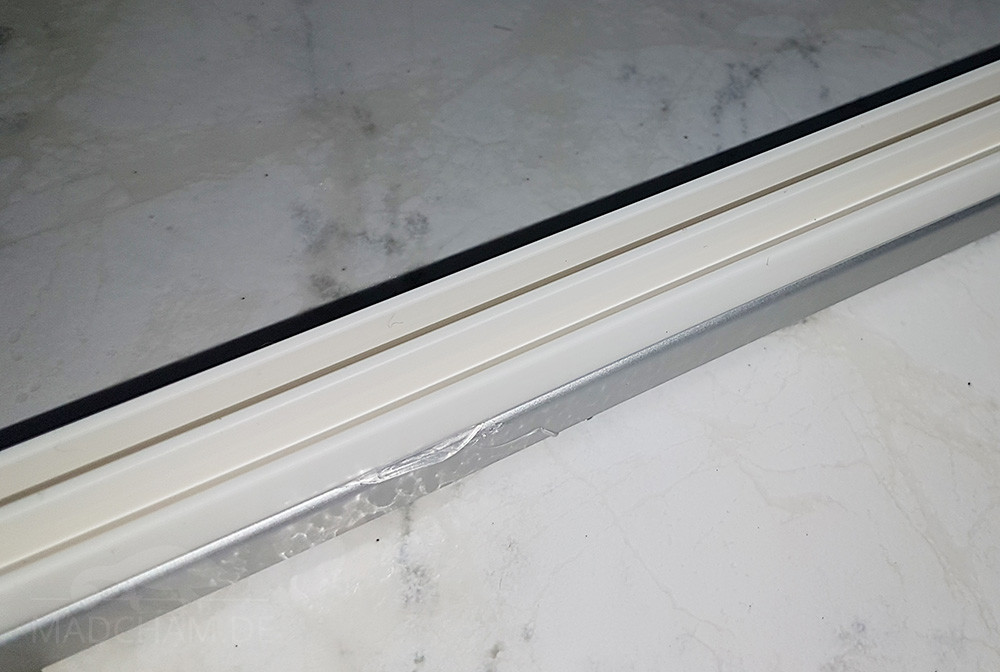
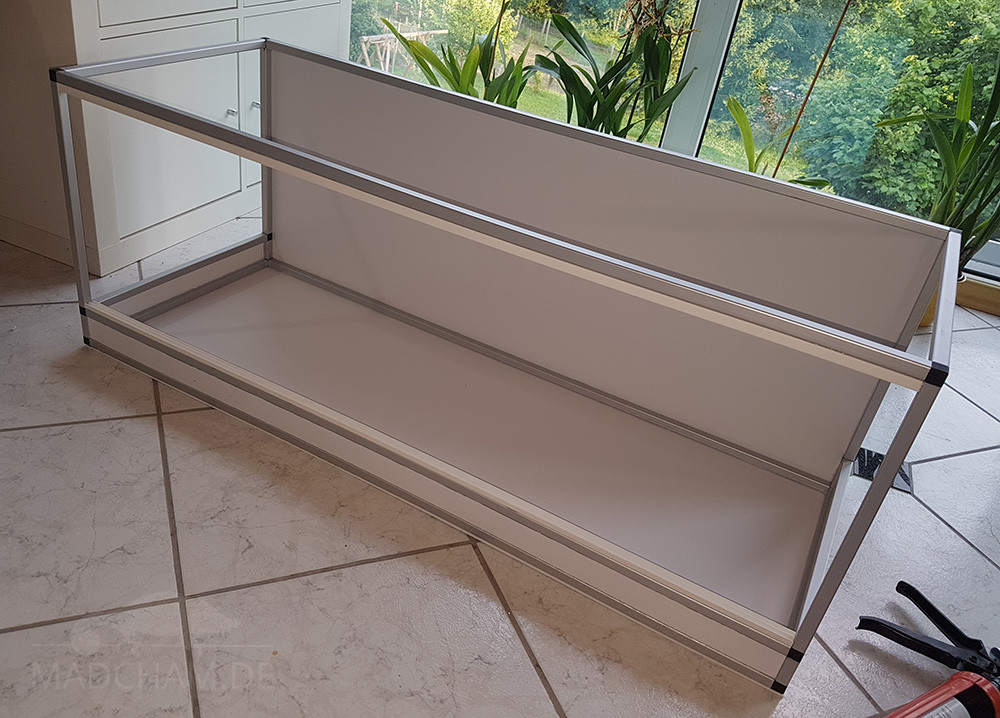
For the next working step, we glue the back wall to the frame as we did it with the bottom panel: Tilt the aluminium frame so the back wall is pointing to the ceiling, apply silicone on the profiles and gently press the forex panels on top. It is a good idea to control all fugues one day after glueing and fill in more silicone where appropriate. Otherwise you will get leaky cages. You can already install the glass guiding profiles which shall run the forex doors later. Cut them to the length of the “door frame” and glue them to the profiles with silicone. The glass guiding profile with the longer plastic edge is thought for the top, the other for the lower edge.
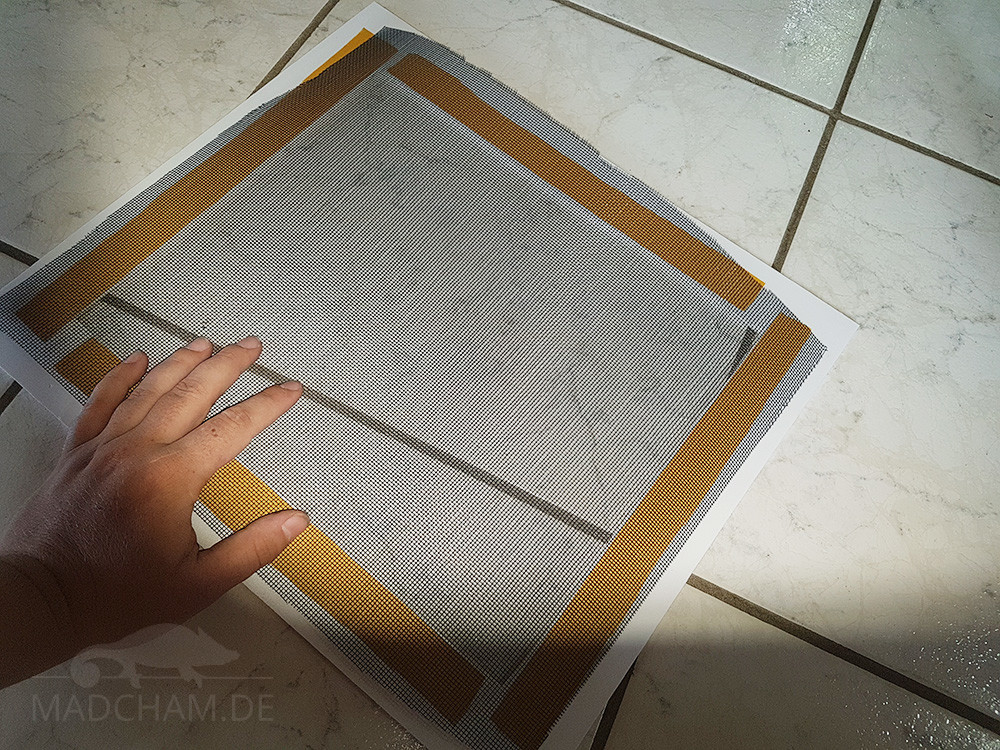
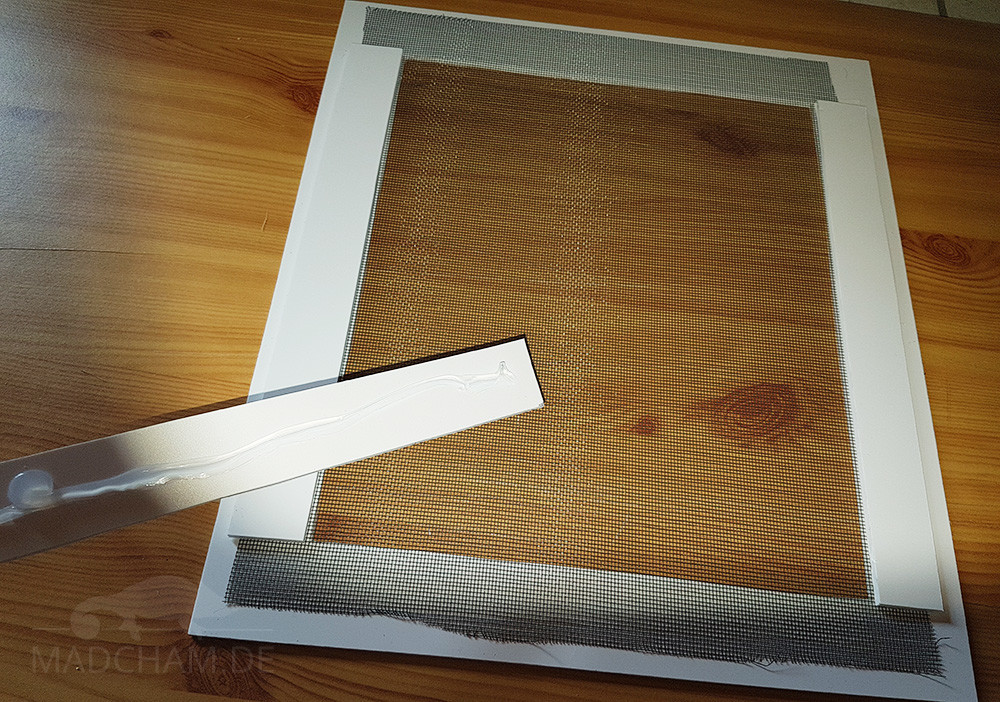
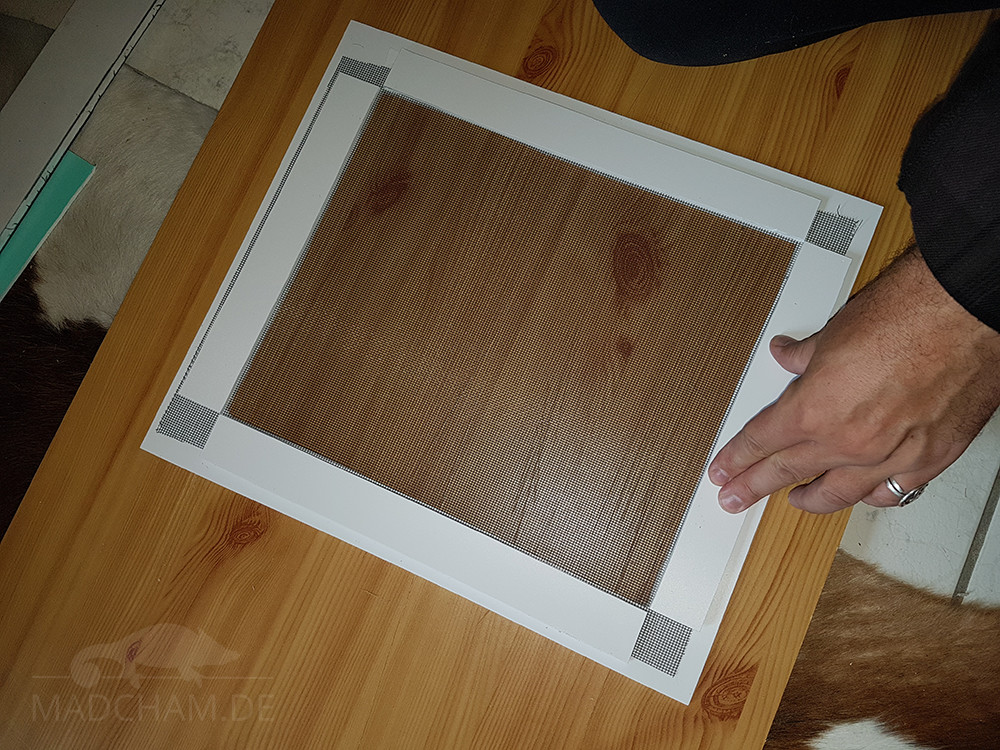
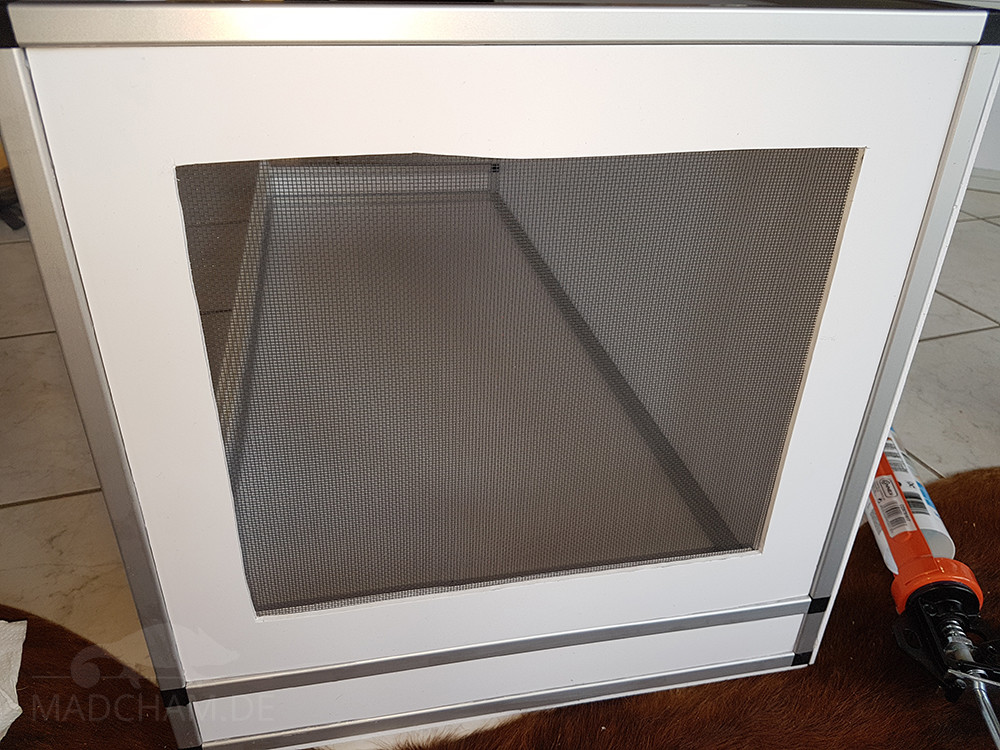
Then we have a look for the gauze cutouts for the top, sides and doors. We decided to use black aluminium gauze. It is hardly inflammable and hardly visible for the human eye. We begin with the side panels: First draw in the cutouts (again the turquoise protective foil is useful here). There should be 4 cm between the edge of the panel and the cutout. The best way is to use an angle tool and a folding rule to get everything straight. Then put your side panel on a firm surface and cut the “window” out with a knife. You can then use the cutout parts to cut them into 3 cm broad strips that we will need to fix the gauze.
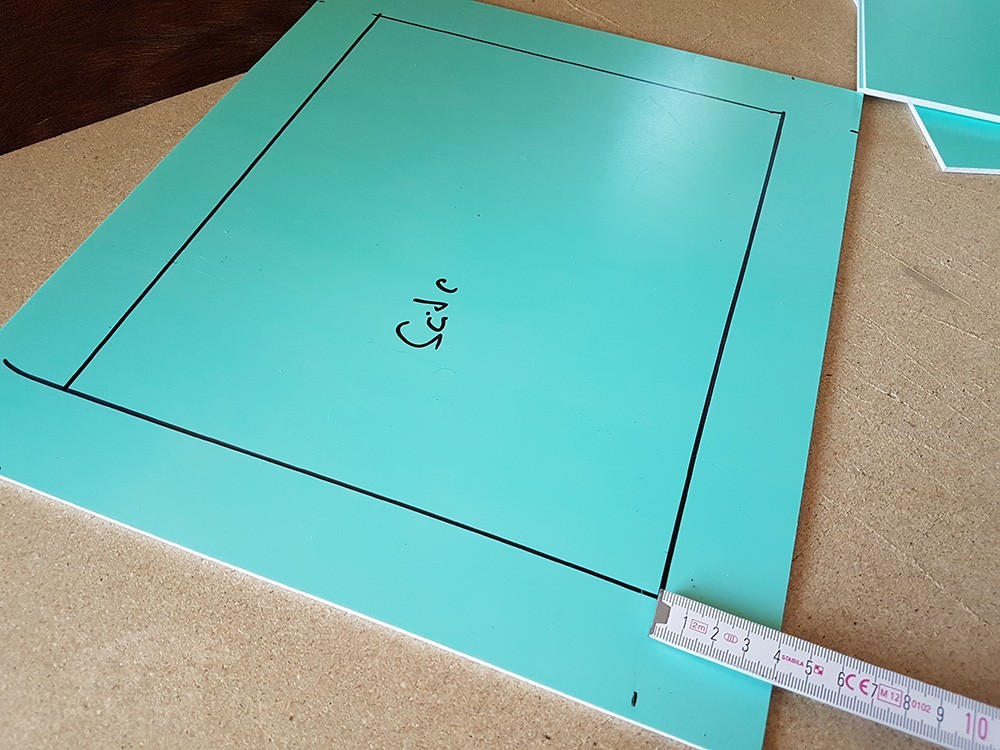
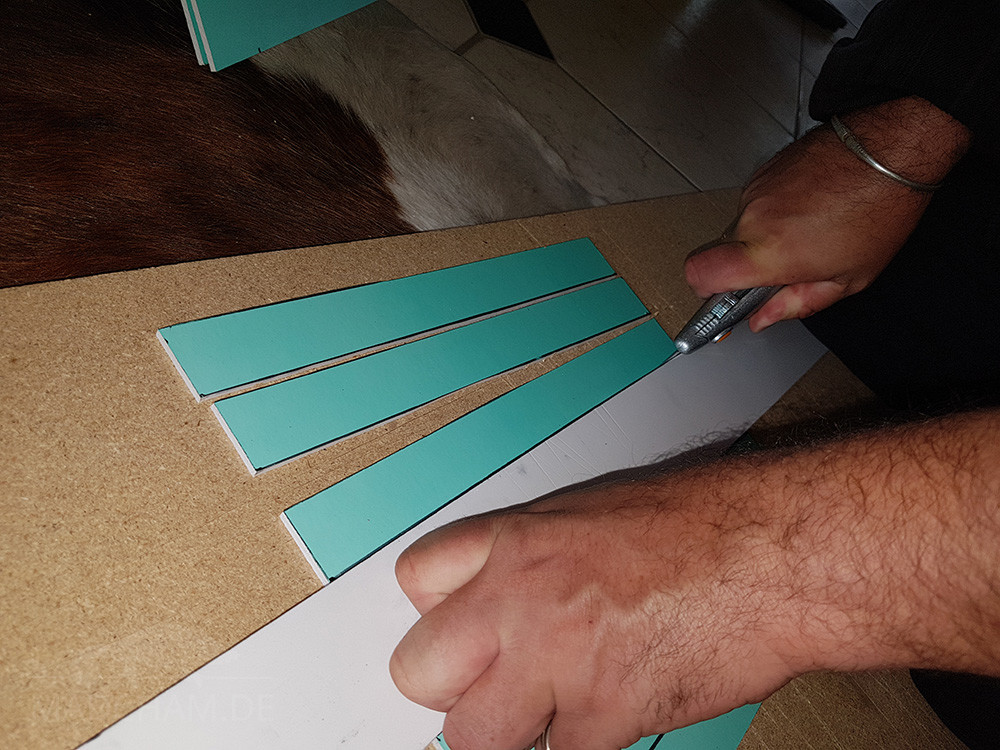
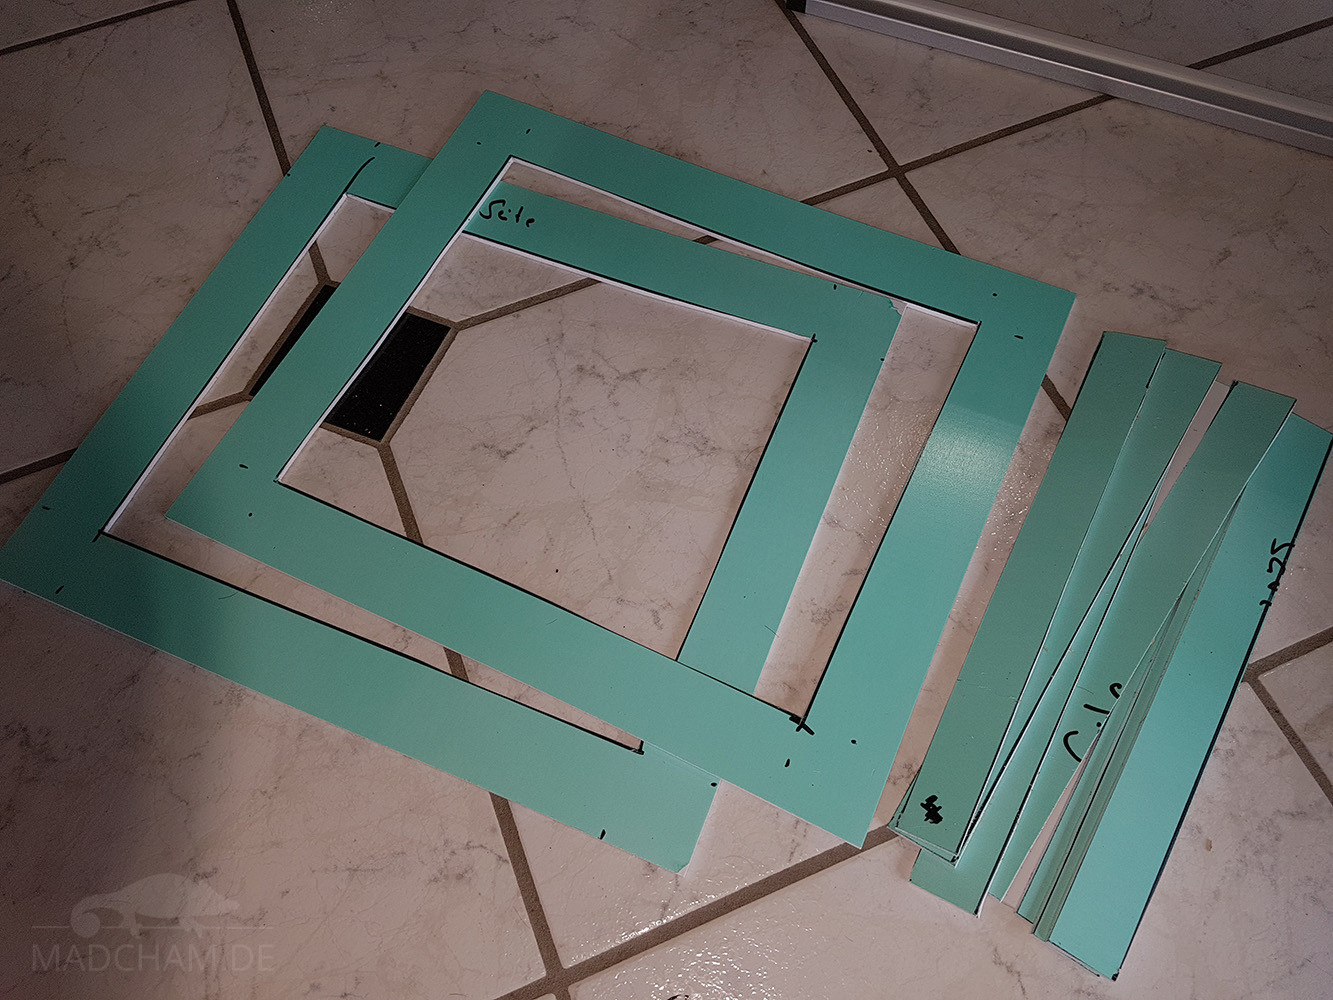
Do the same with the top panel, but keep 4,5 cm on the edges as a frame. Between the cutouts, 4 cm will do the trick. For the doors, 4 cm are also enough frame. For the top panel, you will need the 3 cm stripes again, so please cut four pieces per cutout. For the door you cannot use the strips, because they would disturb them when closing.
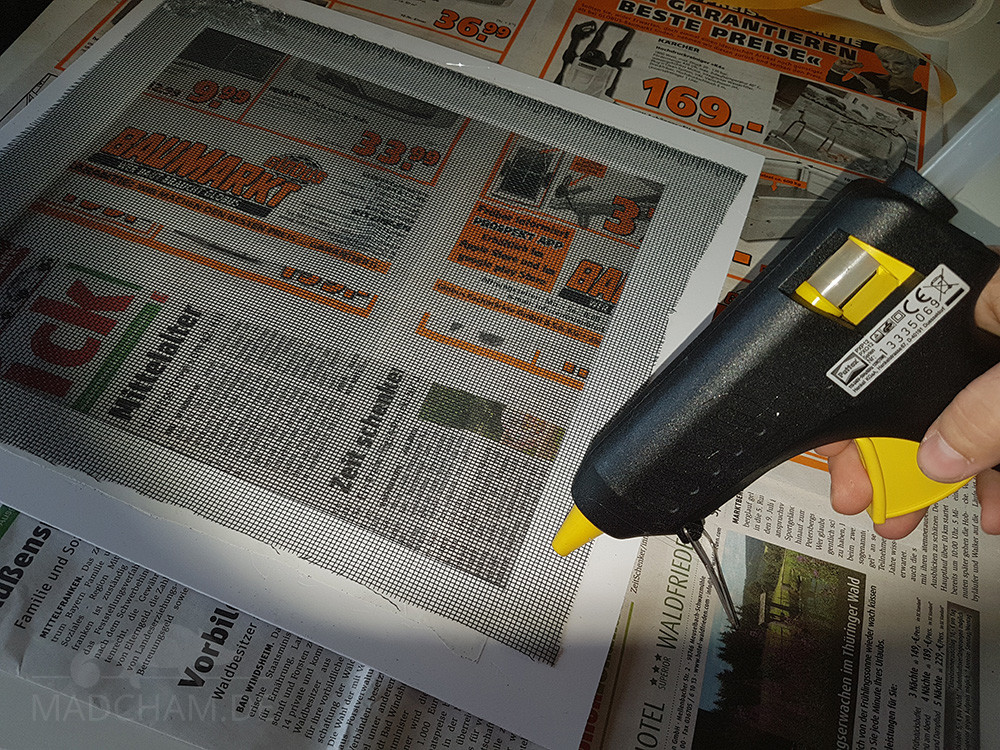
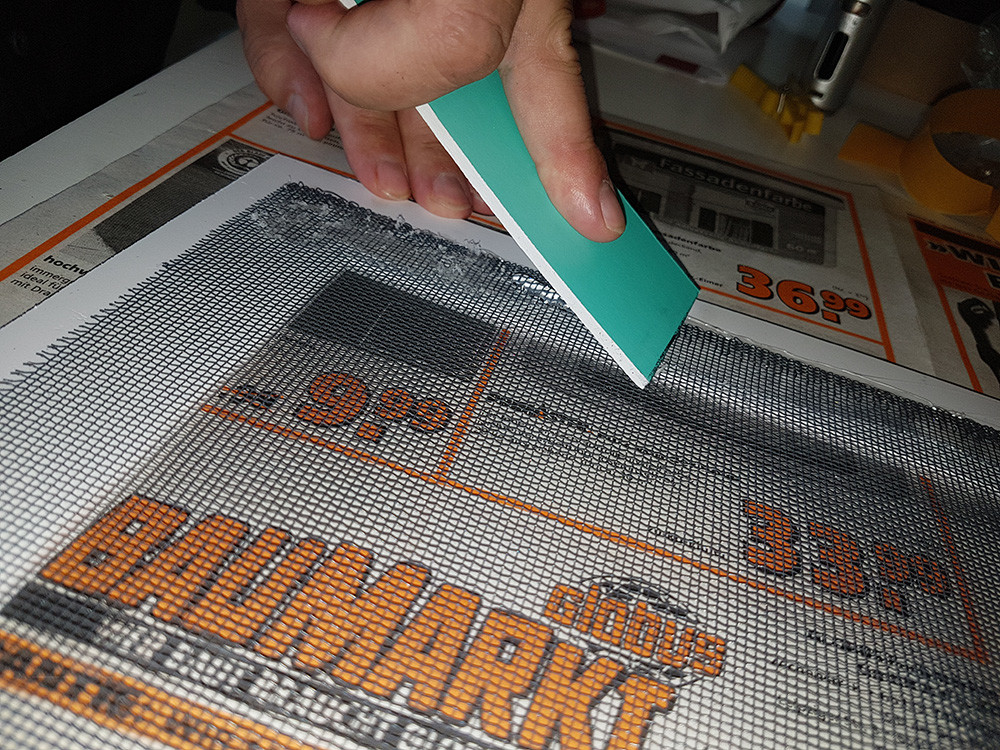
You can glue the side panels and the top with silicone. To make the gauze fit better, we used double-sided tape on the forex to roughly fix the gauze first. Then cut the gauze with scisscors so they surpass the cutouts a little, but not the forex itself. Put silicone on the forex stripes and glue them on tpop of the gauze. It is helpful to have a second person assisting you to tighten the gauze. For drying better use a plate or another weight to put it on the glued sides. Wait one night.
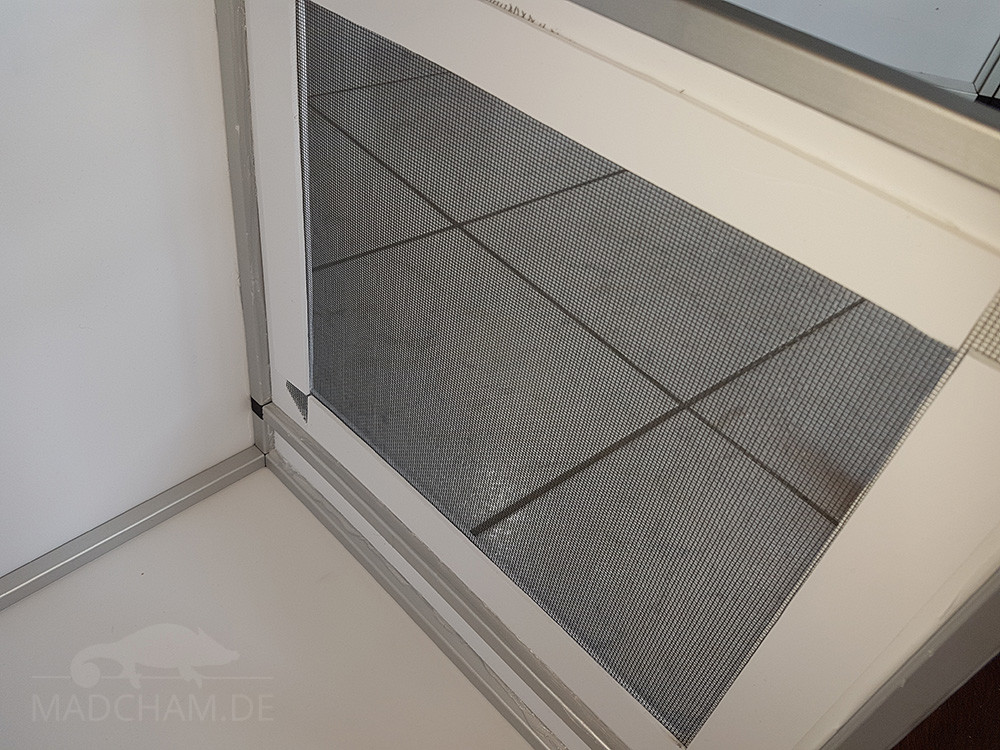
In the next step you can glue both side panels into the aluminium frame: Put silicone on the inner sides of the profiles and carefully install the side panels. The side with the additional forex stripes should be inside the cage now. The top panel works the same way. Please do not forget to control all your silicone fugues one day later and fill more silicone in where appropriate to make it tight. Also cut or put some silicone on any sharp gauze part that could hurt a chameleon later.
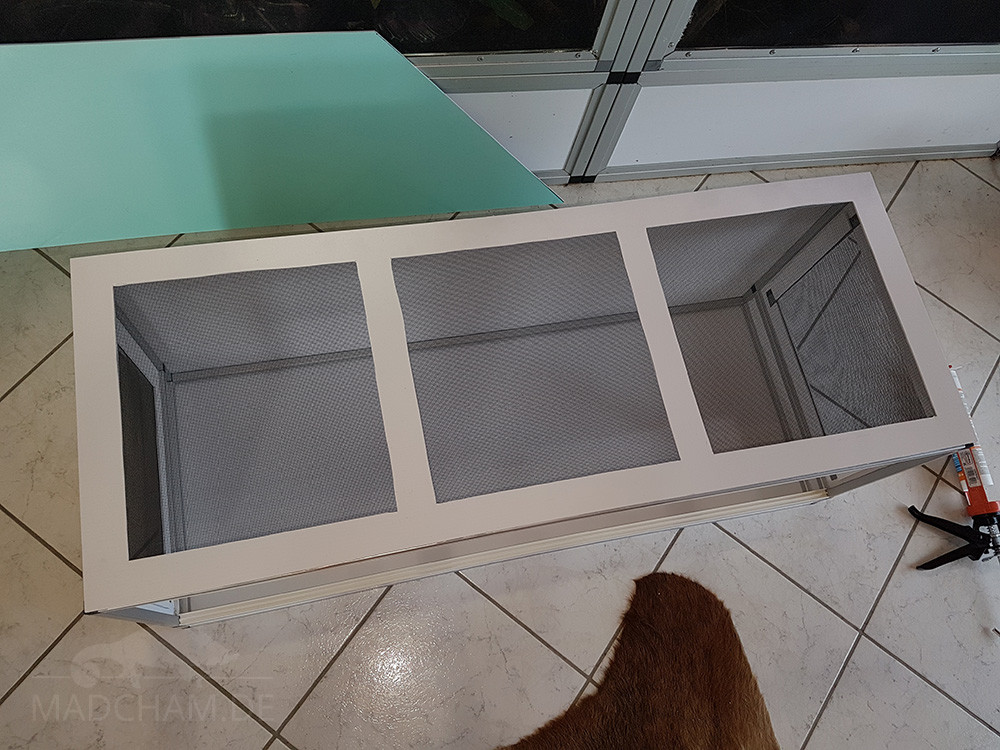
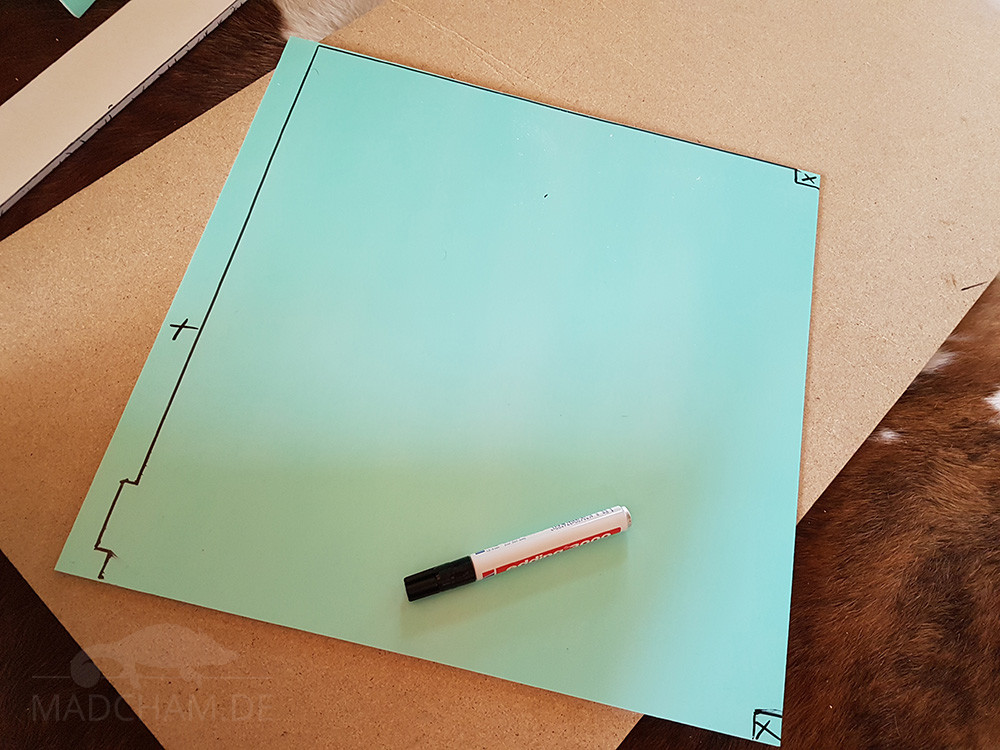
Concerning the doors, our silicone solution does not work. We therefore chose to use a hot-glue gun. It would be a good idea to do this step with two persons – one applies the hot glue, and the other presses the gauze. Then it is already time for the last but one step: Two partition walls have to be cut and place inside the cage. This is some guesswork, we had to try it several times before it fitted. Have a look at the picture to see how we cut the partition walls. Measure the inner length of the whole cage and divide it through three to get the broadth of each cage. Mark the right position with a pencil. Put silicone to the partition walls and adjust them inside the cage.
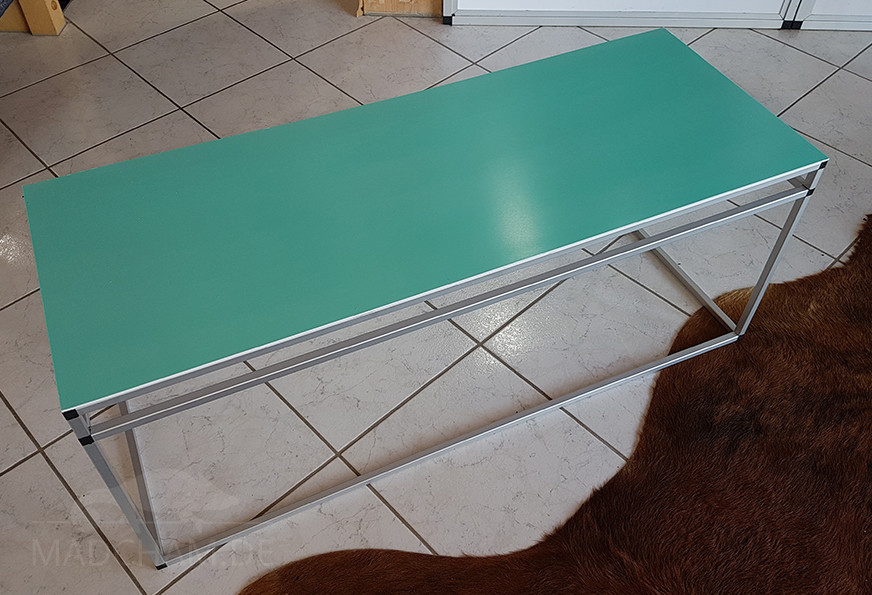
As soon as the doors are dry enough, you can put them into the glass guiding profiles. First put two doors into the front track, and then add the third door to the back track. And that’s it. The cages are ready! You only have to fill it with plants and soil for your offspring.
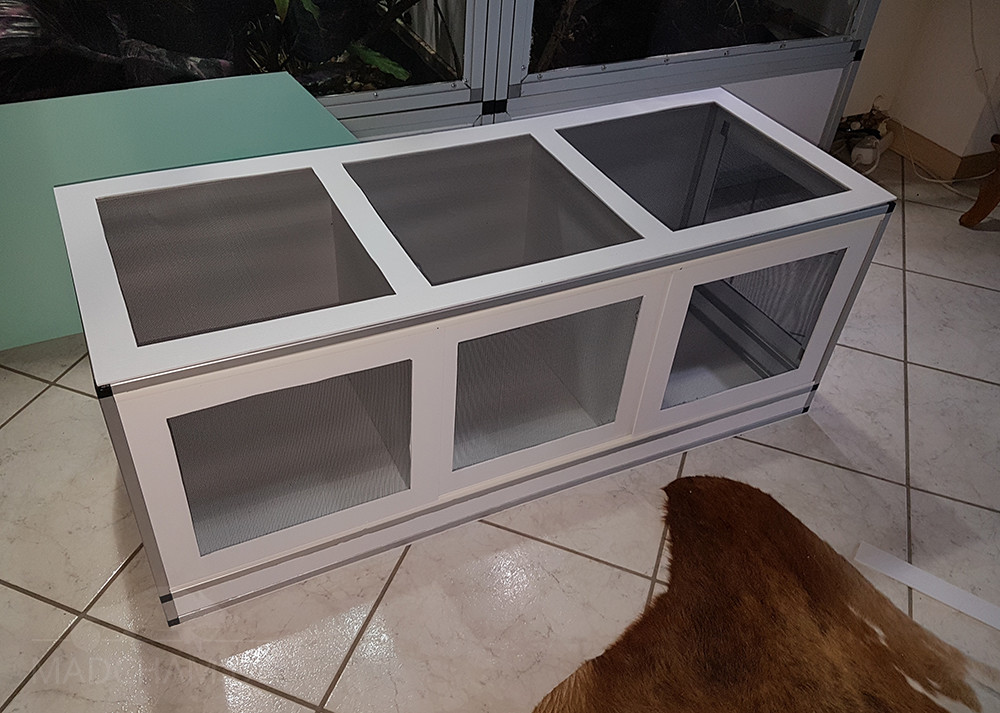
The finished offspring cages – expedient, reusable and economical


Like us on facebook

Most popular articles


Your travel specialist for Madagascar