This construction manual is from one of our young Calumma parsonii parsonii‘s cages that we built by ourselves (as almost all of our chameleon cages). We assume no liability for mistakes in lengths or sizes. 😉 Costs for this cage are about 600 €. We decided to use an outward opening door made of black insect screen (aluminium gauze) that covers the entire front of the terrarium excluding the bottom tub. Thus we can work in every part of the cage perfectly and it adds a proper ventilation, too.
Necessary material:
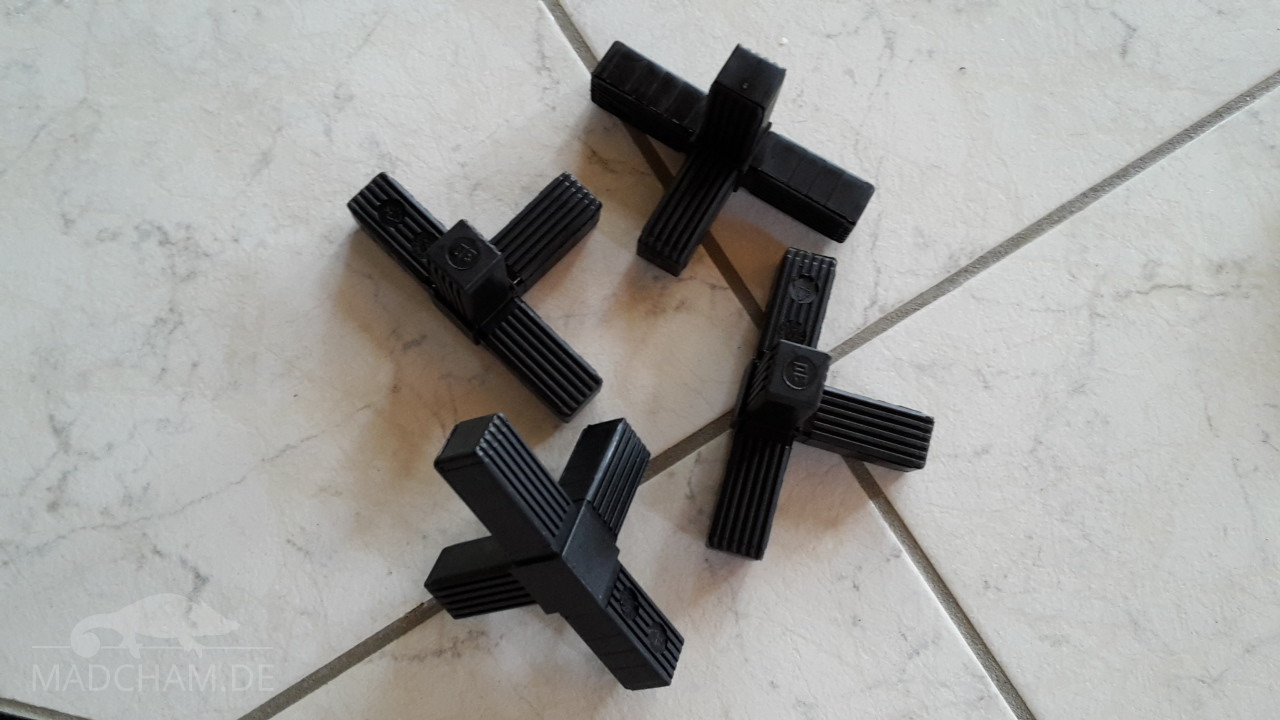
- 8x connectors 25 x 25 mm 3er (black or silver)

- 4x connectors 25 x 25 mm 4er (black or silver)

- 4x connectors 25 x 25 mm 2er (black or silver)

 2x aluminium profiles 25 x 25 mm 84 cm long (door)
- 2x aluminium profiles 25 x 25 mm 141 cm long (door)
- 2x aluminium profiles 25 x 25 mm 147,5 cm long (h)
 2x aluminium profiles 25 x 25 mm 147,5 cm long (i)
- 4x aluminium profiles 25 x 25 mm 25 cm long (g)
- 3x aluminium profiles 25 x 25 mm 90 cm long (e)
 1x aluminium profile 25 x 25 mm 90 cm long (c)
- 2x aluminium profiles 25 x 25 mm 90 cm long (f, b)
- 4x aluminium profiles 25 x 25 mm 80 cm long (d)
- 2x aluminium profiles 25 x 25 mm 80 cm long (a)
- 1 float glass plate 5 mm, 79 x 146,5 cm
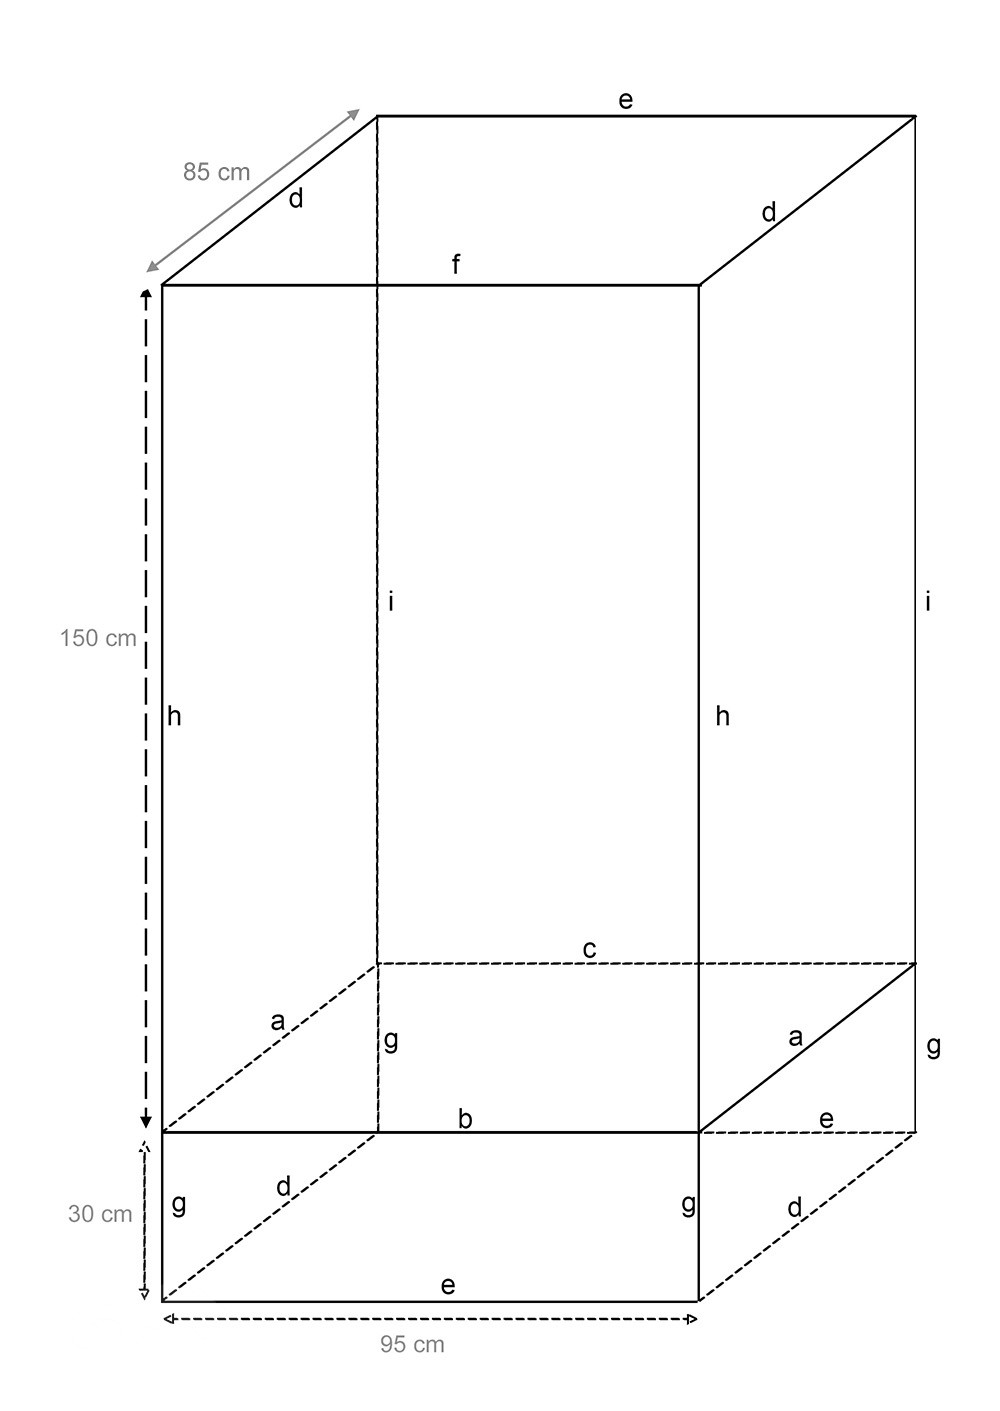
Assembling sketch
- Forex panel 10 mm, 1x 89 x 146,5 cm (backwall)
- Forex panels 10 mm, 2x 24 x 79 cm (sides of bottom tub)
- Forex panels 10 mm, 2x 24 x 89 cm (sides of bottom tub)
- Forex panel 10 mm, 1x 89 x 79 cm (bottom panel)
- Forex panels 10 mm, 1x 79 x 146,5 cm (right side panel)
- black aluminium screen 90 x 250 cm
- Alu minium bars, 15 mm width, about 9 m in total
- Pop rivets pliers
- Pop rivets, about 45 pieces
- Masking tape
- Rechargeable driller with metall drill (matching chosen pop rivets)
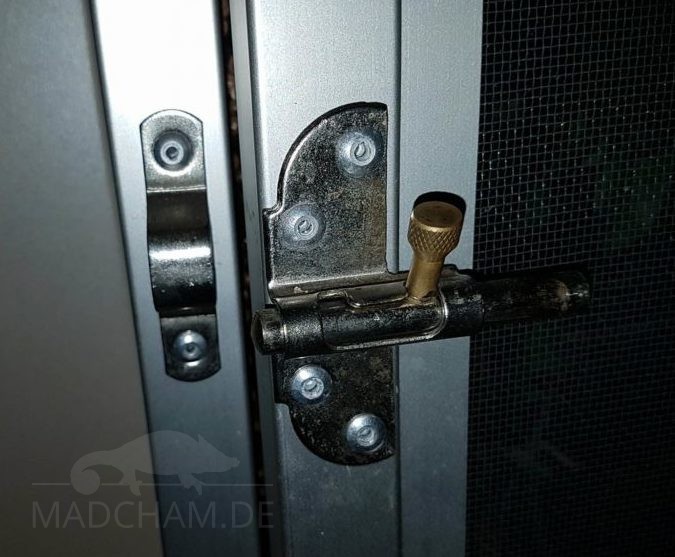
- Door lock + matching pop rivets + metall drill
- four folding hinges ant matching pop rivets
- 30 l Seramis or other expanded clay spheres
- Textile landscaping mesh
- several cartridges of aquarium silicone
- Desciduous forest soil and unfertilized potting soil
- Backwall to your desire
And that’s how to assemble it:
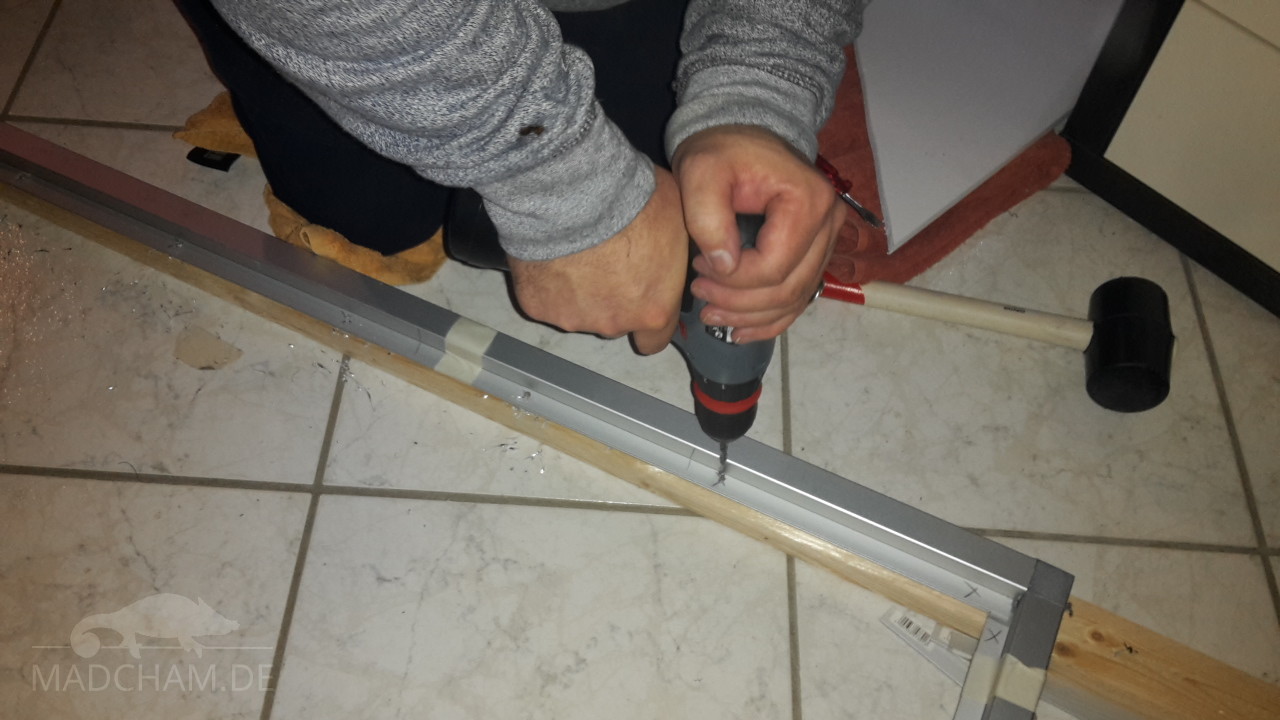
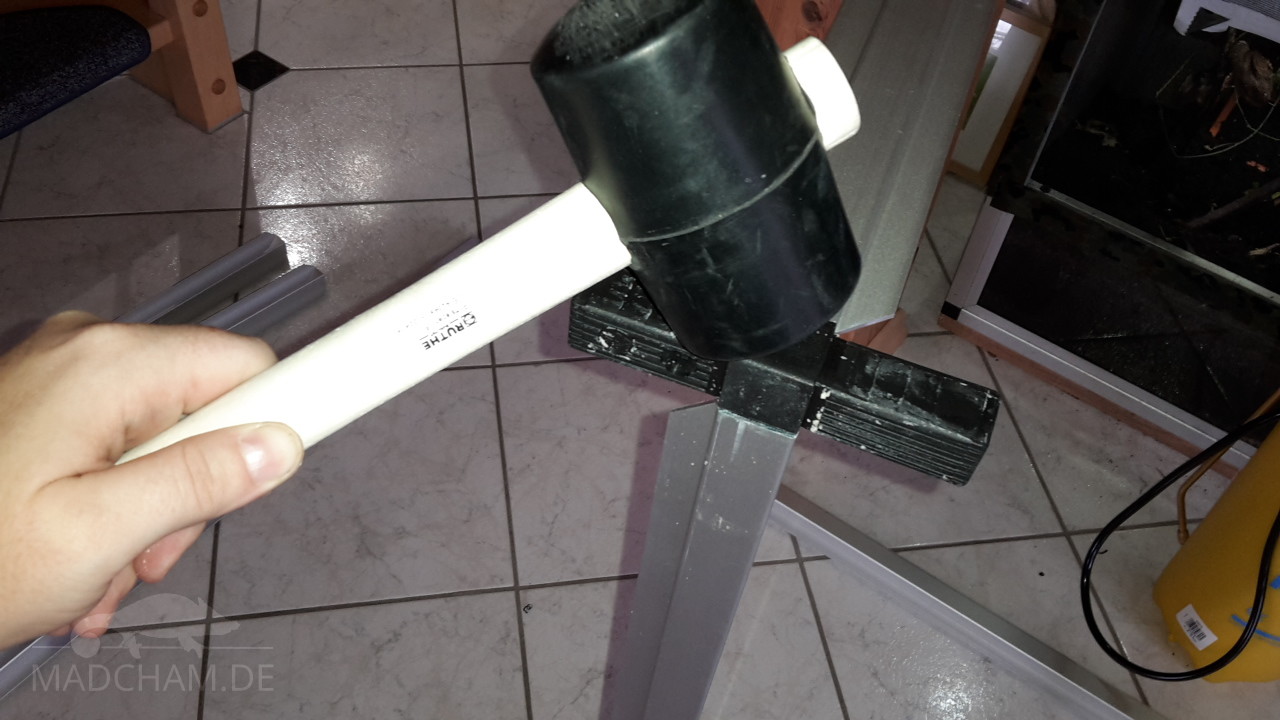
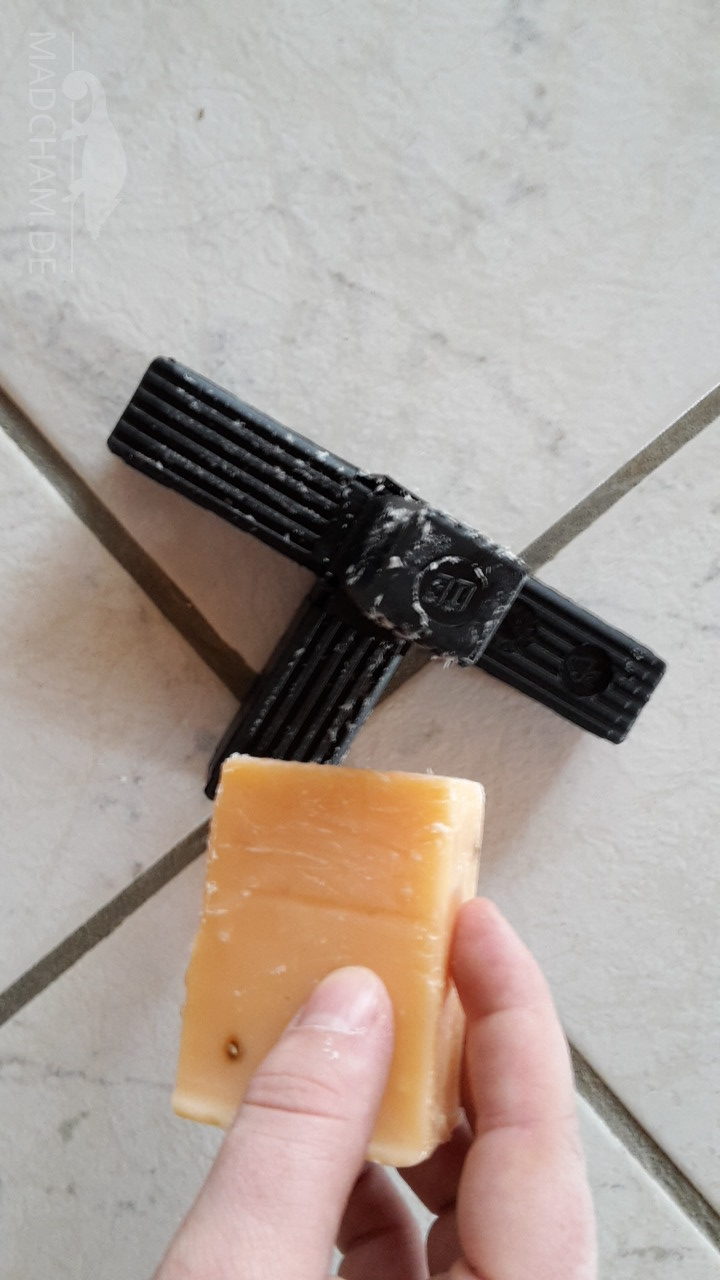
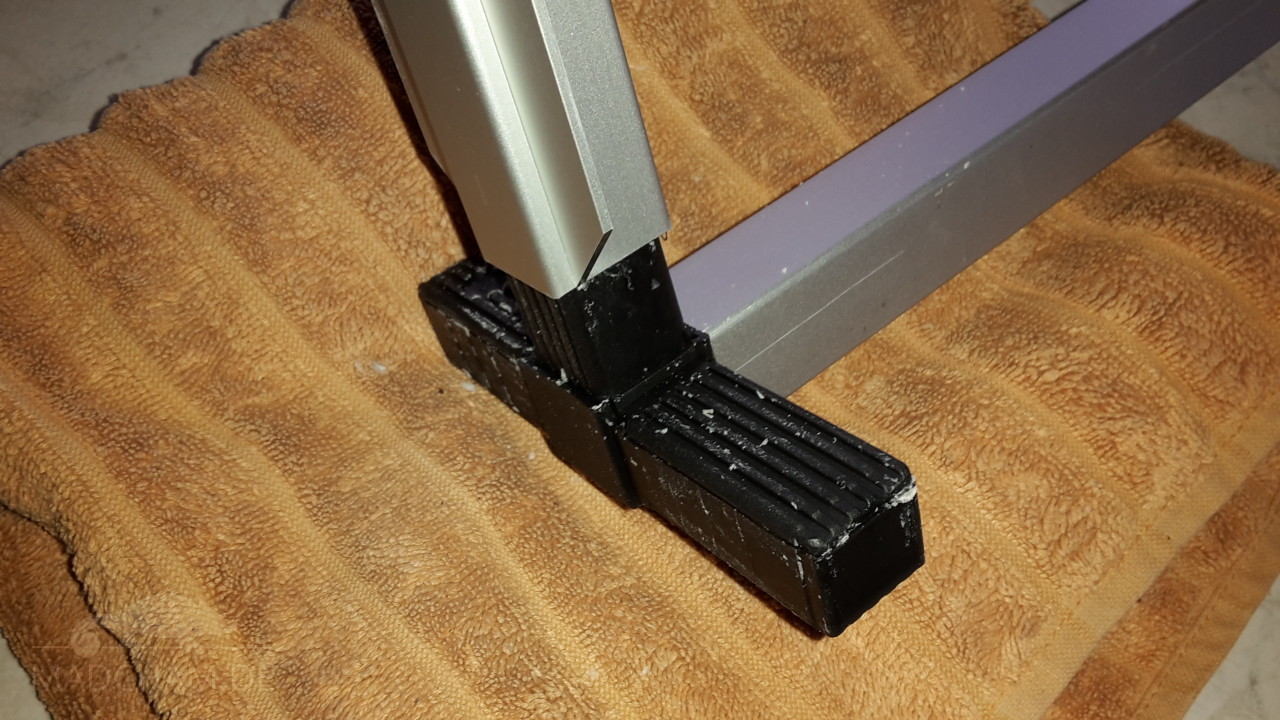
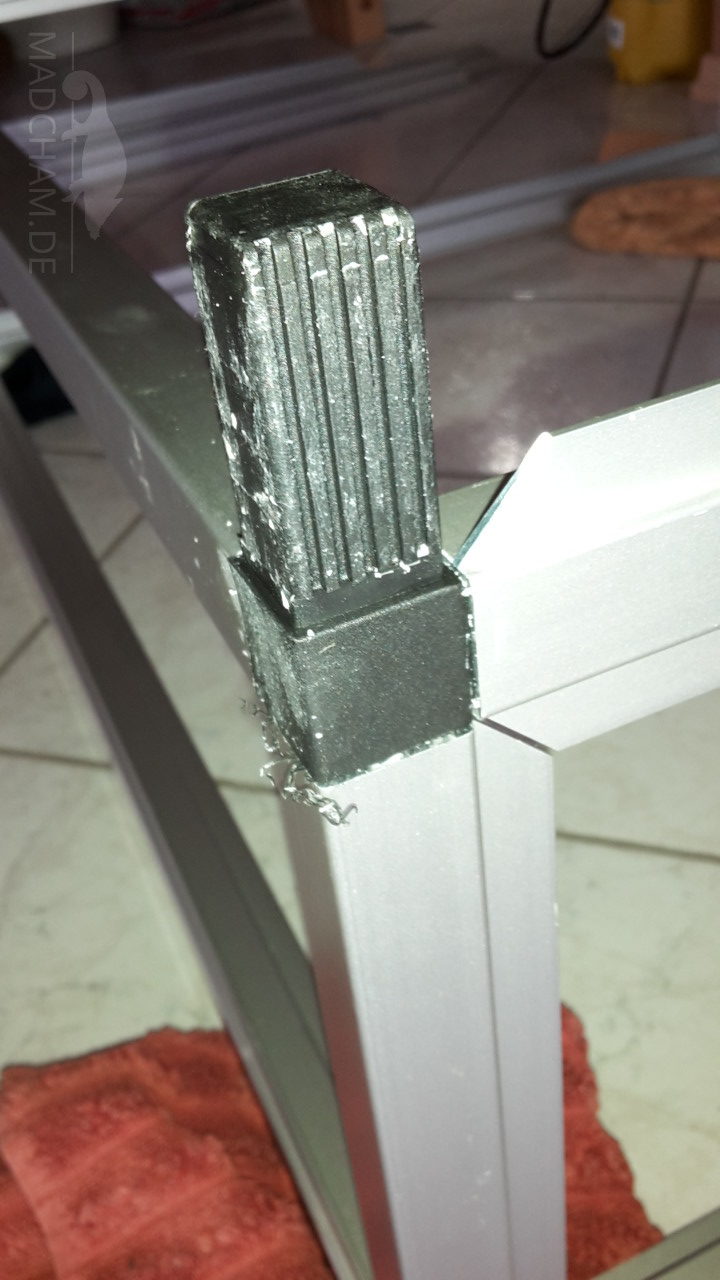
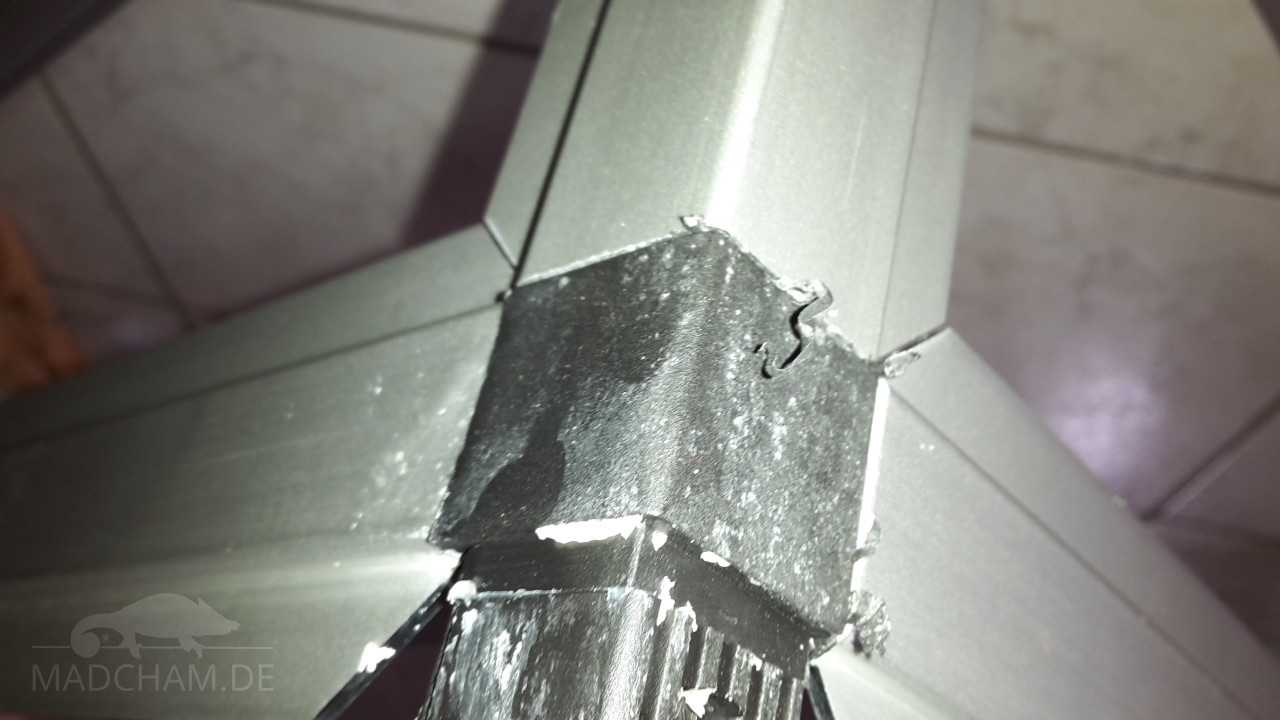
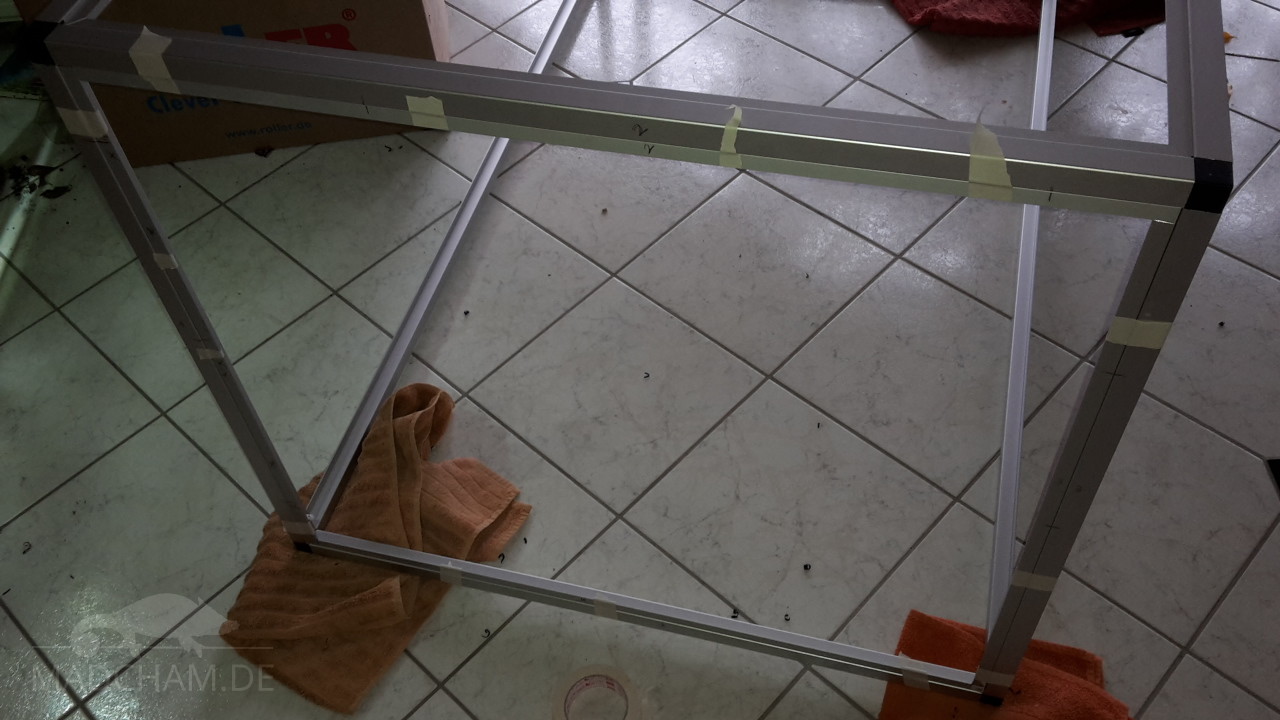
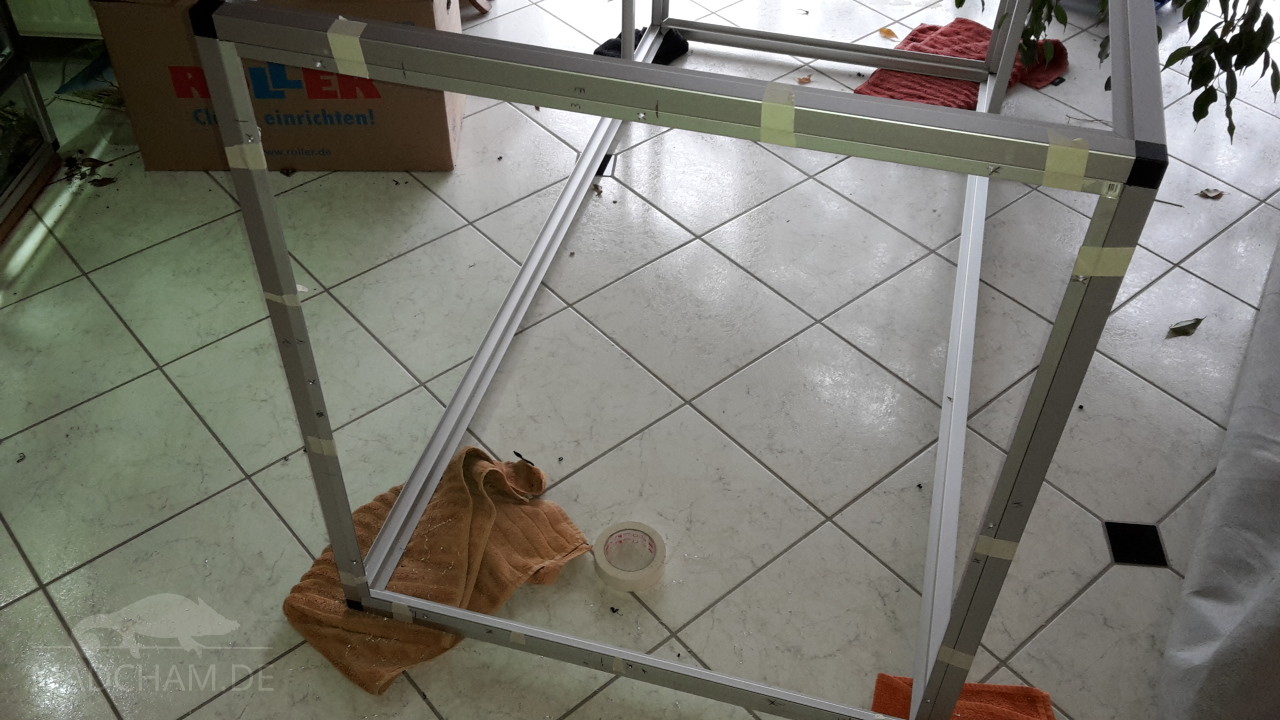
Your first step is to assemble the aluminium profiles via connectors. If the aluminium profiles have not been deburred yet, you will do it: Simply remove sharp edges and aluminium residues on the insides of the profiles with a file/rasp. Then rub your connectors with soap so it will be easier to link the profiles. Use a rubber hammer to put the connectors into the profiles, and put a towel under the profiles to avoid scratches. Be careful when assembling the whole profile frame: Each profile has to be in the right place, have a look at the assembling sketch before! Inside the door frame there shouldn’t be any bars or bridges from the profiles. Otherwise you won’t be able to put the door in its frame. The finished frame should be very stable and steady yet. You can also put connectors and profiles of the door together now.
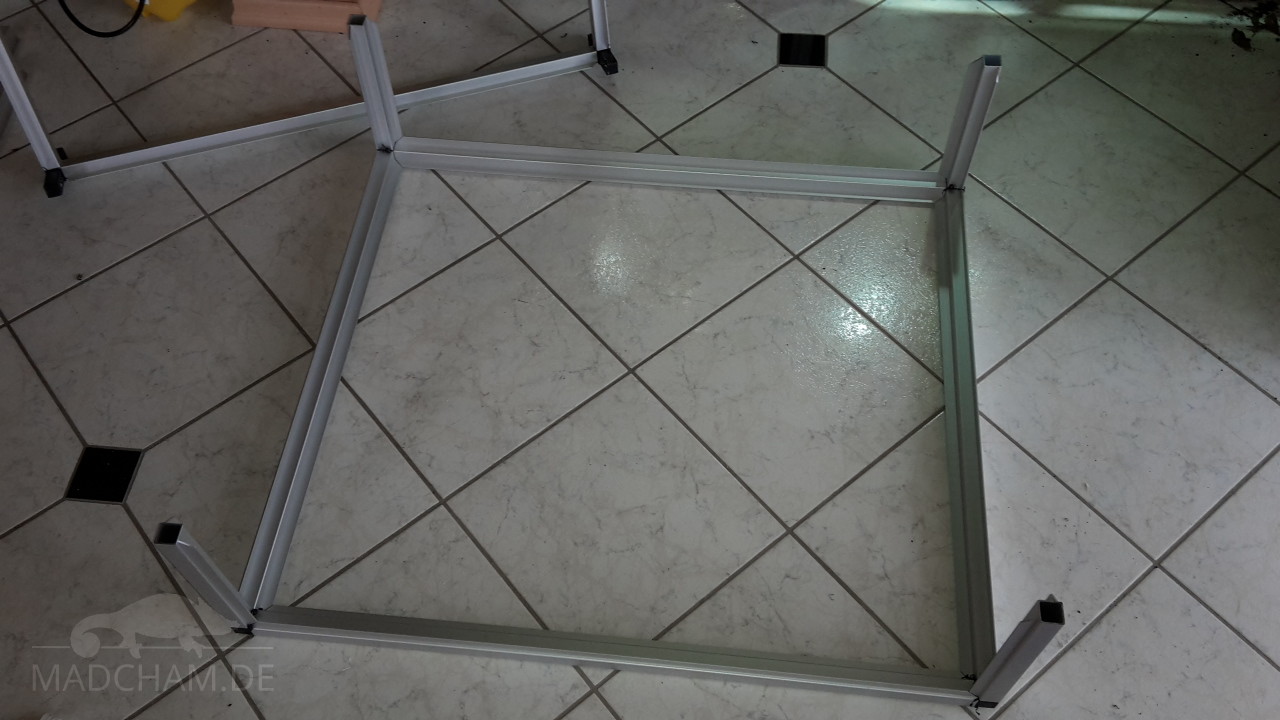
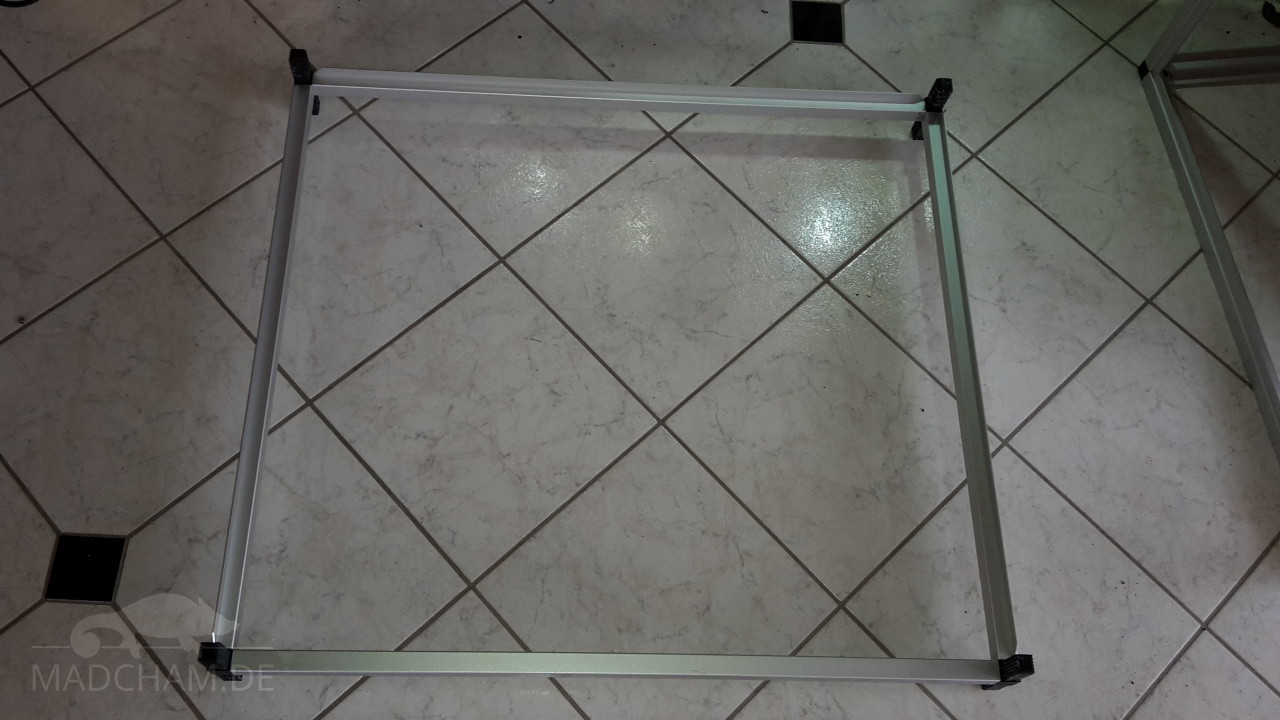
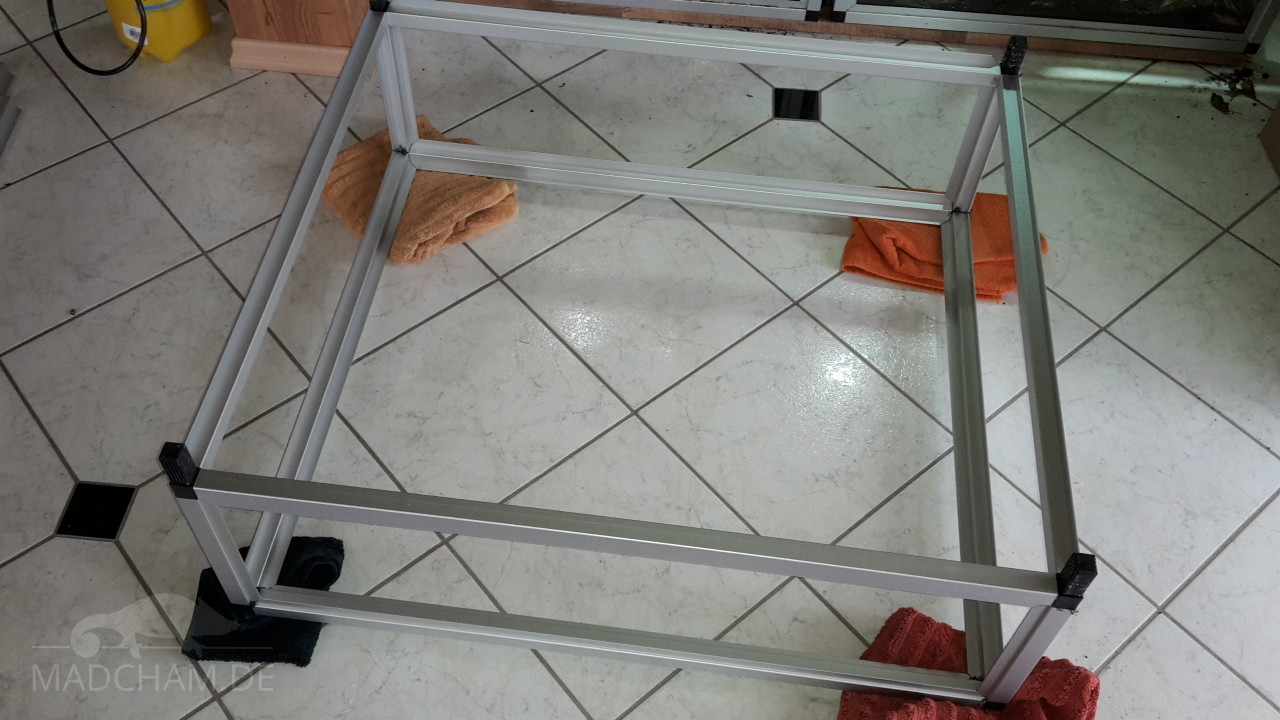
That’s how the finished aluminium frame looks like.
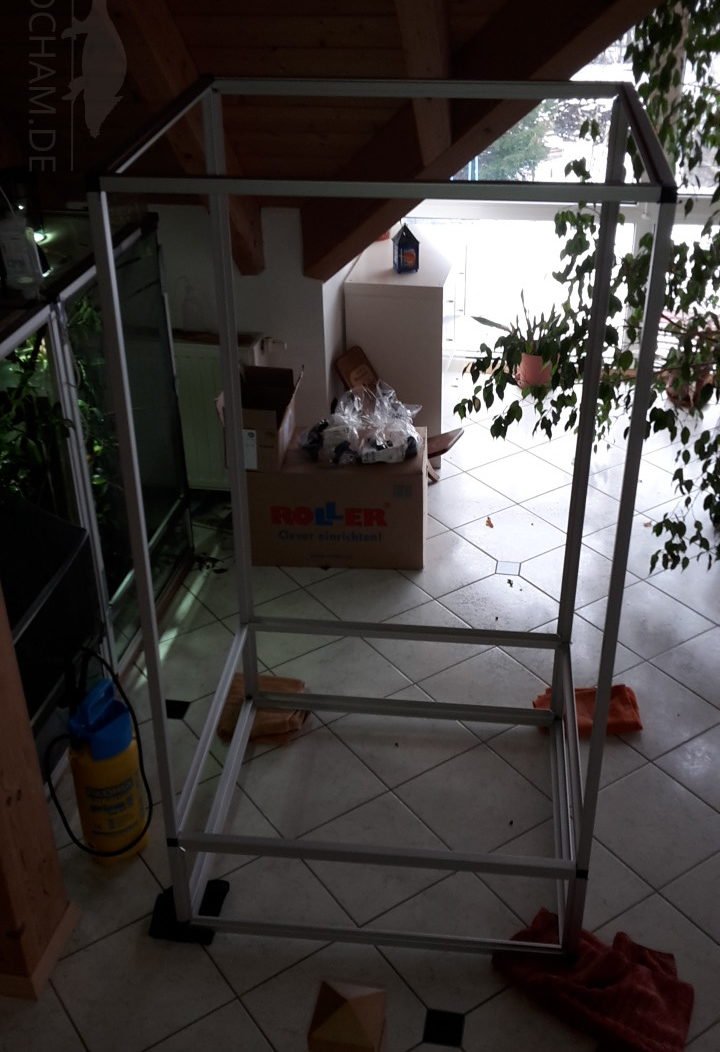
Das fertige Aluprofil-Gerüst
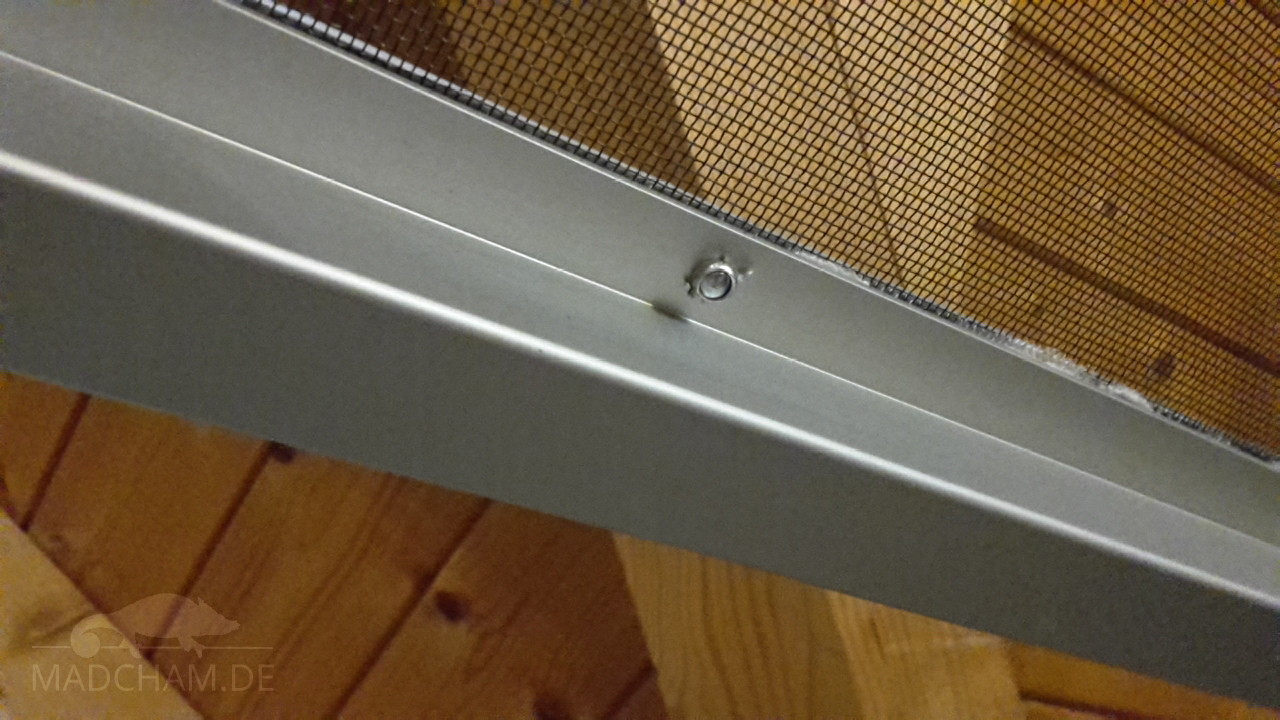
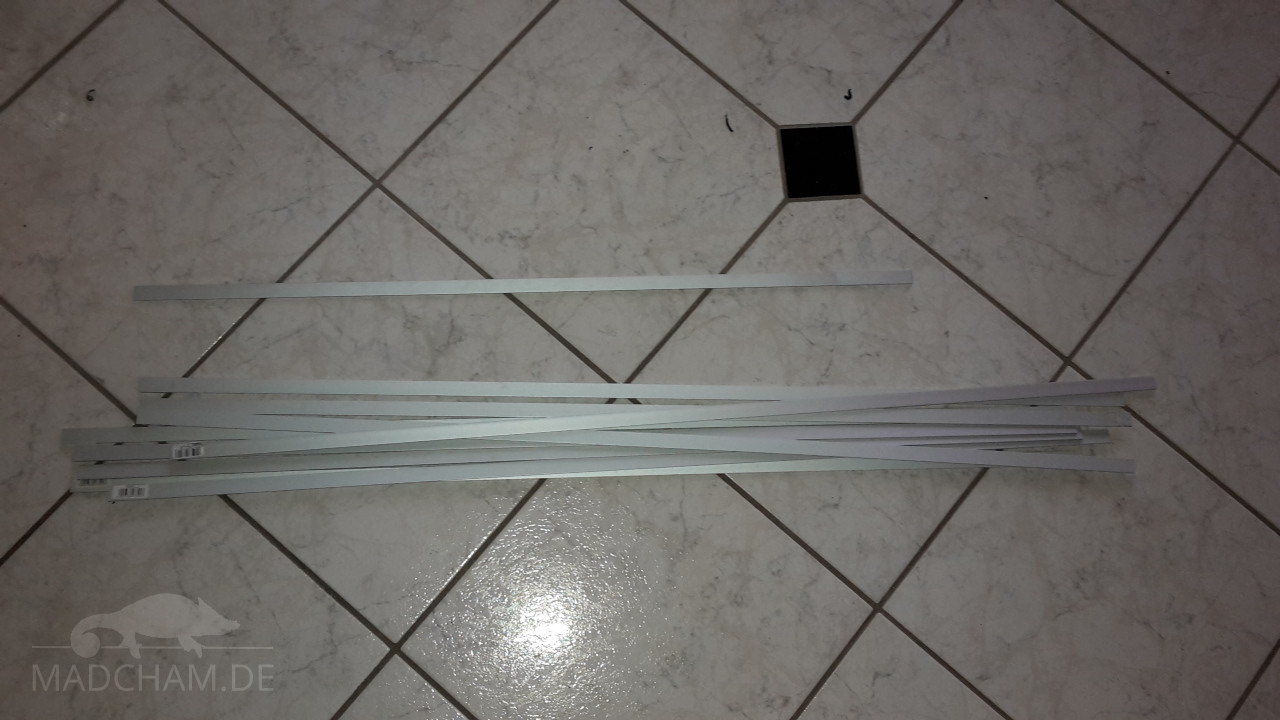
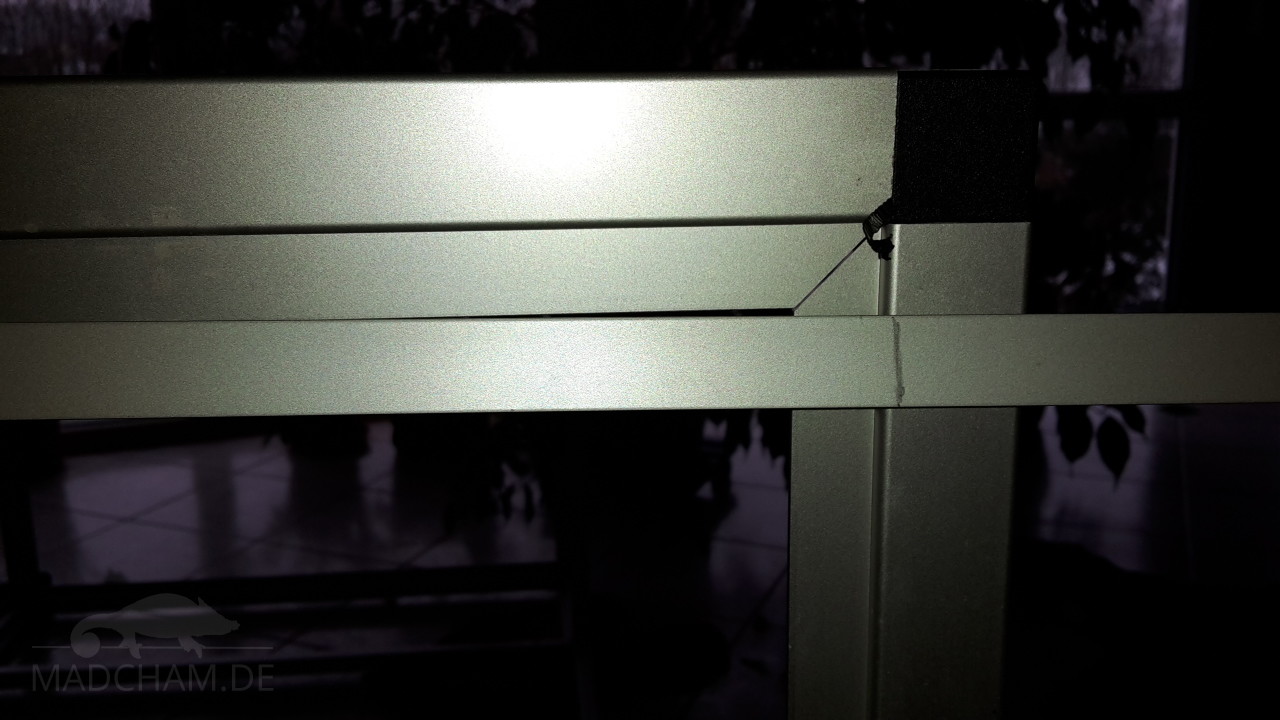
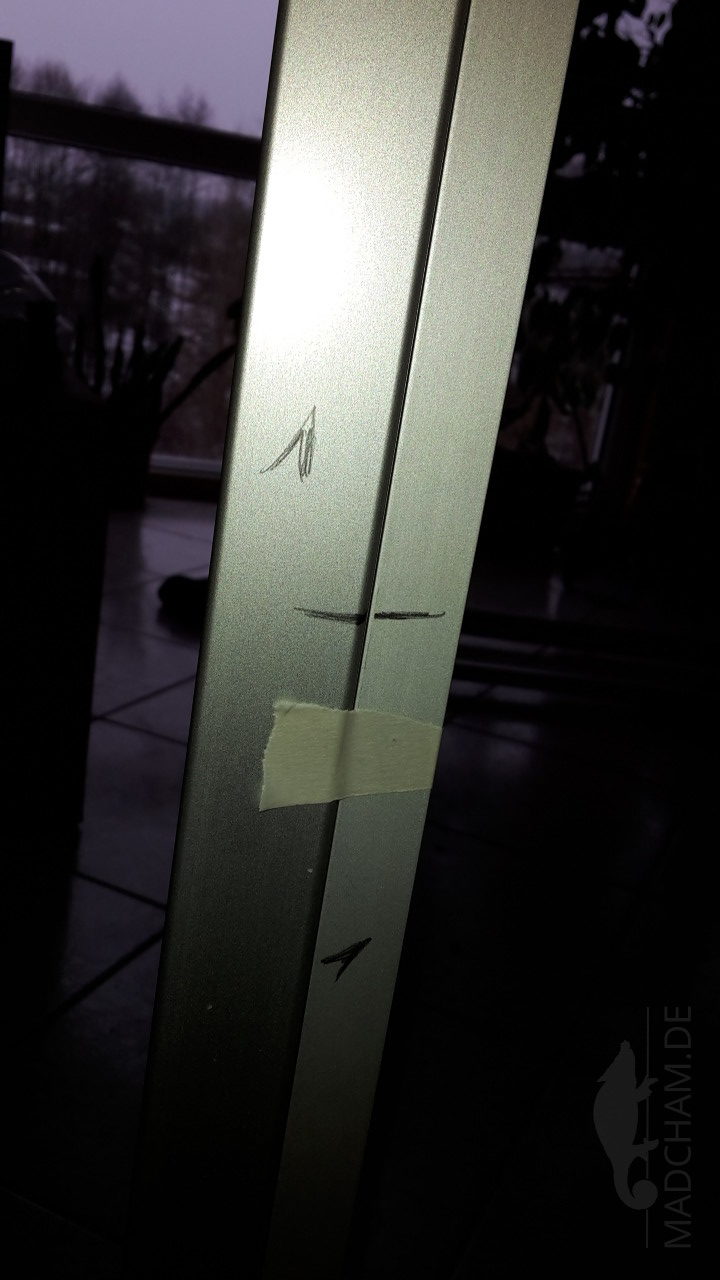
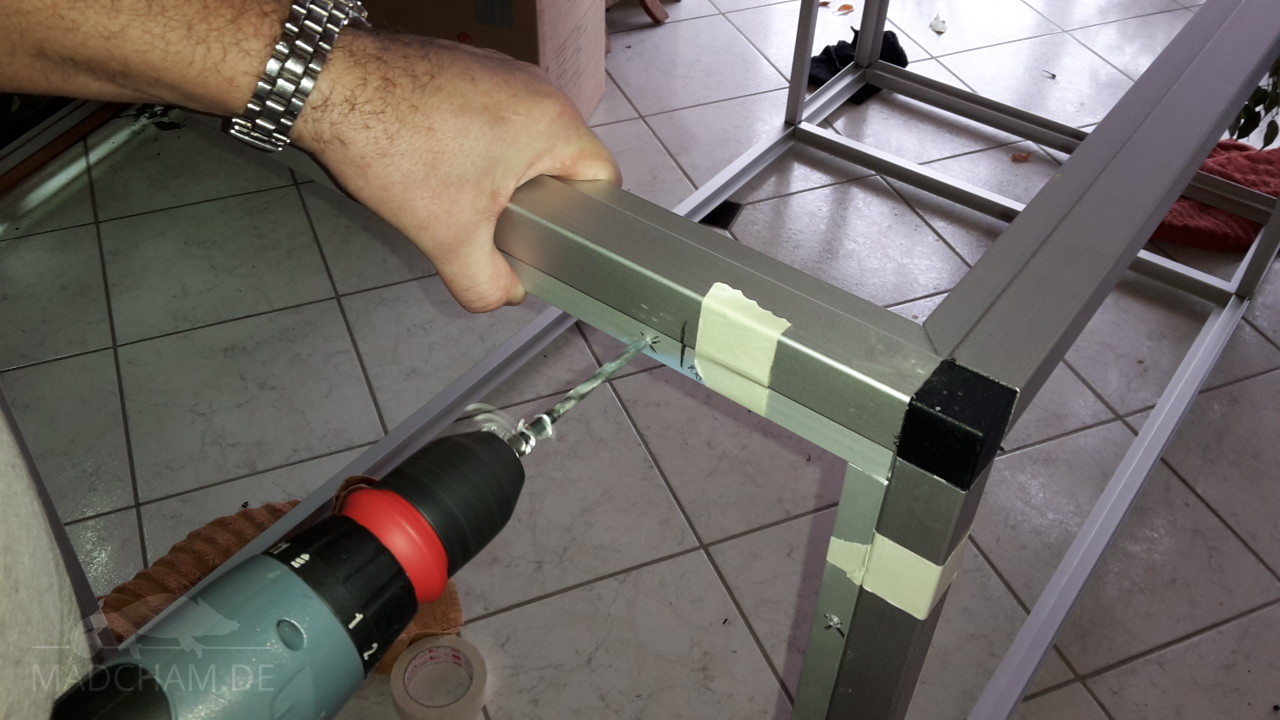
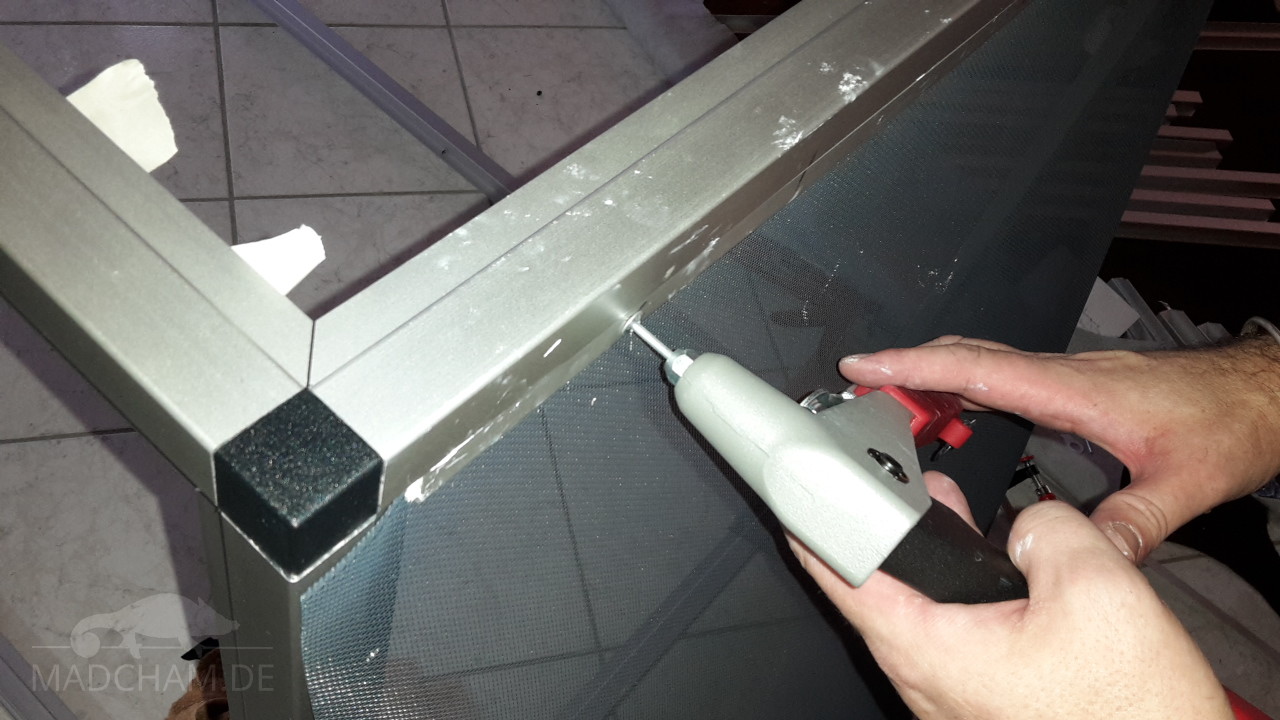
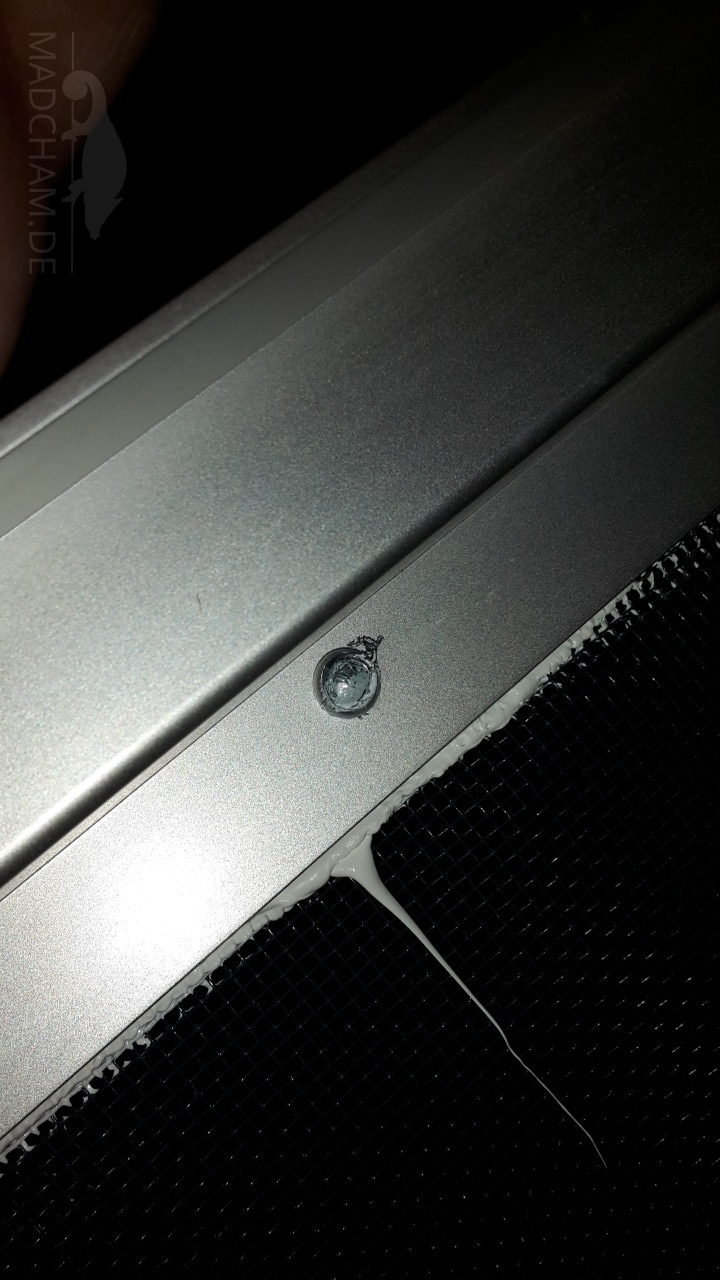
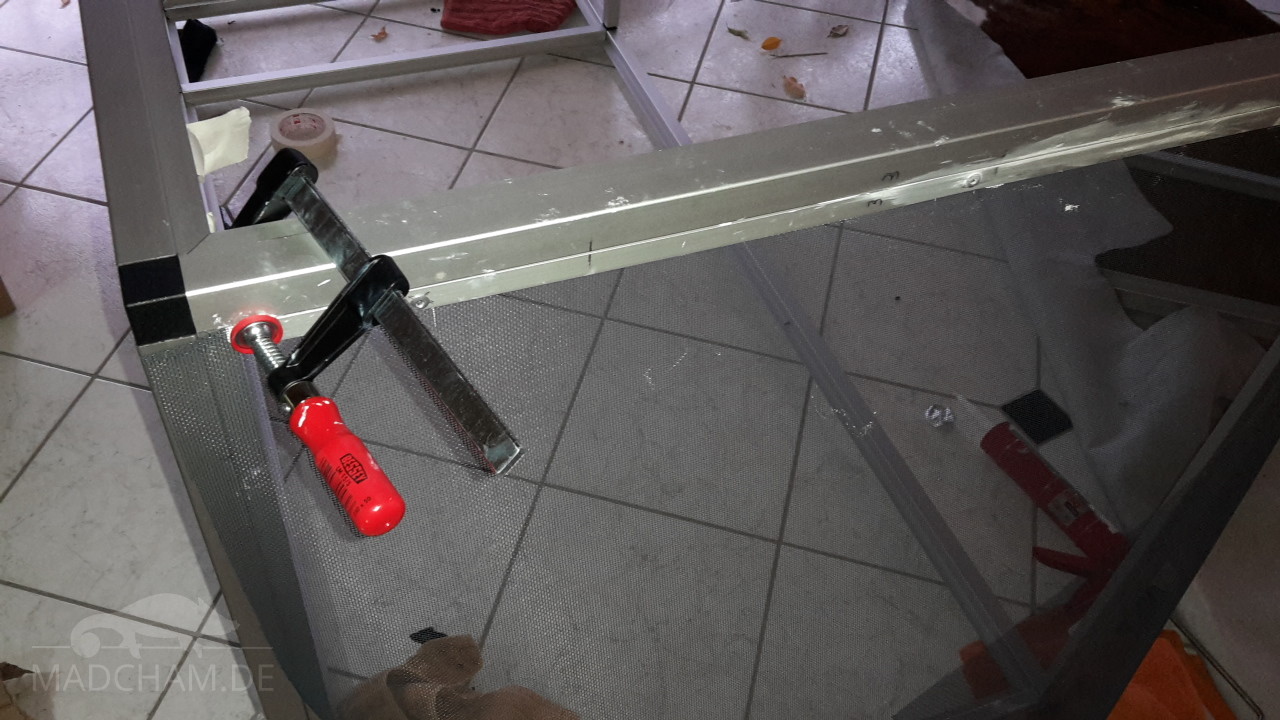
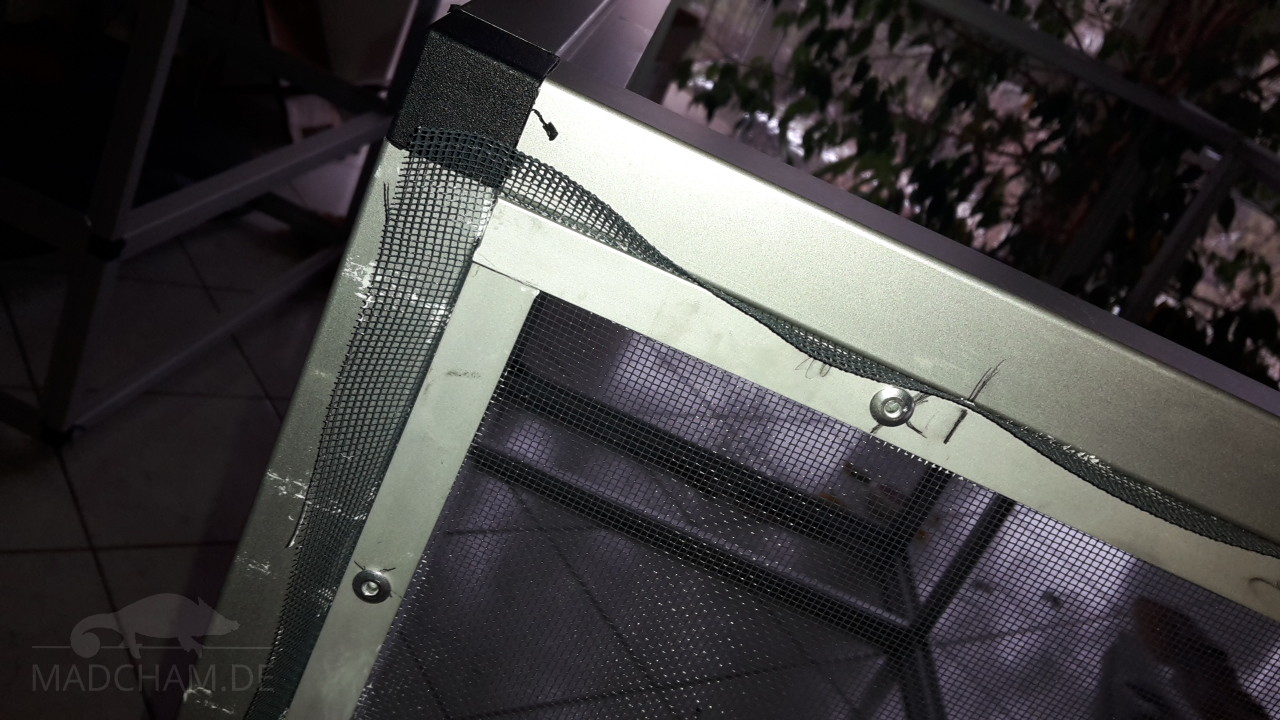
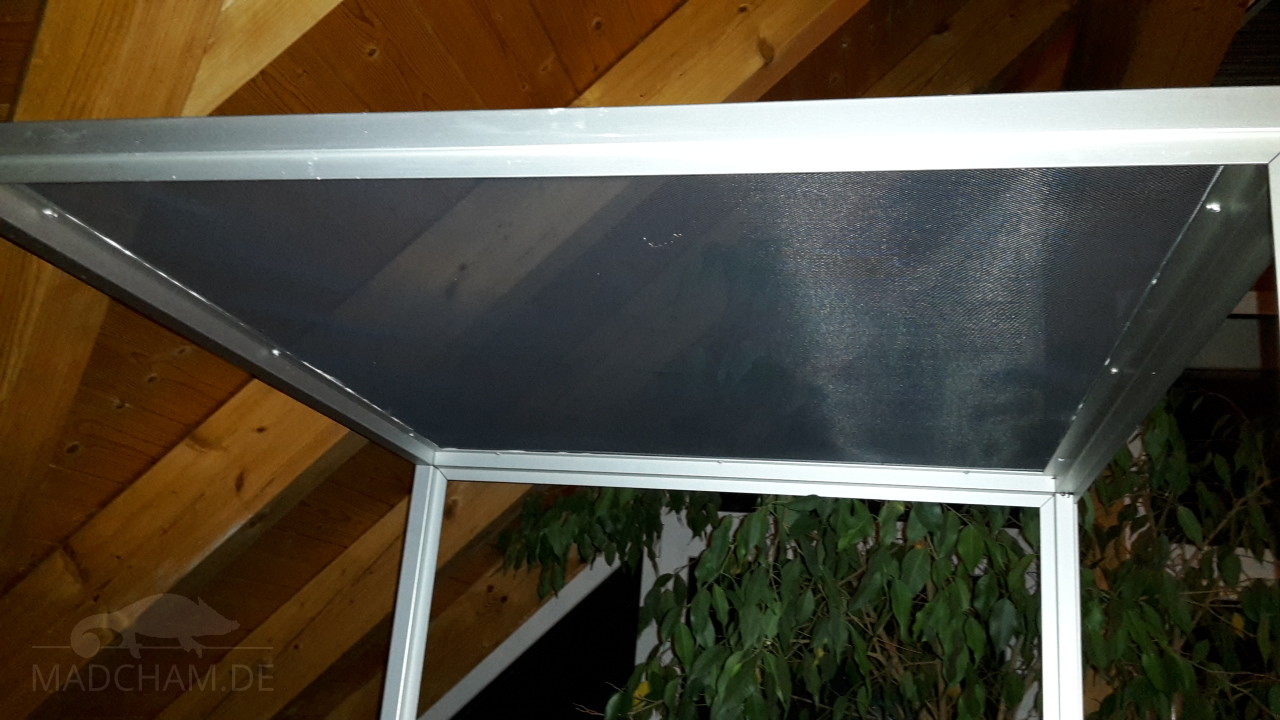
Now it is going to become a little tricky, you need to cover the top of the terrarium with insect screen. Better plan more time, it takes a lot! We decided to use black aluminium screen because it is hardly inflammable and almost invisible for the human eye. You need at least two persons for the top screen. First cut the screen with knife or scissors to a size which leaves a little more space than needed for the top. Then it’s time for the aluminium bars: You build some kind of loose frame from several sawed bars. These bars lay on the upper side of the aluminium profile bars. Later the screen will be put inbetween the profiles’ bars and aluminium bars. If you got all pieces, fix them with masking tape on top of the aluminium profiles. Then drill at least five holes per cage side through the aluminium bars and the profile bars, large enough for your pop rivets. Afterwards remove all aluminium residues with a small file and tag all aluminium bars so you can remove the aluminium bars and put the insect screen on the profile bars. Before fixing the screen, put some silicone underneath to get higher stability. On the first side, you can fix the screen without pulling it, just be sure it is even. The second person then takes the aluminium bars and presses them on top of the screen. Prick through the screen with a screw driver to make all drilled holes free for pop rivets. One person should hold screen and aluminium bars in its place, the other person tightens the pop rivets with pliers. If used correctly, pop rivets will break at a predetermined breaking point. Repeat this for all other sides, and be sure one person is always stretching the screen to avoid bumps and waves in your top screen. You can add screw clamps for a better result until the silicone has dried. Finally, remove all pencil markings with a disinfection agent containing alcohol and cut the protruding screen with a cutter. Then cover the door frame with screen using the same principles.
By the way, if you avoid greasing the silicone as much as we did in some of the pictures, you will have to clean much less afterwards! 😉

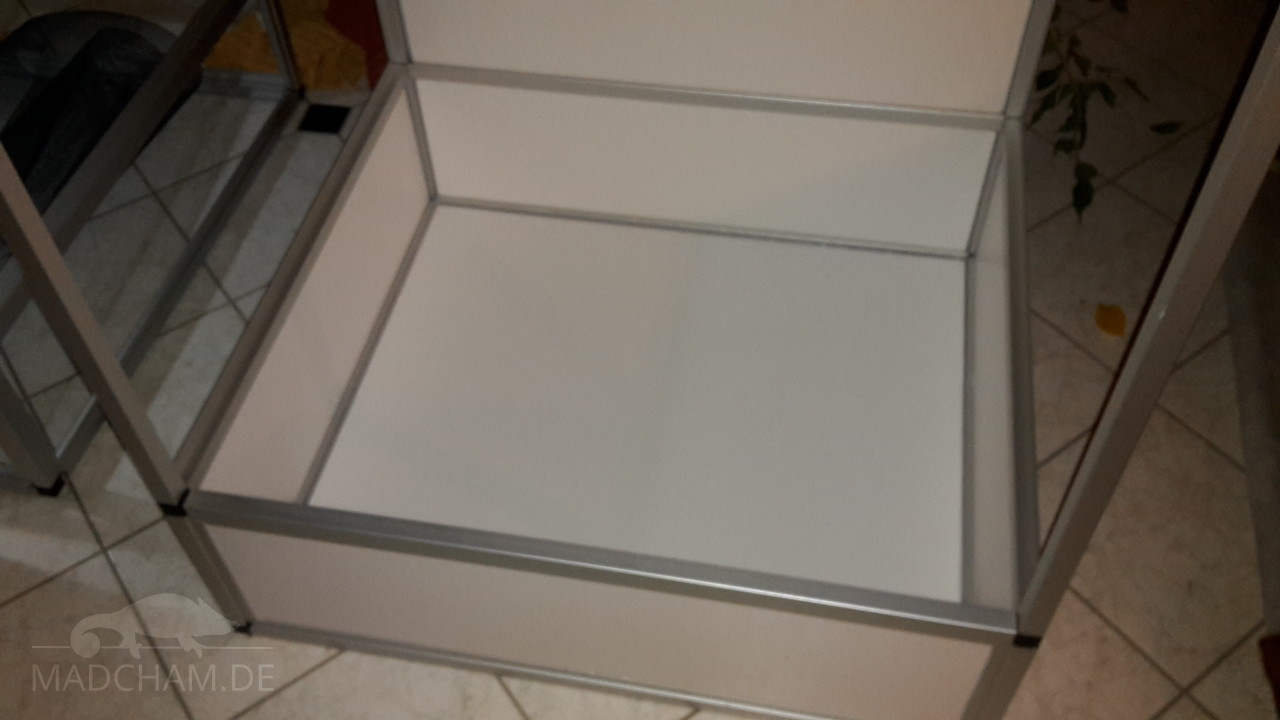
The next step is installing the forex panels. Put aquarium silicone on the profiles and bars where the panel will be, then put the panel from the inside into the aluminium frame and press firmly. Again, screw clamps might be helpful. Before adding the next panel, let the silicone dry for some hours. You can remove excess silicone at the very end. By and by, fix all panels of the bottom tub, the backwall and the right side. Then put silicone on the profile bars of the second cage side, but instead of using a forex panel, you add the glass carefully. It makes sense to tilt the whole terrarium to the side for this purpose, and better put some soft towels beneath. Let the glass side dry for one day before continueing.
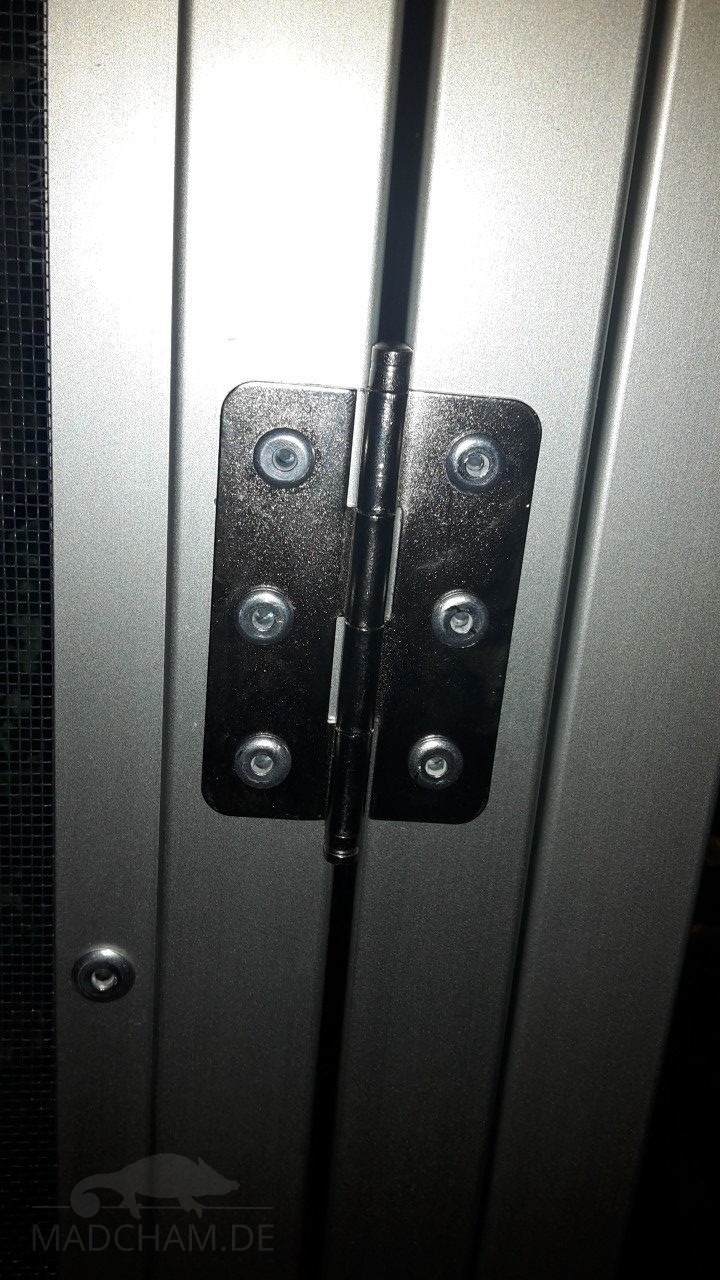
Just the door is still lacking now: We used four folding hinges for which we needed some smaller pop rivets. First install the hinges on the door: Put the hinge in the place where you want it to be on the door frame, and mark with a pencil where you need to drill holes. Remove the hinge. Then take your driller and drill all holes. Important: Do not drill through the whole profile but only through one side! Finally put the hinges back in place and tighten them with pop rivets. To fix the door inside the terrarium, you need two persons again: One person carefully places the door inside the frame, the other person looks for equal distance of the door from the frame on all sides. Fix the door temporarily in its position (tape, cardboards) and mark the holes of the hinges with a pencil. Then remove the door and drill the holes. Finally, one person puts the door back into the frame and holds it while the second person adjusts the hinges, put pop rivets inside and tigthens them with pliers.
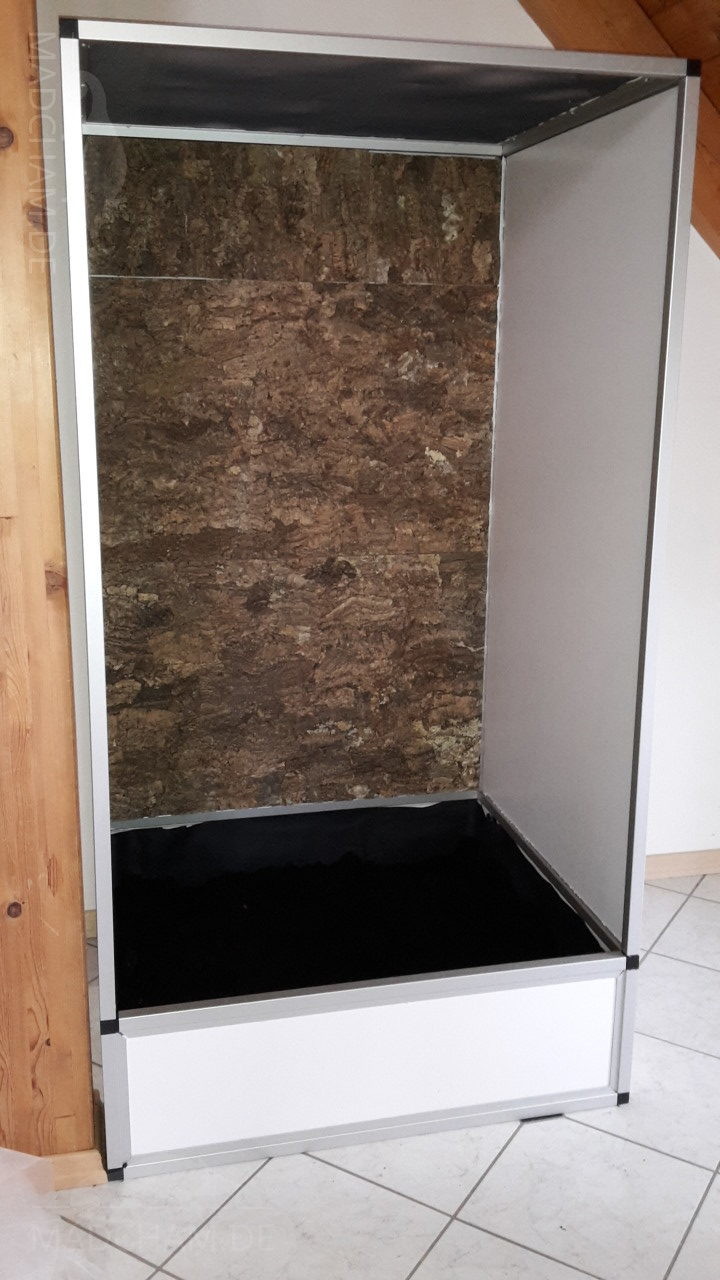
The final step before your cage is ready: Grout all fugues inside the terrarium with aquarium silicone. For one thing, your terrarium becomes waterproof through this procedure. Additionally, the filled fugues prevent feeders from “disappearing” later. Let all fugues dry for one day. Maybe install the lock on the door frame meanwhile. Finished! Now your cage is ready for interior decoration.
Equipping the terrarium:
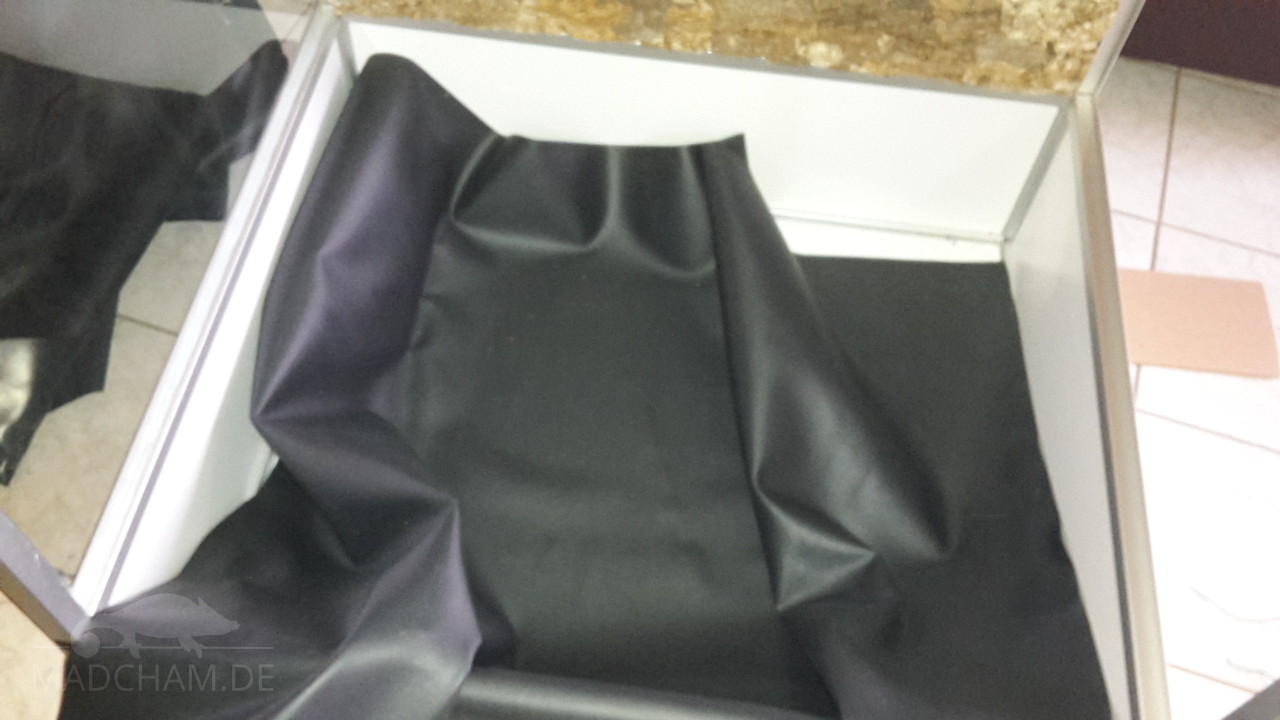
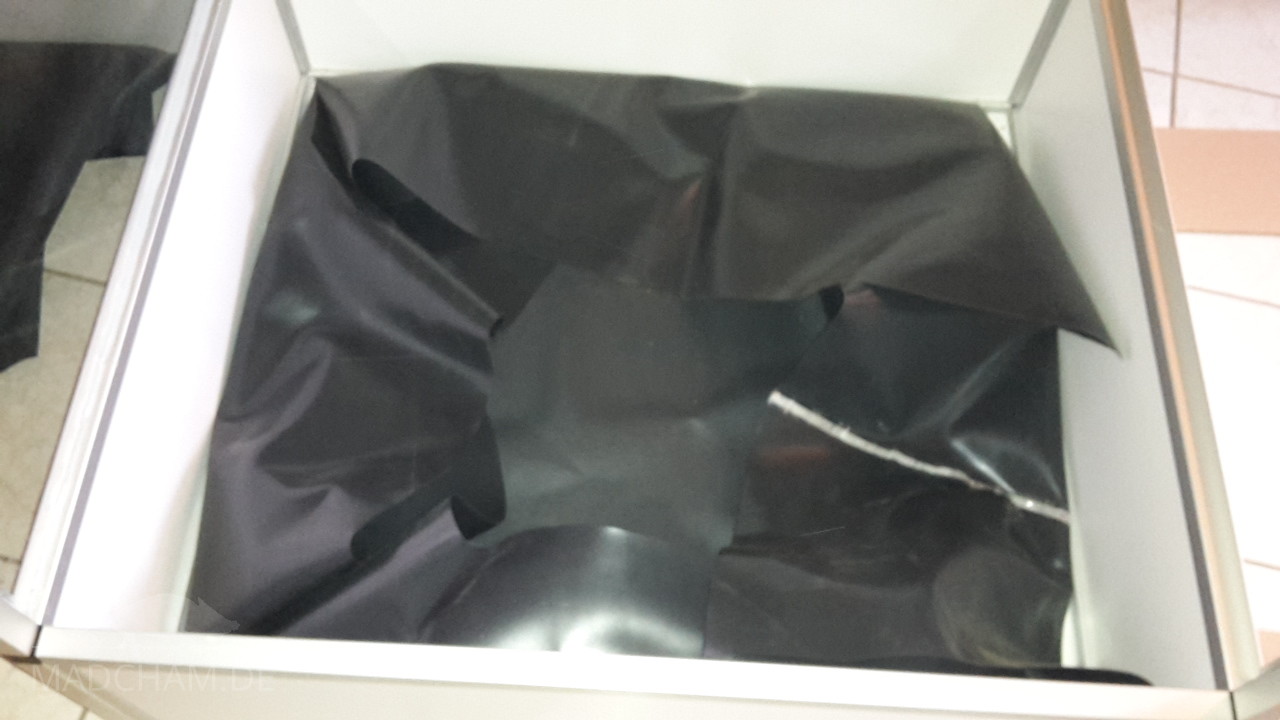
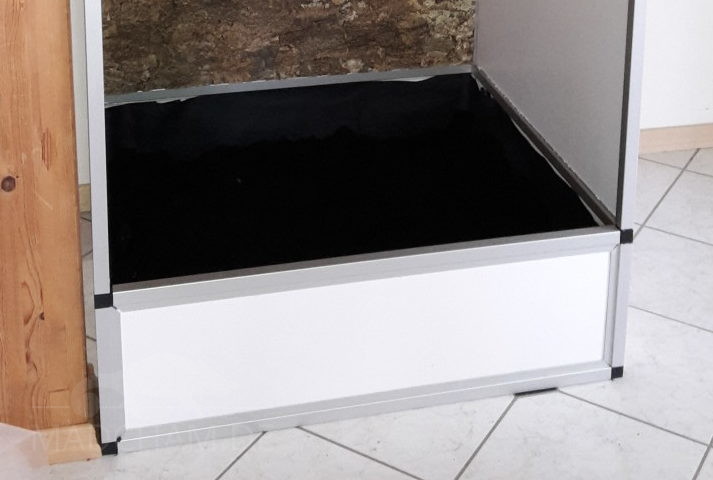
For safety purposes we always apply pond foil to the bottom tub, even in forex cages. Cut a big, maybe 2 x 2 m piece out the foil and place it in the bottom tub. Then fold the edges – the more precisely you work the better it will be – and glue the edges with aquarium silicone to the forex bottom tub. Protruding pond foil can be cut. If you like it, you can add some climbable backwalls to the cage – we used ornamental corks.
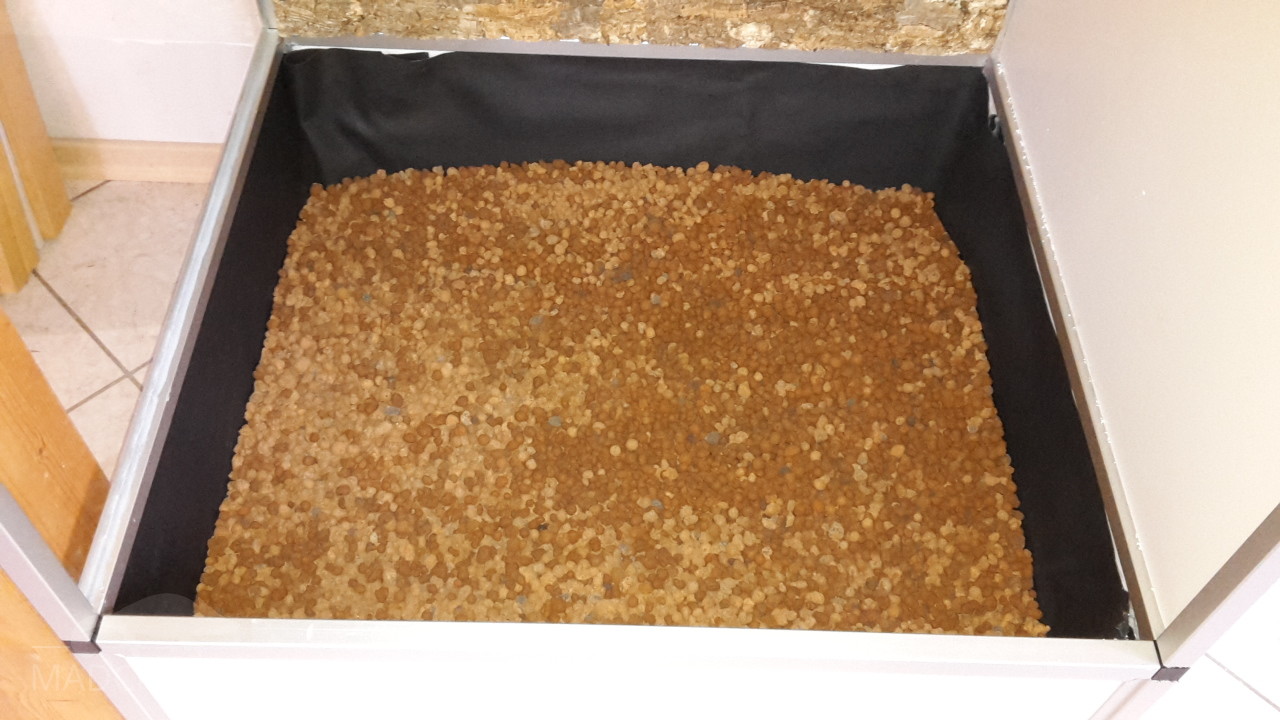
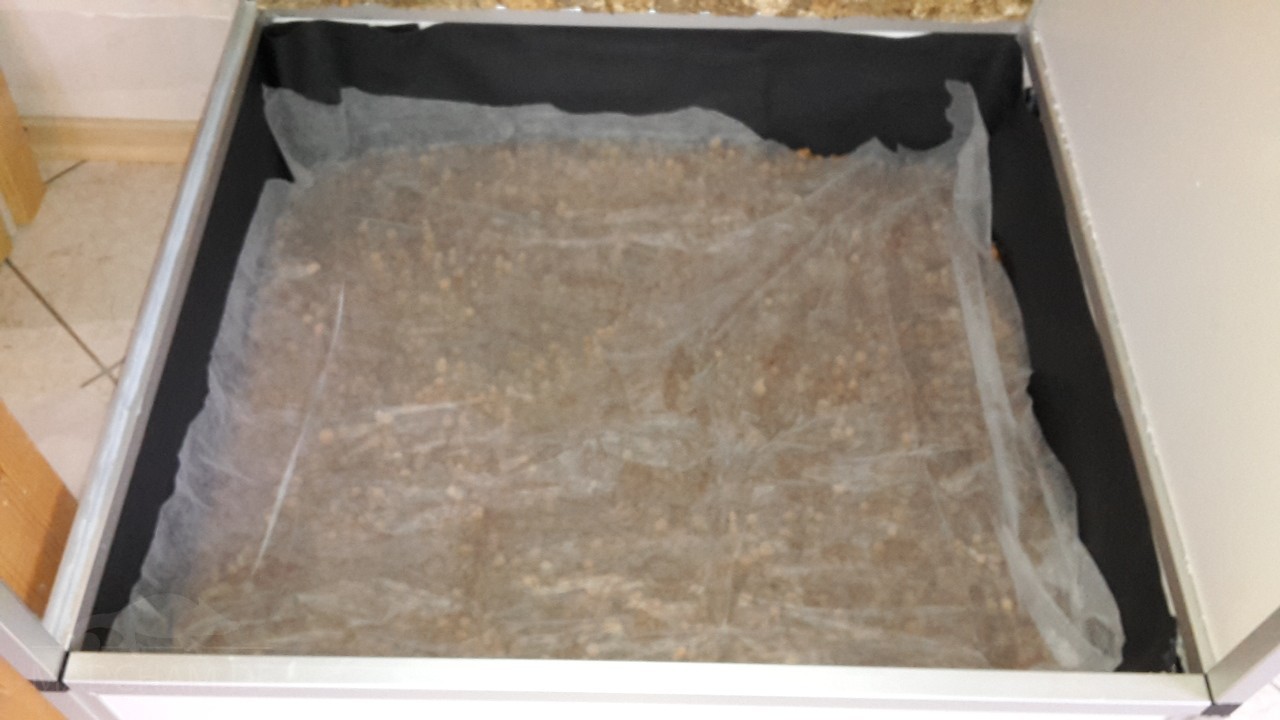
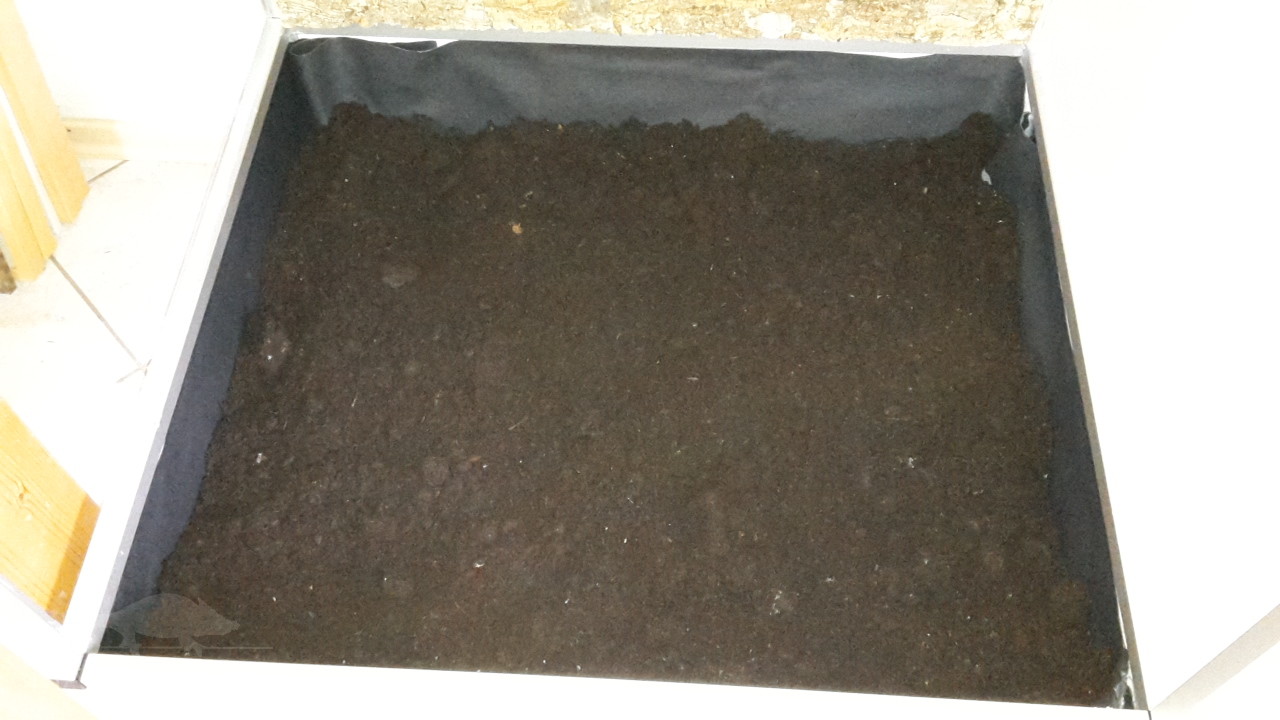
Let the pond foil dry for some hours. Then it’s time to fill up the bottom tub. For male chameleons, we use a drainage layer made of expanded clay spheres and put a textile landscaping mesh on top (honestly, we have no idea how you call this piece of textile in English correctly!). On top of the mesh we put deciduous forest soil, and a layer of leaves. For female chameleons we forego the drainage layer for the benefit of easier egg laying and fill the bottom tub with a mixture of sand and forest soil completely.
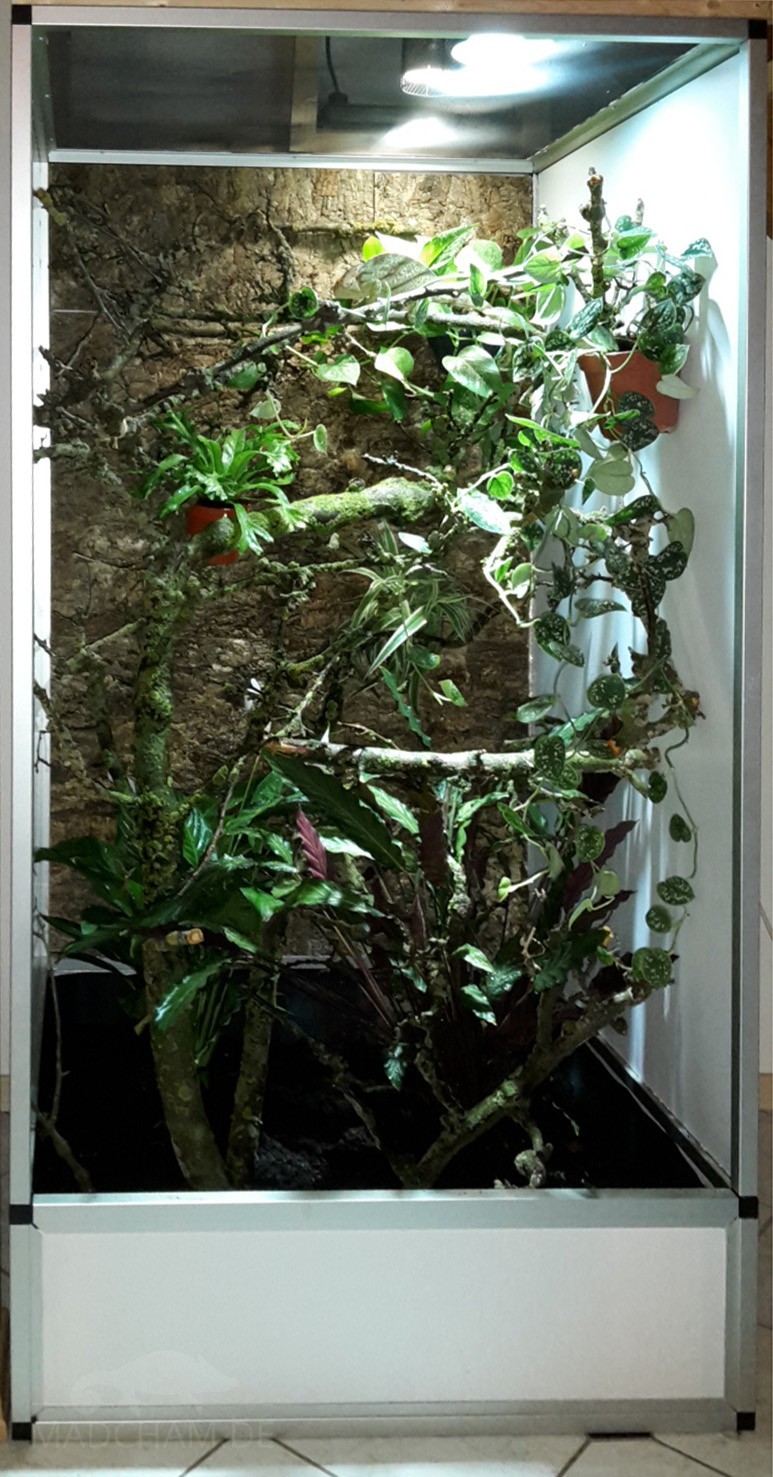
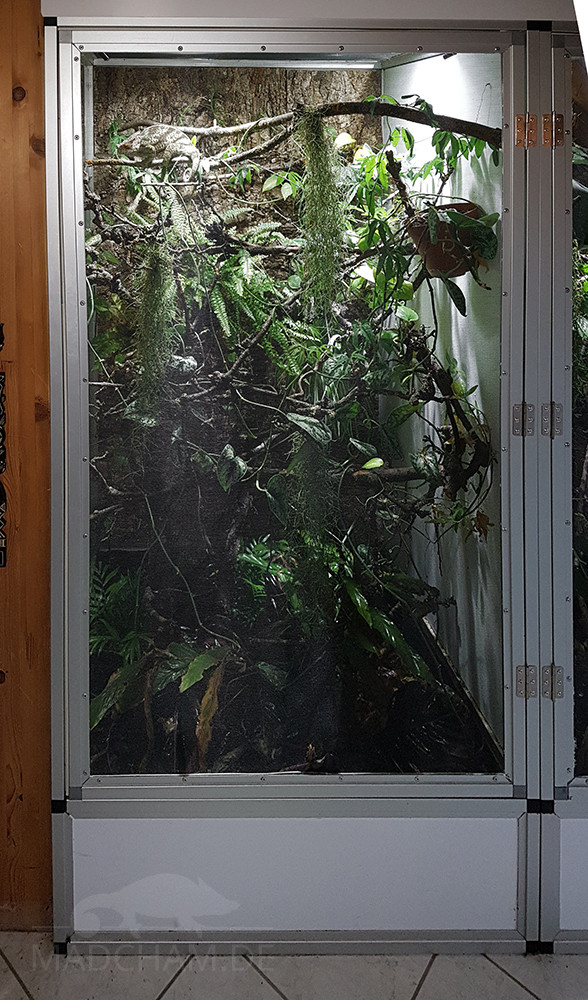
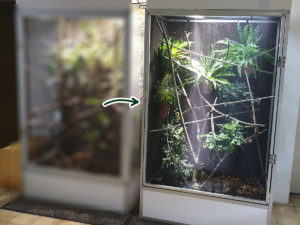
Finally, we’ve put some old branches from fruit trees (in this case from an apple tree) inside the terrarium. Big branches are screwed to the forex panels, smaller branches might be fixed with silicone only. Then we added plants. The finished chameleon cage should run some weeks before the new inhabitant moves in.


Follow us on Instagram


Most popular articles


Your travel specialist for Madagascar