Photographing chameleons in their natural habitat is not only exciting but also a lot of fun. Not least through the passion for chameleons and photography, this website was created! Therefore, there is now a separate article exactly on this topic.
Inhaltsverzeichnis
Camera
Compact cameras
Compact cameras are small, lightweight and the most commonly sold cameras. The prices are low and the image quality is usually not very good. The lens on compact cameras is fixed, so you can’t change anything. Photography is usually fully automatic with a fixed shutter speed. You can’t and don’t have to make or change any settings. However, this is more like taking a snapshot than a photo.
Bridge cameras
Furcifer antimena in Ifaty, Nikon D750, Nikkor 24-70 mm/2.8, full-frame, f/11, 1/200 sec, ISO 100, manual mode, freehand, one Nikon SB900, one softbox
Bridge cameras are actually SLR cameras, but they only have a single, fixed zoom lens. Today, however, bridge cameras are also understood to be mirrorless cameras. They are usually more compact than SLR cameras and require fewer accessories, which lightens the photo backpack by a few kilograms. Manual adjustment of aperture, shutter speed, and ISO is possible but is not used by most users because there are several motif programs. Motif programs are virtually “pre-programmed” settings for certain shooting situations.
Single-lens reflex cameras
If you want to take pictures properly, you can’t do without a digital single-lens reflex camera (DSLR). A wide range of different lenses can be attached to DSLRs, allowing you to switch between different focal lengths. The range of accessories is virtually infinite. This also means that the photography equipment easily weighs 10 to 15 kg per person – so we certainly lug quite a bit through the forest on Madagascar. Some of the latest digital SLR cameras achieve extreme image resolutions of up to 60 megapixels. For very good image quality, however, you usually do not need such extremes. Nowadays, there are digital SLR cameras for beginners as well as professionals in practically all price segments – from 700 € to 10,000 €, almost anything is possible. However, the decisive factor in the area of SLR cameras is not only the camera body but also the lenses used with it. And here, too, the prices are spread over a very wide field.
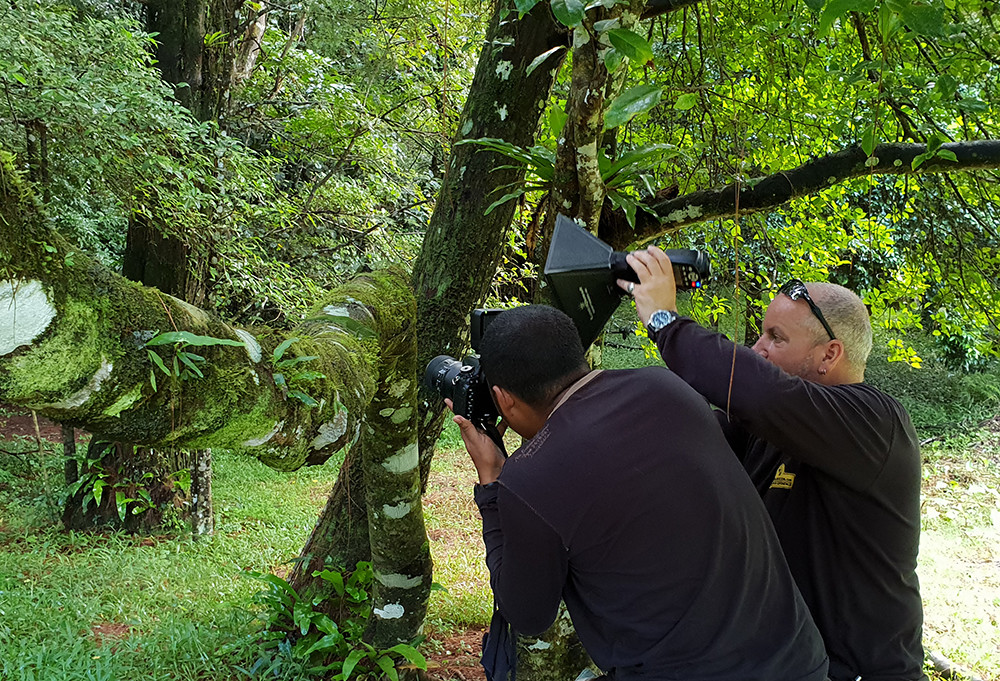
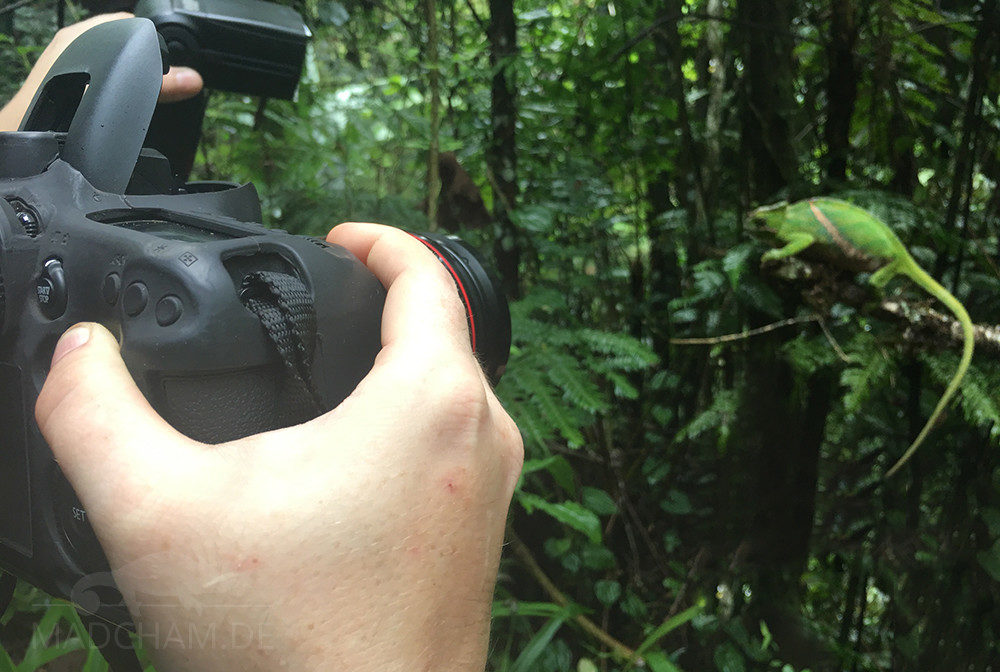
Dimby and Thorsten photograph Furcifer timoni in the rainforest of Amber Mountain
We use only Nikon and Canon digital SLR cameras to photograph chameleons in Madagascar. And we photograph exclusively and always manually, that means with the setting of exposure time, shutter speed, iso, and flash by hand. We generally do not use automatics. By the way, Thorsten and Dimby take pictures with Nikon, Alex takes pictures with Canon.
If you don’t really know what you want, but would like to get started with photography, we recommend that you go to a photo store for advice. Well-known, large photo specialty stores include (in Germany) Calumet, Foto Koch, Foto Leistenschneider, or Foto Brenner. There, you look for a photo salesperson (which, by the way, is an apprenticeship) and make an appointment for a consultation. It would be good to know the desired price segment before the appointment. Please always keep in mind that there will be some accessories, especially lenses, in addition to the camera. You can then look at various camera models live on-site, test the feel in your own hands and simply try out what suits you best. And then please keep the most important thing in mind: After a thorough consultation, you should also buy where you have been well advised, and not order online from Amazon.
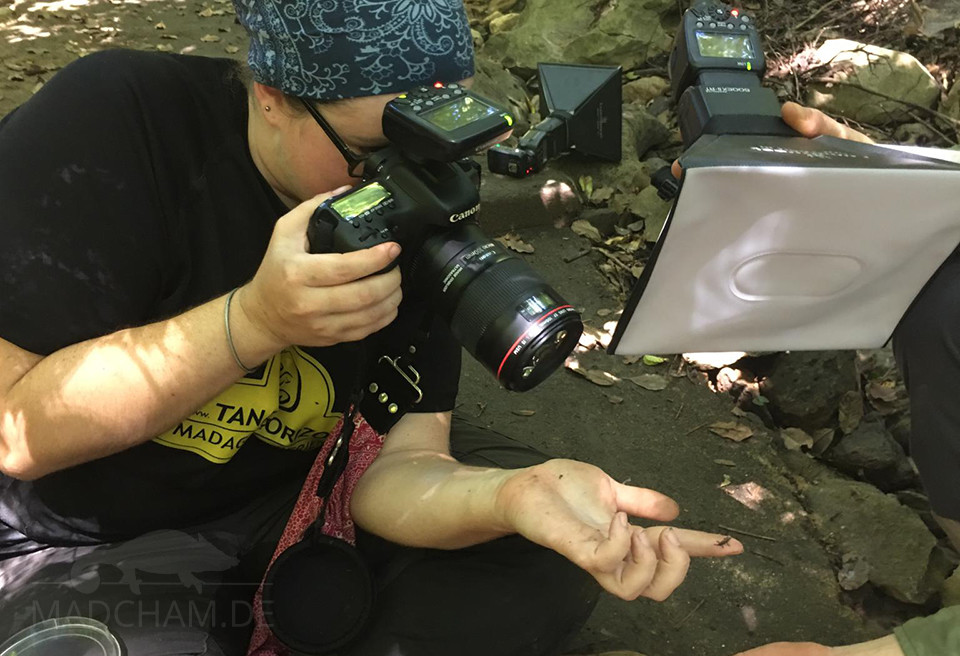
Alex photographs Brookesia micra on the island of Nosy Hara – on the right in the picture is an external flash with a softbox belonging to the camera
It is also a good idea to attend workshops offered by camera manufacturers to familiarize yourself with the camera and learn how to take photos manually. Almost everywhere there are also interest groups, photo clubs, or similar, in which amateurs and advanced photographers are equally welcome and can exchange ideas. Anyone can use “automatic” – real photography is when you can manage all the settings yourself.
Lenses
For beginners, a zoom lens that covers several focal lengths from light wide-angle to telephoto is usually suitable. If you are an advanced photographer, you will usually buy several lenses over time that suit your own interests. Basically, there is a wide range of lenses for any SLR camera – not everything has to be from the same manufacturer. Test reports and comparisons can be helpful in the search for a suitable lens.
Normal lenses
The normal lens has a fixed focal length and images pretty much what you see with the human eye, without distortion. The focal length results from the diagonal of the camera sensor. For most cameras, the standard lens is between 40 and 60 mm focal length. For photographing chameleons in Madagascar, these lenses are not really needed.
Telephoto lenses
Calumma crypticum in Anjozorobe, Canon 7D Mark II, Tamron 150-600 mm/5-6.3, half-frame, f/8, 1/400 s, ISO 400, manual mode, freehand, available light
Telephoto lenses are lenses with focal lengths from 65 to 1200 mm. With them, you can “get close” to distant subjects. Simply put, the higher the mm number, the farther away chameleons can still be photographed. However, telephoto lenses usually weigh a lot and have a considerable size. For chameleons, telephoto lenses are only suitable if you want to photograph animals far up in the tree or from a distance of several meters. In Madagascar, we rarely use telephoto lenses for chameleons.
Wide-angle lenses
Wide-angle lenses have a focal length of 14-35 mm. They capture much more than our eyes can see in a single frame. Wide-angle shots are therefore often used for landscapes, for example. Chameleons can be photographed with the wide-angle lens, but usually have to be photographed so close that the animals do not tolerate it well.
Fish eye lenses
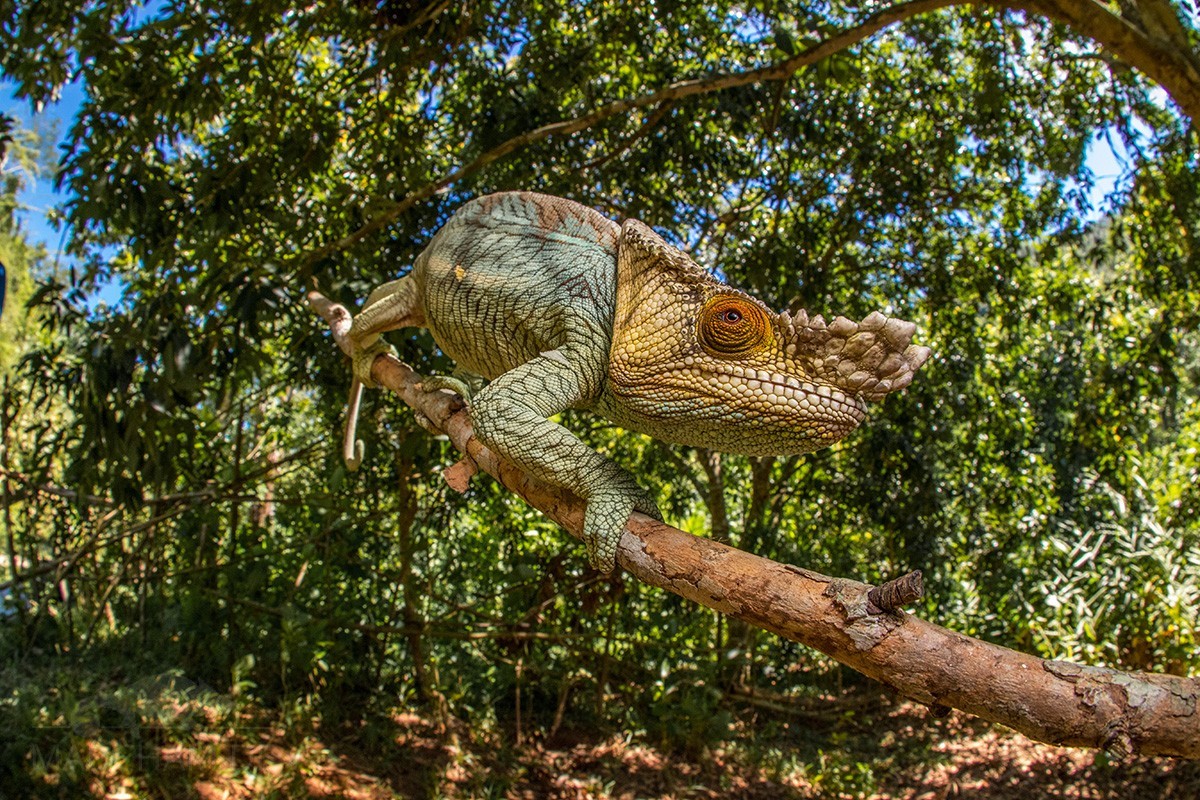
Calumma parsonii parsonii near Mahambo, Canon 7D Mark II, Sigma Fish-Eye 10 mm /2.8, half-frame, f/9, 1/250 sec, ISO 400, manual mode, hands-free, untethered Canon Speedlite 600EX II-RT, one Lumiquest softbox.
Fish-eye lenses are very special wide-angle lenses with 8 mm or 16 mm focal length that distort the image in a barrel shape. What is closer to the lens appears much larger as a result. This makes it possible to show chameleons in an exciting way, but you have to get very close to the animal. Fish-Eyes can therefore only be used for a few species and in special situations in Madagascar. Very small chameleons are difficult to capture with the fish-eye, a size of at least 6-8 cm is better.
Zoom lenses
Zoom lenses are the “all-rounders” for Madagascar. The common focal lengths of these lenses are 24-85 mm or 70-200 mm. So they cover several focal lengths in a single lens. For example, a 24-70 mm zoom lens can be used very well for larger chameleons. From panther chameleons to Parson’s chameleons, animals of a lot of sizes can be photographed very well with it. The important thing with zoom lenses is to make sure the subject distance is short so you can get as close to the subject as possible.
Macro lenses
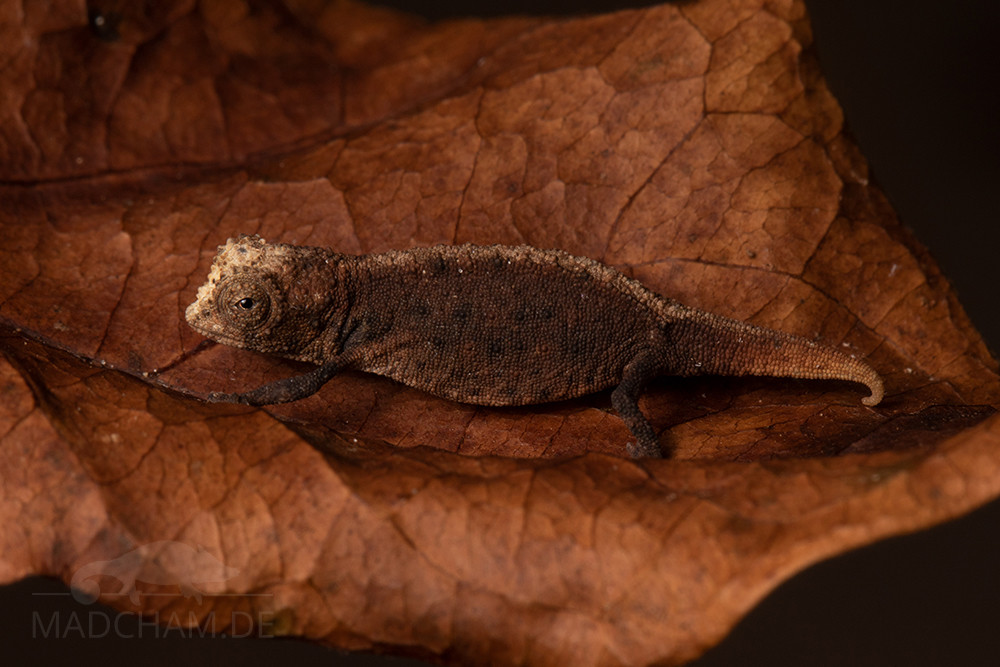
Macro lenses are usually fixed focal lengths with optimized lens groups for good magnification. They are particularly good for photographing small chameleons, for example, the terrestrial chameleons of the genera Palleon and Brookesia. Also smaller tree dwellers like Calumma gallus, Calumma linotum, Calumma boettgeri, Furcifer lateralis or Furcifer minor can be photographed very well with for example a 100 mm macro lens. Caution: the better the macro lens magnifies, the smaller the area that will be in focus in the photo. Or technically correct: the larger the magnification, the shallower the depth of field. A shallow depth of field can be compensated to a limited extent via the aperture, but not endlessly.
Brookesia superciliaris in Andasibe, Nikon D750, Nikkor 105 mm Micro, full frame, f/11, 1/125 sec, ISO 100, manual mode, hands-free, two unleashed Yongnuo YN560 III, two Lumiquest softboxes
Madagascar photography
Available light
Available light photography means that no additional light sources are used. Only what the sun and the respective light conditions of a situation provide is used for photography at that moment. In Madagascar, available-light photography is not always possible. Especially deep in the rainforest, it is often relatively dark so that you do not get very far with the available light. Every now and then, however, there are opportunities to photograph chameleons exclusively with the available light.
Flash
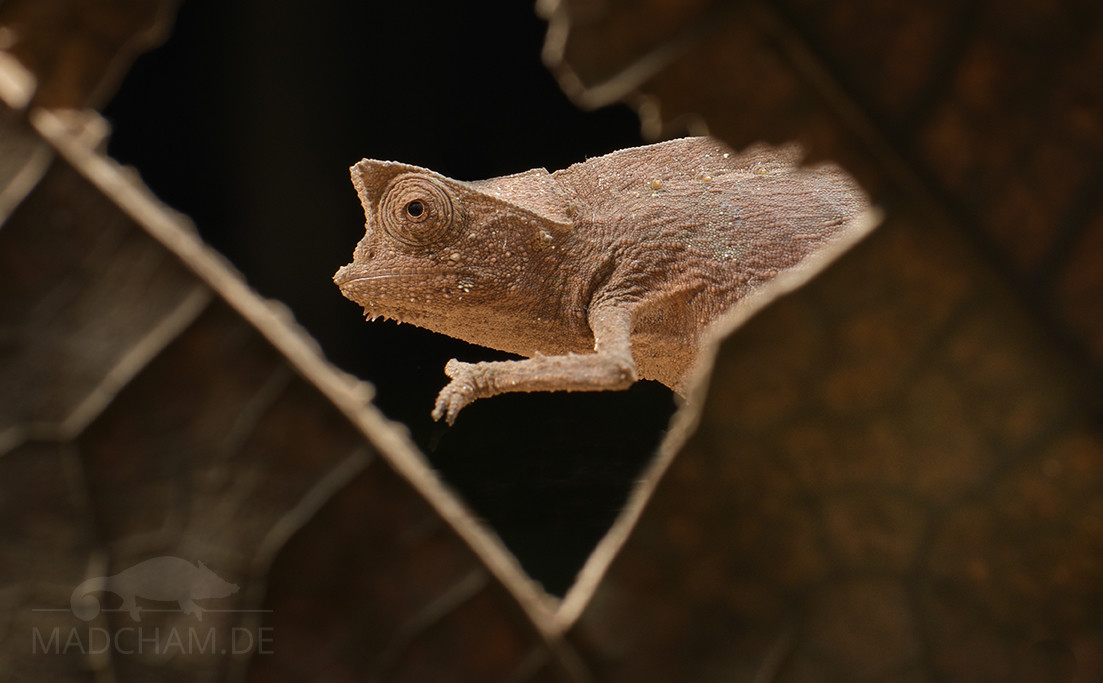
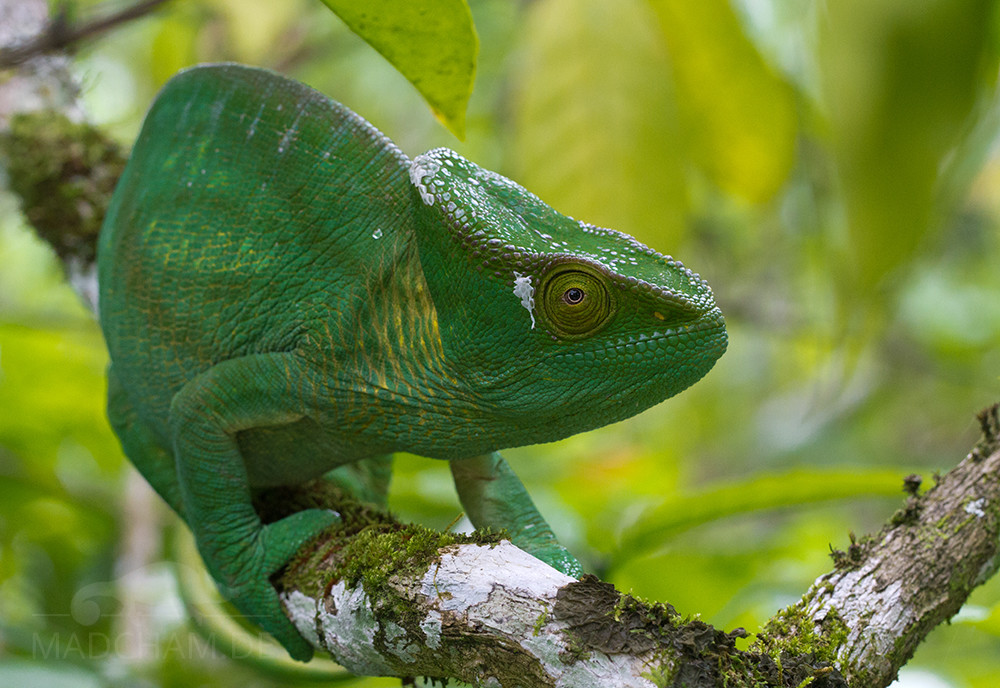
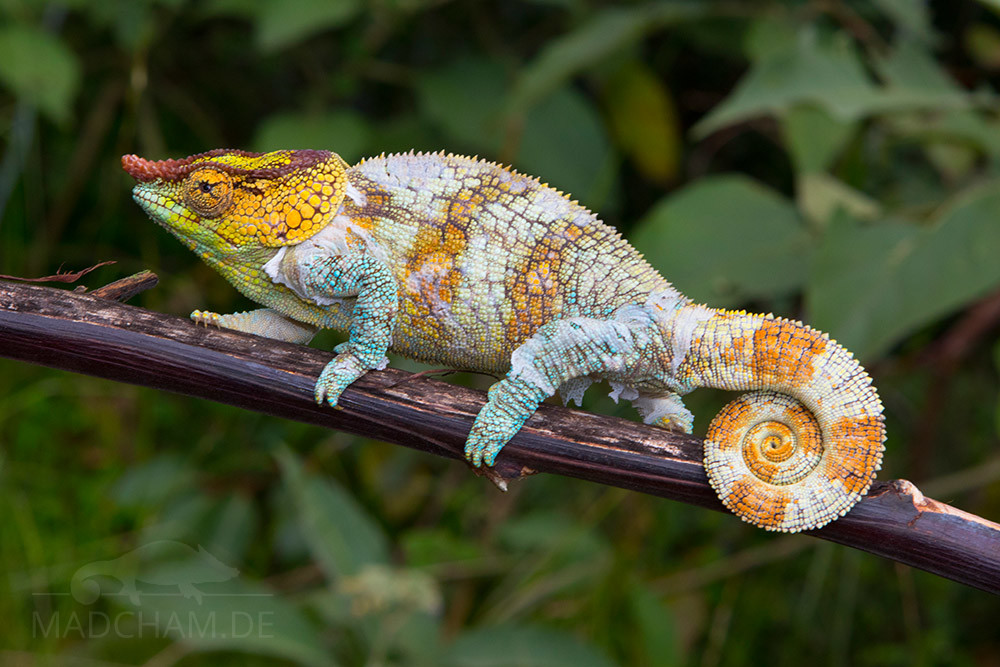
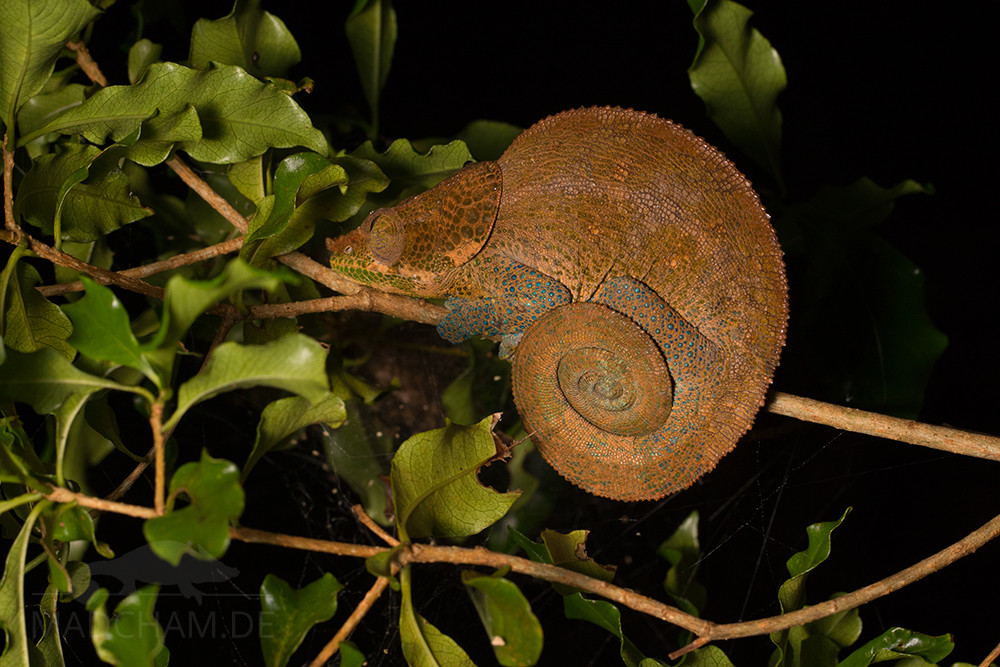
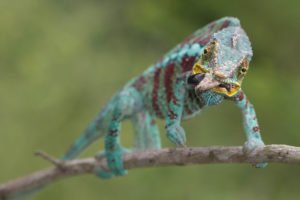
In Madagascar, flash is often necessary for chameleon photography. As a rule, the flash is not used as the sole light source, but only to brighten up a scene or to improve the existing lighting situation. The following two photos illustrate the difference. The female Calumma parsonii parsonii on the left is photographed without flash, the one on the right with external flash.
Internal flash
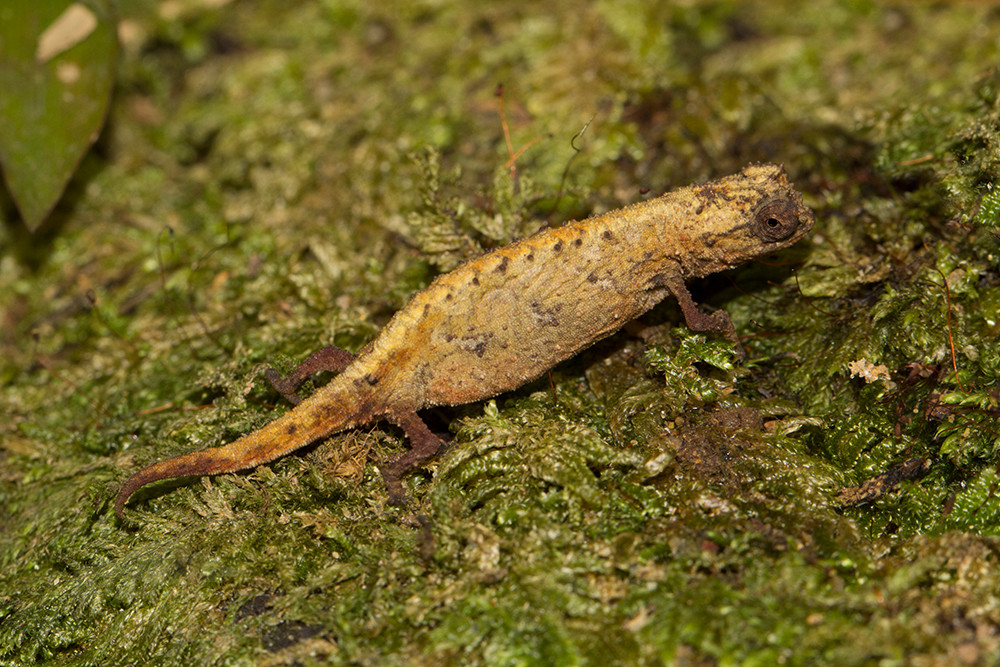
The internal flash permanently installed in SLR cameras is moved out of the camera body at the push of a button. Although it is always quickly at hand, it is located directly on the optical axis of the camera. As a result, pictures taken with an internal flash often look “flat” and “one-dimensional”. The following two photos show this. On the left, you see Brookesia tedi, photographed with the internal flash of the SLR camera. On the right is Brookesia micra, photographed with an external, unleashed flash.
External flash
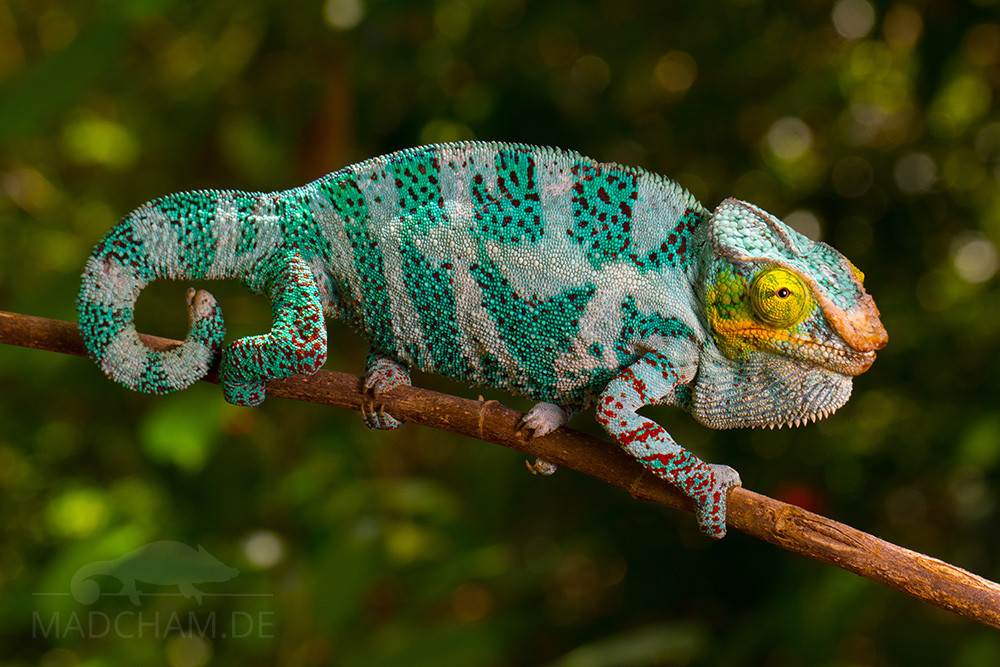
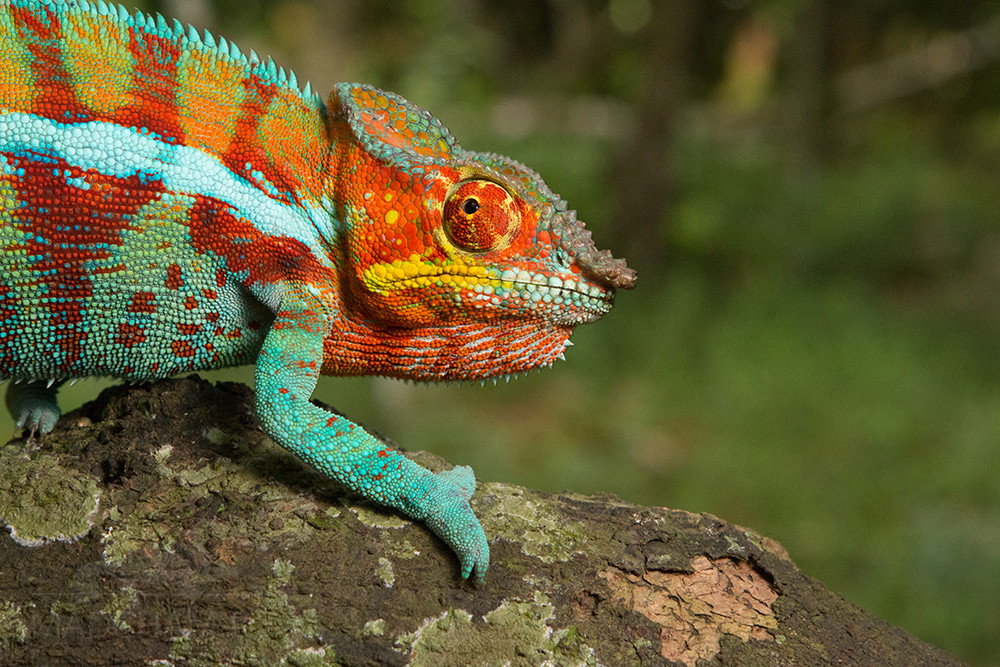
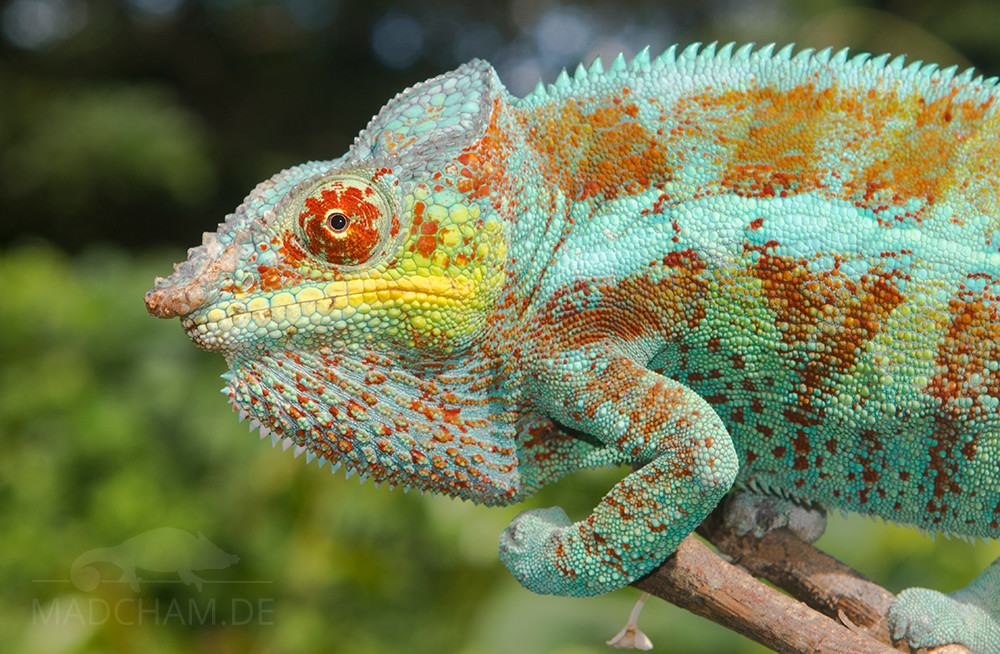
External flash units are either mounted on top of the SLR camera using a slide. This gives your flash more power, but the same axis problem as with the internal flash. It is more clever to use external flash units independently of the position of the camera by means of an external trigger (“unleashed” flash). This allows a variety of new lighting situations and more “natural” light incidence on the photo. Last but not least, you can also work with multiple flashes that can be controlled individually. On Madagascar, you are usually limited to a maximum of two or three external flashes, because you always need people to hold or position the flashes in the rain or dry forest. Only very rarely does the opportunity arise that a chameleon sits so motionless and calm that you can actually build entire sets in no time. Usually, you have to be quick and need at least one person to help hold the external flash as desired or move it along when the chameleon moves. Another image comparison: on the left, a Furcifer pardalis in Ambanja, photographed with external flash unleashed. On the right, a Furcifer pardalis in Djangoa, photographed with the camera’s internal flash.
Does flashlight damage the eyes?
The rumor still persists that flashlights can damage the eyes. You hear this particularly often in connection with the photography of children, but also with animals. In fact, there is no truth to this rumor.
Light can only cause damage to the eye under certain conditions. On the one hand, special light – specifically lasers – can cause burns to the retina. However, the energy of a laser is up to 500 times higher than the flashlight of a camera. Also, the light is extremely focused, a camera flash is not. In addition, the duration of a camera flash is extremely short, usually much shorter than 1/200th of a second. So a burn on the retina cannot be caused by a flashlight. A second variation of how light could cause eye disease is damage from ultraviolet light. This phenomenon is known as “snow blindness”, the technical term is photokeratitis. In this case, the cornea is damaged. This problem cannot occur with a photo flashlight, if only because normal flashes do not emit ultraviolet light.
Calumma crypticum in Anjozorobe, Nikon D750, Nikkor 24-70 mm/2.8, full frame, f/11, 1/125 sec, ISO 100, manual mode, freehand, two unleashed Yongnuo YN560 III, two Lumiquest softboxes
In a nutshell: The average flash from a digital SLR camera cannot cause damage to the eye. Not even in a newborn. By the way, chameleons have a lens eye just like humans. By analogy, we can assume that the flash of a camera cannot cause any permanent damage to chameleon eyes.
One thing flash can do, however, is irritate animals at night. Especially when photographing chameleons sleeping at night, limit yourself to a few shots and do not fire off a “flashlight storm.” An animal irritated by light may be disoriented for a short time, making it vulnerable to predators, especially at night. Therefore, if a chameleon accidentally appears to be disoriented when it walks across its sleeping branch, the light should be dimmed to a minimum and you should wait near the animal until it has returned to its safe sleeping position and you can leave it alone without worrying.
Softboxes
Nevertheless, depending on the situation, it can be unpleasant to be flashed with bright light. So-called softboxes, which you put over the flash, provide a much softer light on the photo. The softbox imitates the natural diffusion of a light source such as the sun. This is not only much more beautiful and natural to look at for the photo, but also more pleasant for the chameleon.
Chameleon photography tips & tricks
The right time
When is the right time to photograph chameleons? This is very easy to answer. During the day, chameleons usually show much more beautiful colors than in the dark. At night they wear their “sleeping colors”. These are brighter than during the day but do not show the animals in their “normal” appearance. So if you don’t want to photograph sleeping chameleons for documentary purposes, you are better off photographing the animals during the day. You can see two examples in the following photos: Once a Calumma crypticum near Ambositra photographed during the day, next to it a male of the same species sleeping at night in Anjozorobe. Below a Calumma oshaughnessyi in Ranomafana, on the left a male during the day and on the right, another male photographed at night.
Small minus point: It is easier to find chameleons at night. But this problem can be solved simply: In the evening, you look for the animals and mark the corresponding trees with, for example, a colored bast ribbon. The next morning you look for the tree again shortly after sunrise (not later!). Now you need some luck to find the chameleon again, but usually, it is still in the immediate vicinity. The mark in the vegetation has to be removed of course.
By the way, there is practically no “right time of day” to photograph chameleons in Madagascar. Of course, an evening mood offers beautiful light, but usually, you will not find chameleons exactly at the time and place during which “optimal light” prevails. In Madagascar, you usually have to make do with the conditions and take whatever light you can get. You can technically upgrade lighting conditions on the island well by using flash.
A tip at this point: Local and chameleon-knowledgeable local guides are very important in Madagascar. Finding well-camouflaged chameleons in the bush even without any experience is extremely dependent on luck, time of day, and season. With the right guides, you have much better chances for good sightings.
Sun position
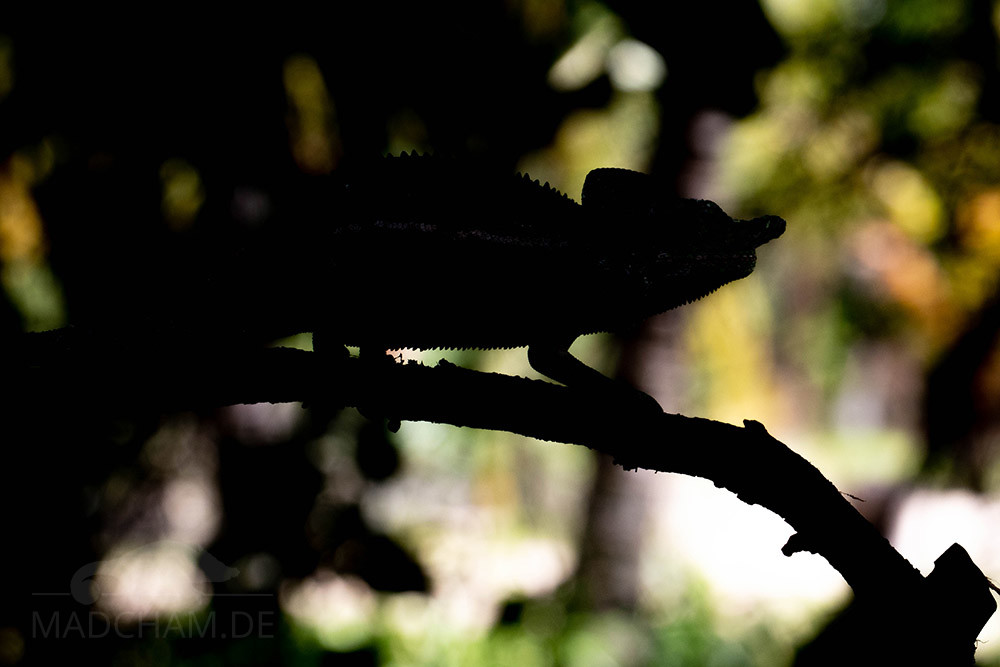
Silhouette of a Furcifer voeltzkowi on Katsepy peninsula in back light
Having the sun at your back is crucial. You can’t take good photos in backlight – unless you deliberately want to photograph only the silhouette of a chameleon. Sunlight coming from the side can be very disturbing during photography. In principle, the sun should be behind the photographer when taking photos.
Background and distracting elements
A calm background is helpful and less distracting from the actual subject, the chameleon. Huts, people, or stray dogs should not be visible in the background. The background may also be somewhat distant from the chameleon, depending on the lens used. Likewise, hands do not belong in the photo. Just as much attention should be paid to “the right moment”. If the chameleon is sitting in such a way that a thick branch runs directly in front of its nose, it is not the right time to press the camera shutter button. While you could theoretically retouch distracting people or branches out of the picture later, good photography should always aim to get a beautiful photo without post-processing.
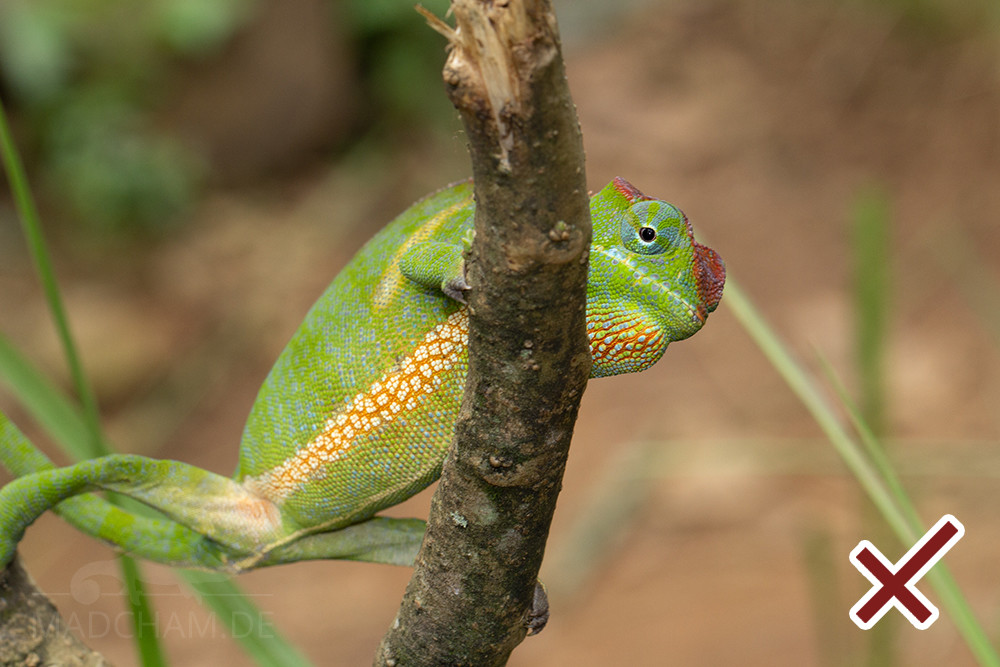
Examples: The male Furcifer pardalis on the left has a human in the background. The female Furcifer pardalis on the right is moving in front of a very turbulent background that distracts from the actual subject. The female Calumma brevicorne has a distracting branch in the picture right in front of her nose. And the Brookesia therezieni in Ranomafana disappears behind a transverse branch with the whole head.
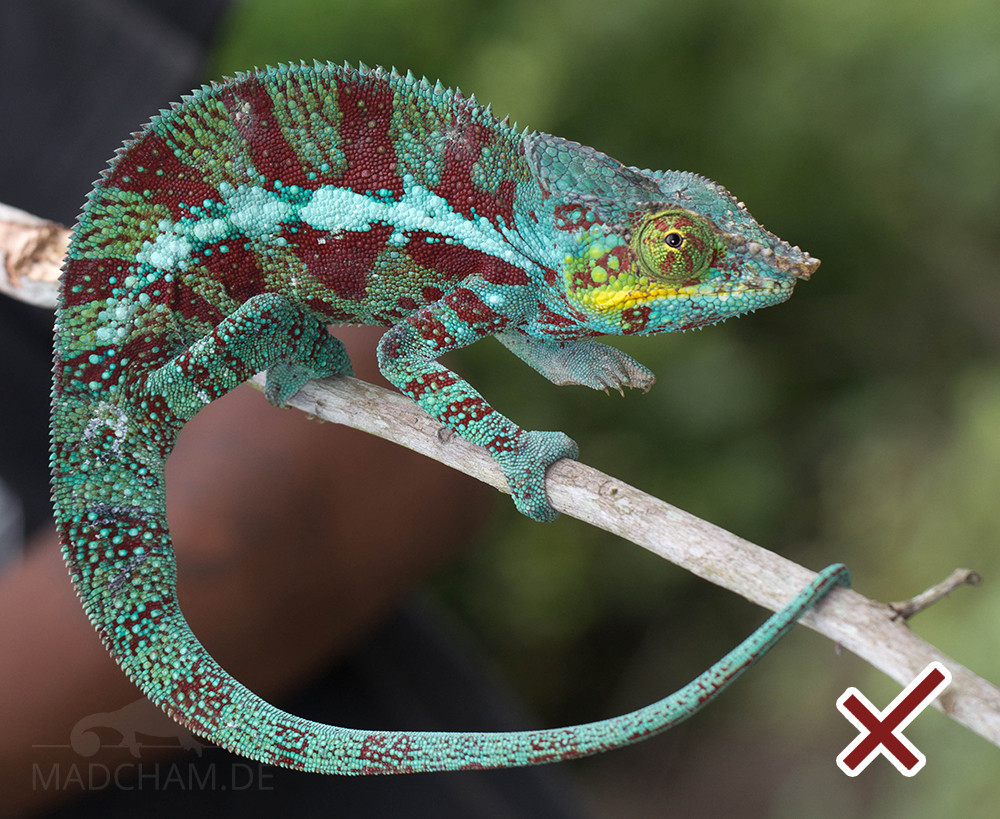
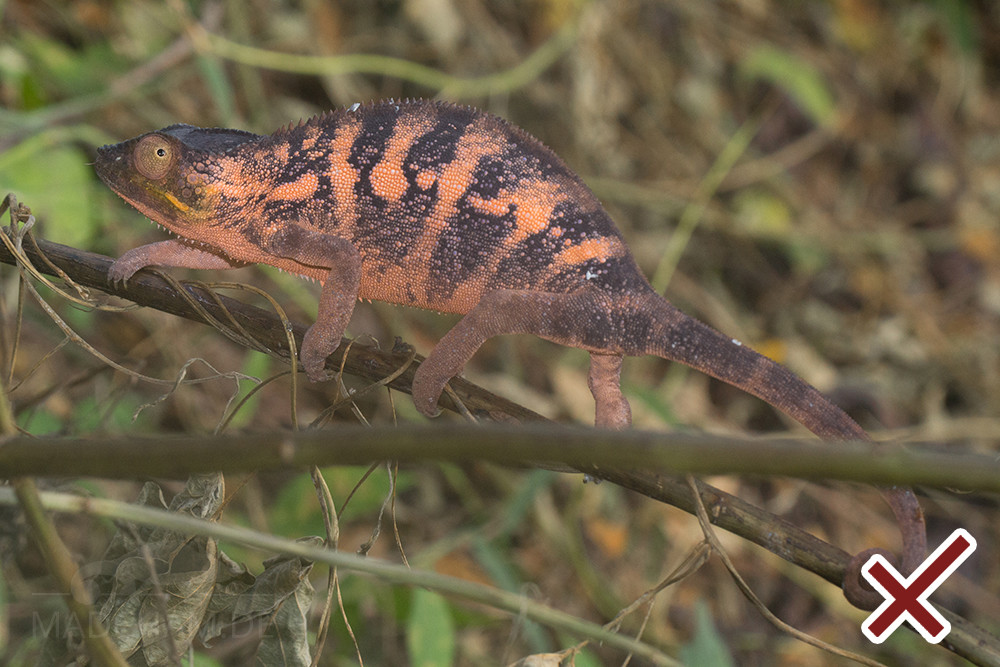
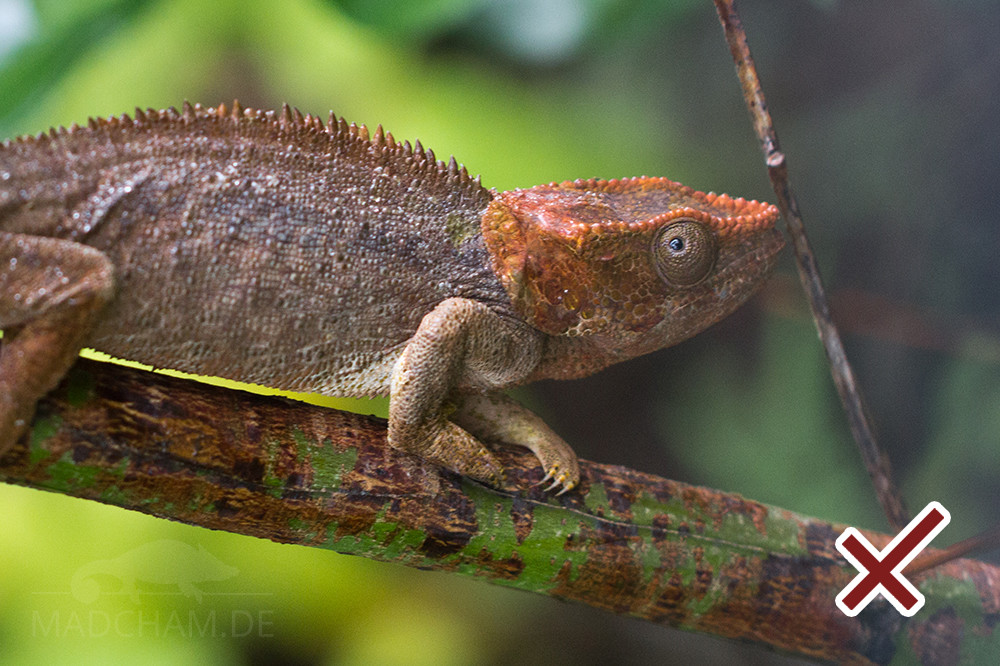
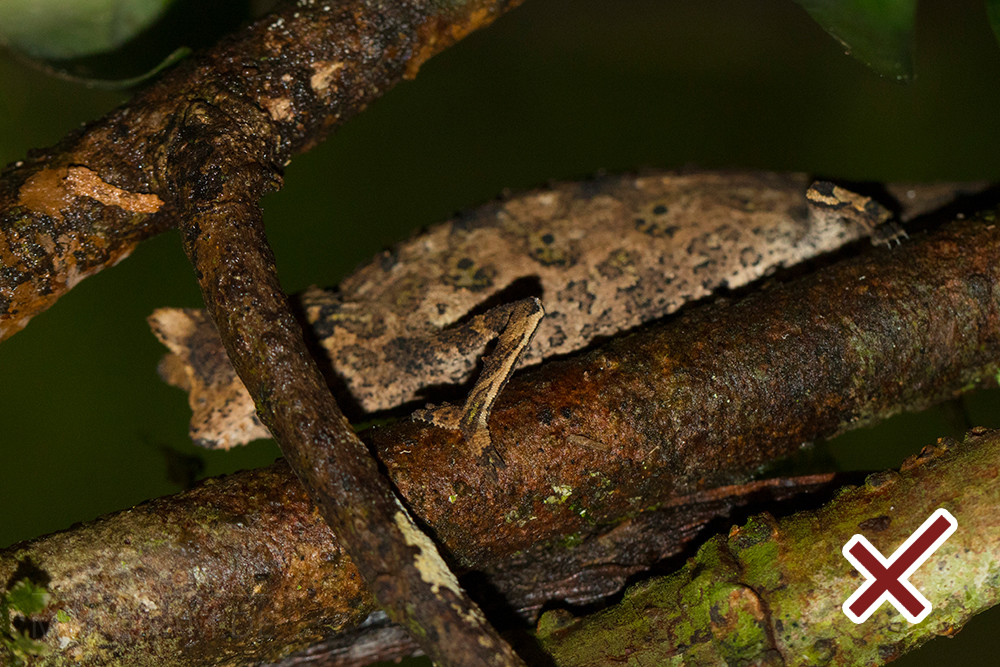
Image filling shot
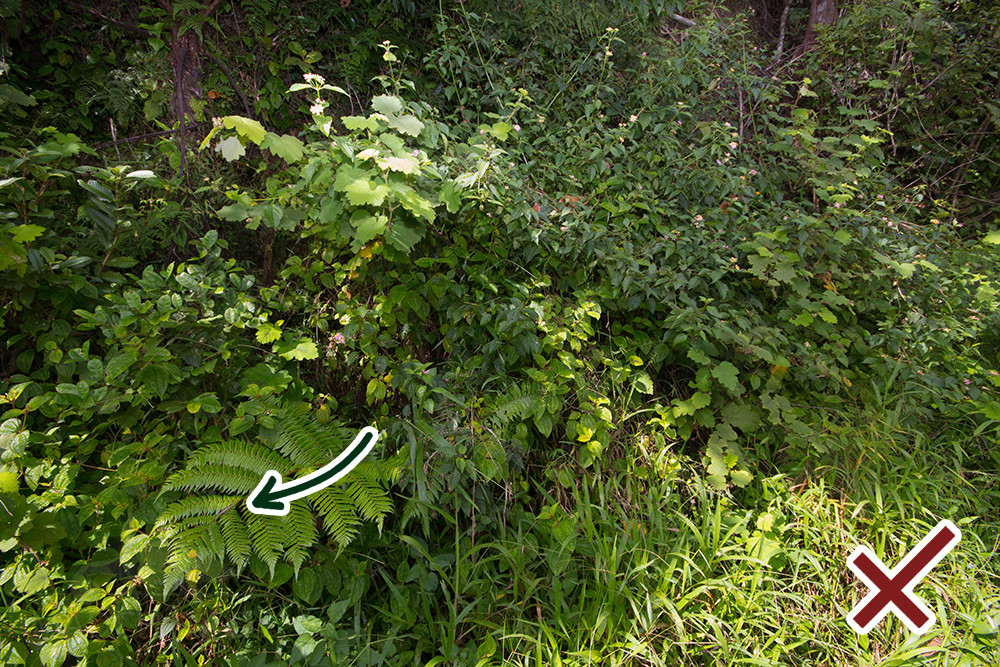
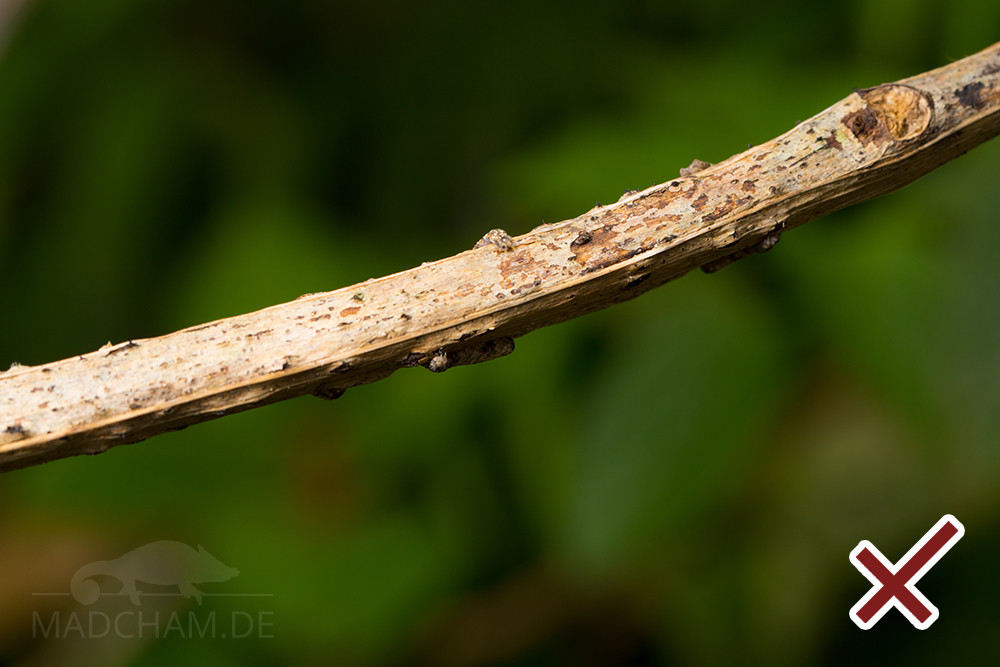
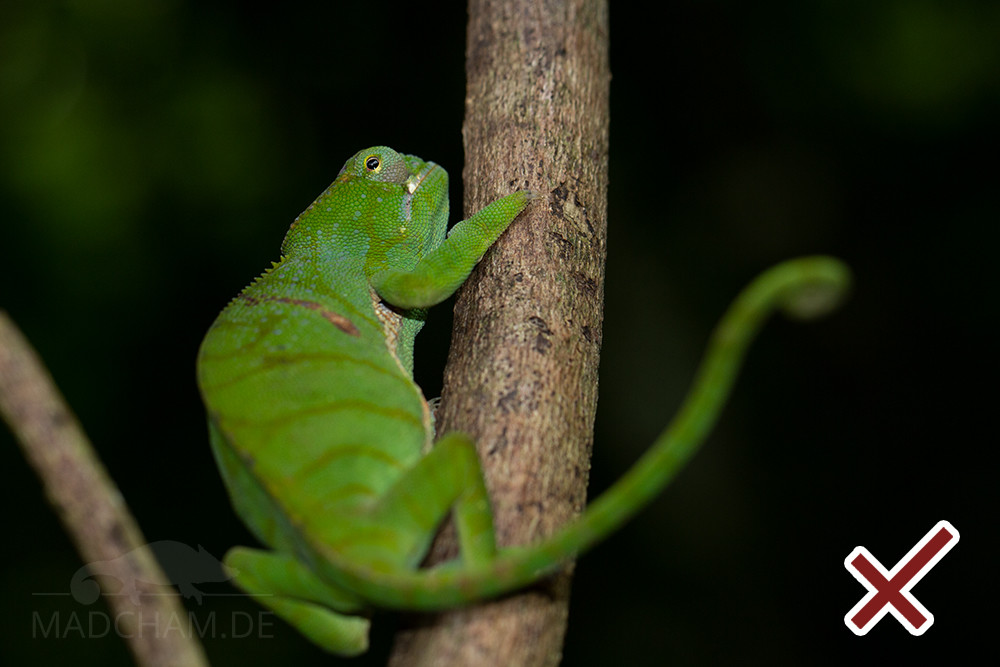
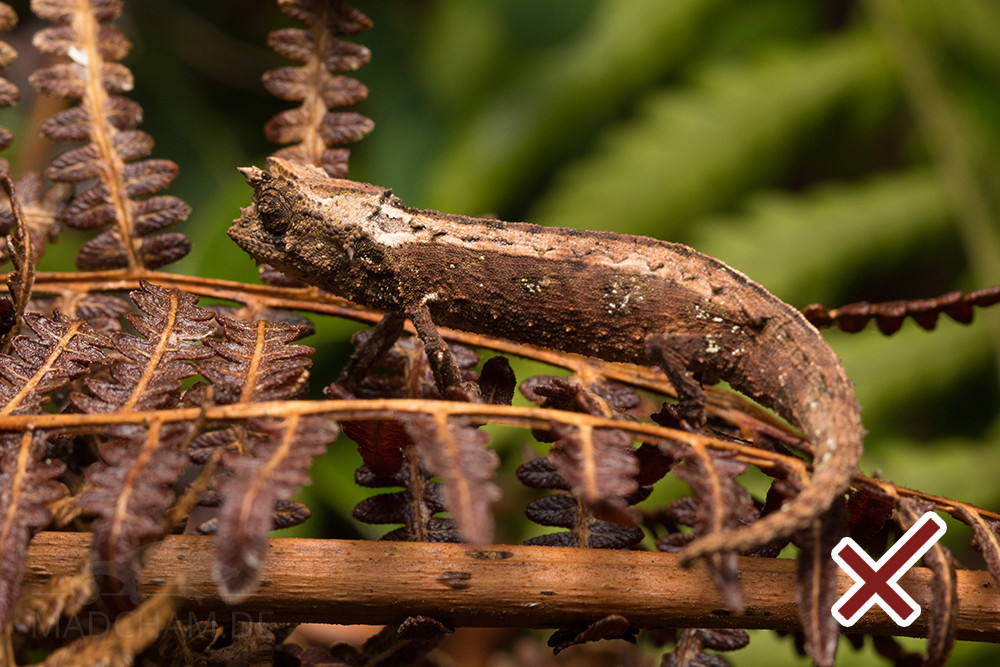
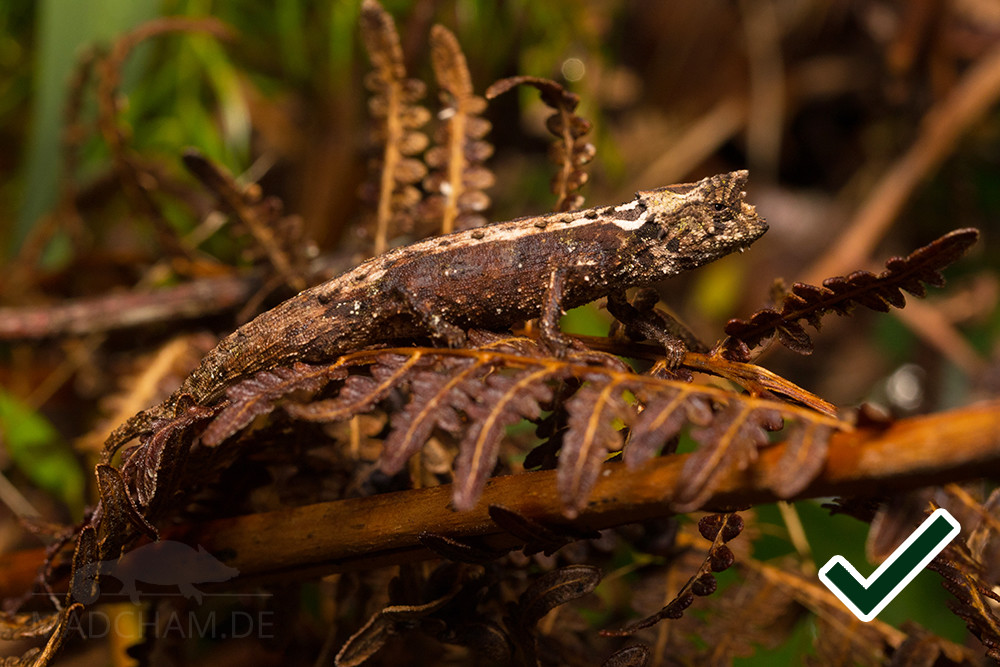
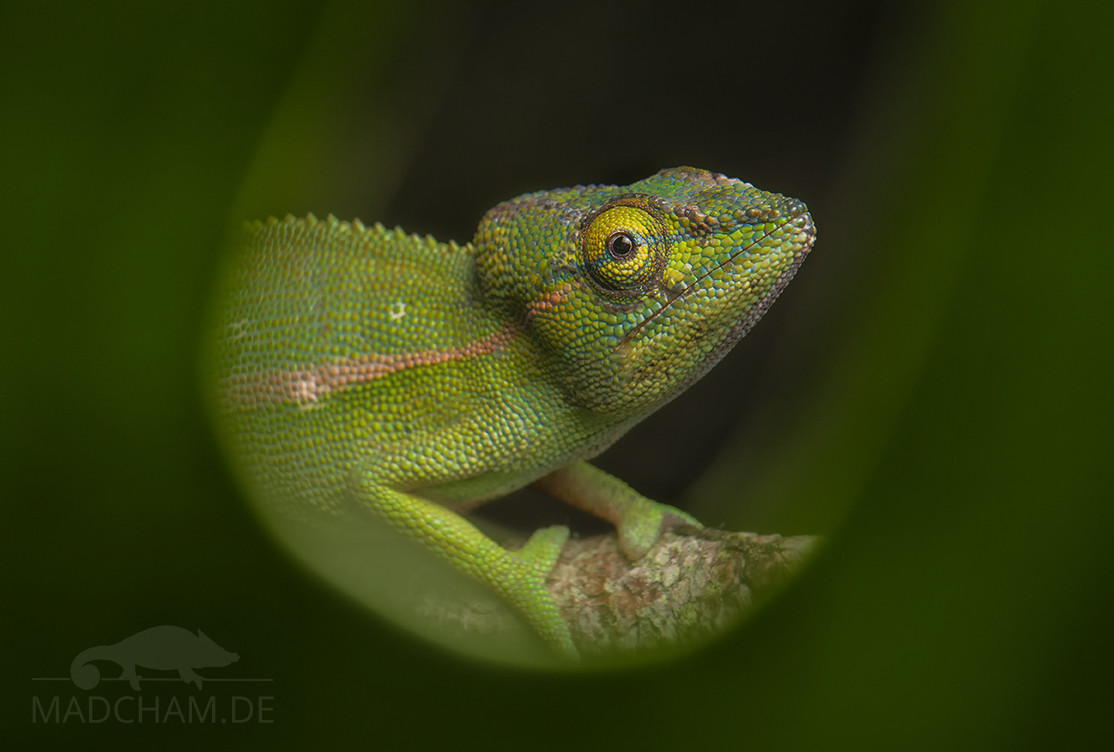
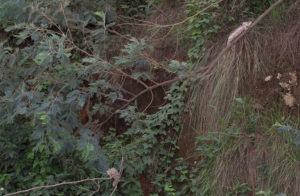
Actually, the most important thing: If you want to photograph a chameleon, the chameleon should also be pictured in full. Some tree or bush and somewhere in it is the chameleon? No one will be able to recognize that later. Zooming into the photo afterward with PhotoShop and selecting tiny parts of the picture leads to an enormous loss of quality. Therefore: Get close enough to the chameleon! The following photo shows what is meant: On the left, there is a Calumma gallus somewhere in the fern. You have to look very closely to recognize it. On the right, there is a portrait that fills the picture, where you can have a wonderful look at the same animal.

At eye level
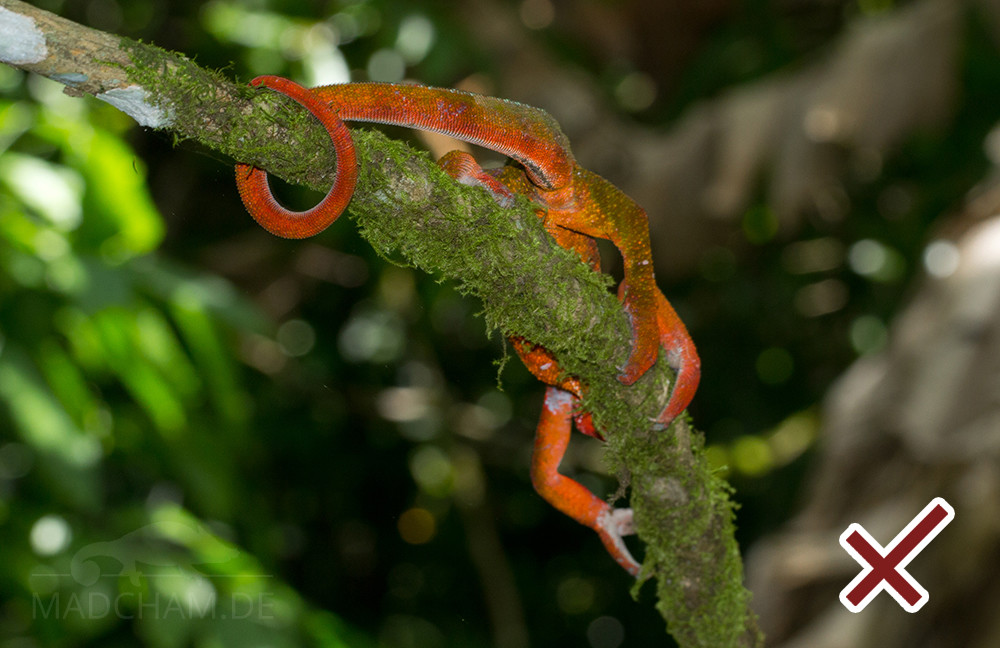
To photograph chameleons well, you should get eye level with the animal. Even if it is a tiny terrestrial chameleon! Chameleons photographed from above or below are narrow lines with eyes. Nothing of the great colors, shapes, and patterns of the different species comes into its own. In addition, chameleons are rather sensitive to potential predators above them. If you photograph them from above, they usually show stress coloration and try to flee. You then have a running away chameleon in the photo, which looks neither relaxed nor nice. The following two photos show several runaway shots: The female Furcifer bifidus at Vohimana (top left image) is sticking out one foot while most of her body is obscured by a branch. The Furcifer pardalis from Vohimana (upper right image) was only caught from below – not a good shot either. The Calumma gallus in Vohimana (lower left picture) is actually not visible at all behind its branch, only a few feet are just peeping out. The female of Furcifer timoni (picture bottom right) is just disappearing in front of the photographer.
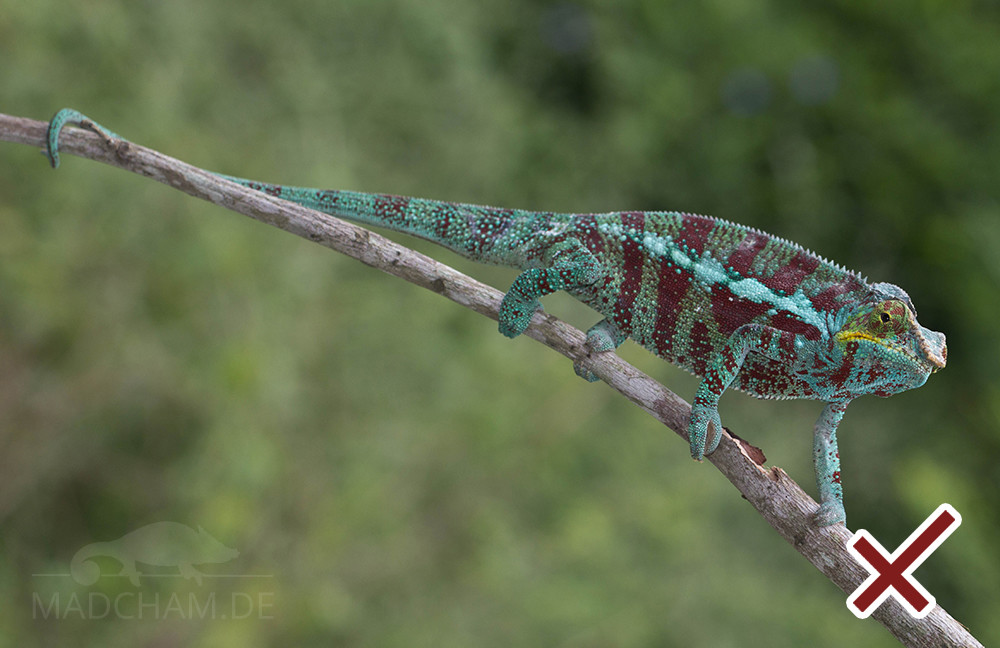
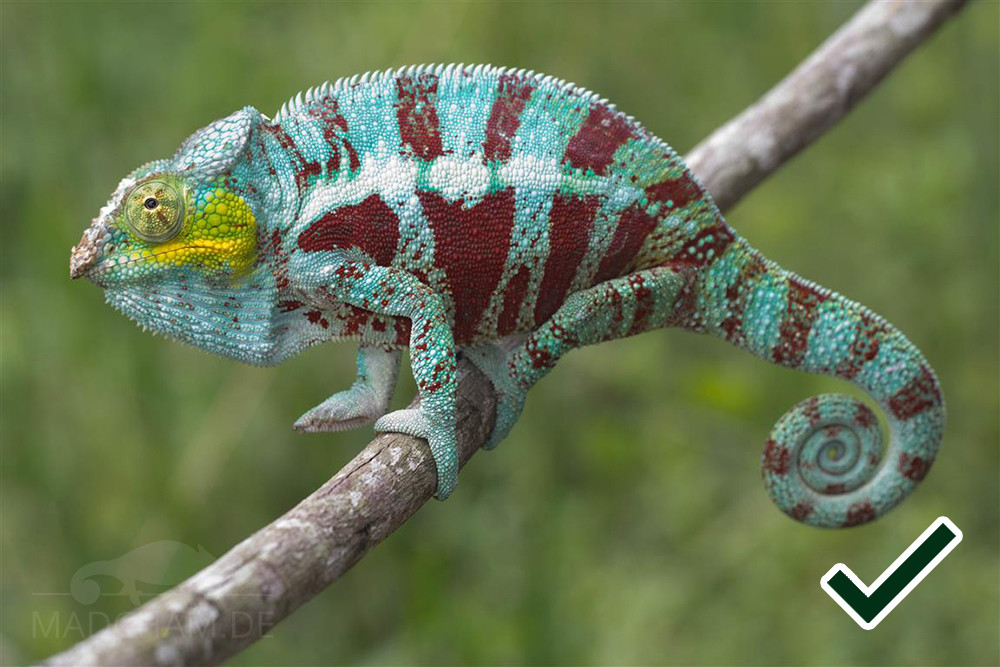
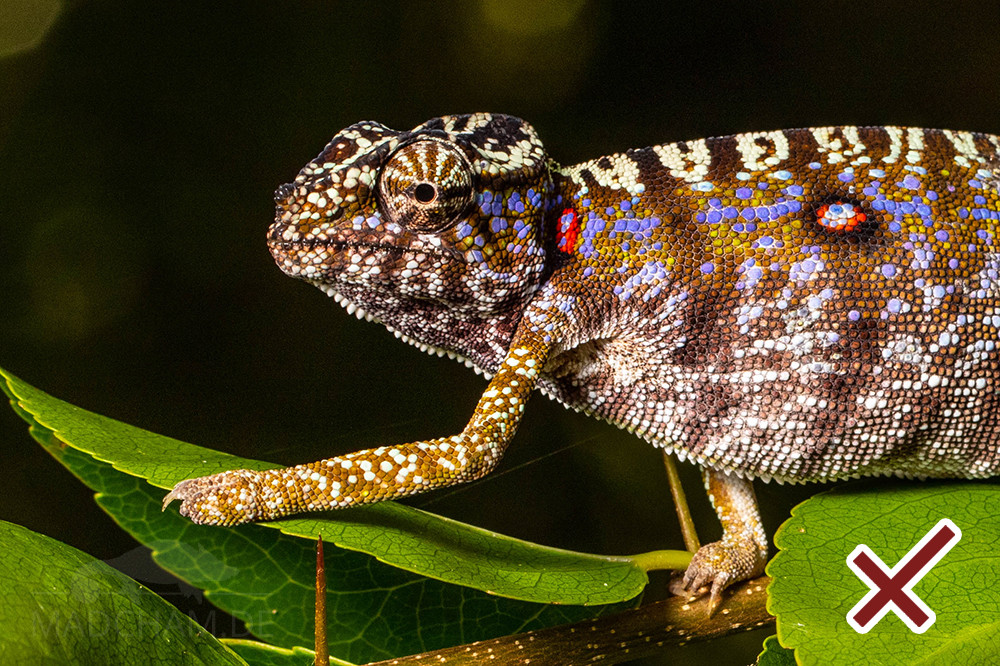
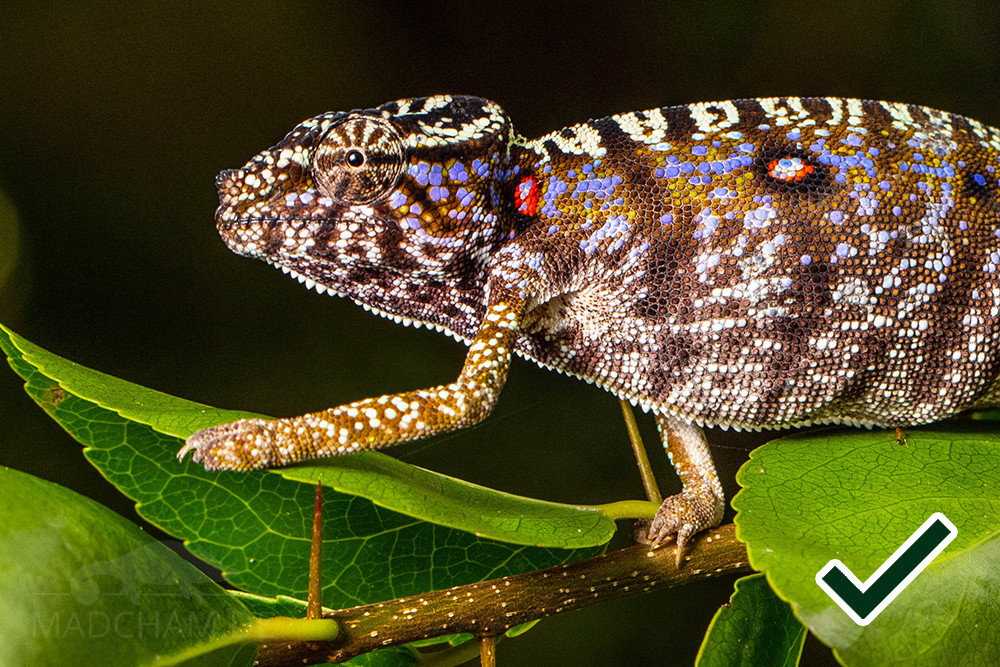
The body of the chameleon should also be as parallel as possible to the optics. It is often a problem to get the whole tail of the chameleon in the picture. Sometimes it hangs out of the picture, sometimes it is cut off. This can be solved by photographing the chameleon diagonally. Alternatively, touching the tail gently will cause many chameleons to curl their tails. And if nothing works at all in the side view, you can also take nice photos from the front. The following two photos show the same male of Furcifer pardalis from Djangoa. On the left side with stretched out, “endless long” tail, on the right side photographed a little bit diagonally with a curled up tail.
View direction
In photos that appeal to the viewer, at least one chameleon eye looks at the viewer. At best, the chameleon should look directly into the camera. In most cases, this is self-adjusting during photography, you just have to release the shutter at the right moment. Chameleons are extremely attentive and fix any movement with their eyes – even if only one finger wiggles over the shutter release. If a photo is supposed to depict a specific situation – for example, a chameleon threatening an opponent to the side of the photographer – the line of sight can deviate. Below are two photos of the same Brookesia thieli, only the photographer has moved around the animal. Once the animal looks somewhere in the area, once it looks to the viewer.
Light in the eye
To make a chameleon photo look more vivid, a so-called highlight in the eye is crucial. The term originally comes from painting. It refers to applied bright color dots that are intended to represent light reflections in certain areas of the subject. This can be used to make human portraits look more “radiant”. The following two photos show what is meant: On the left, there is no highlight in the eye of Furcifer voeltzkowi on Katsepy, on the right there is.
In photography, one uses natural light sources whose reflections are then reflected in the chameleon eye. The light source can be the sky, the sun, but also a flash. The highlight must not be in the middle of the pupil, but should always be seen to the side of it.
Sharpness and focus
With chameleons, the focus is usually on the eyes. This means: Set the focus point of the camera on the eye facing the viewer. It should be noted that chameleons have somewhat protruding eyes. If the depth of field is too shallow, only the eyes will be in focus, but the rest of the animal will not. To a certain extent, you can regulate this by opening the aperture. A chameleon in focus whose eyes are out of focus will usually result in a poor photo. “Eyes only in focus” is also not a good picture in most cases – unless you really want the focus to be only on the eyes in a particular scene.
Read the chameleon
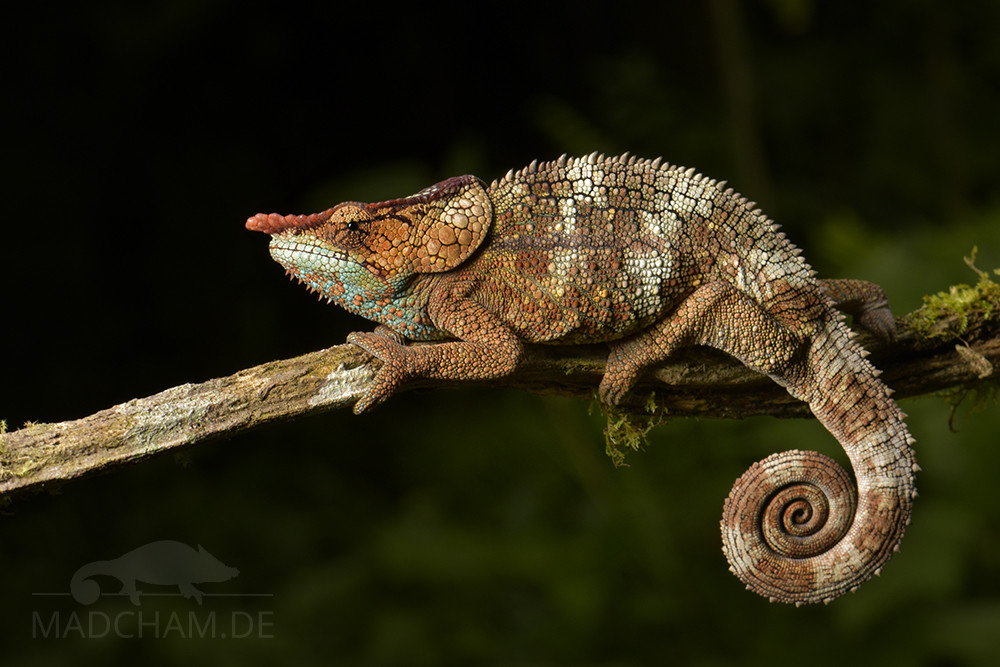
Chameleons communicate with colors, body shapes, and movements. Anyone who wants to photograph chameleons particularly well should be able to interpret them and deal with them. Because their behavior is predictable and relatively easy to learn. A “black-faced” chameleon, an extremely brightly colored, overheated animal, or one that just jumps off a branch and flees is not pretty to look at in any photo. Obviously sick animals with sunken eyes, injuries, or females during egg-laying should also be disturbed as little as possible. There are so many chameleons in Madagascar! Not every single one of them is suitable as a photo motif. If you are just starting with chameleon photography, you may prefer to choose the large Calumma parsonii cristifer as your first subject, as it sits very chilled and calm on its branch anyway, instead of trying to photograph the running, nimble Furcifer willsii twenty meters away. Leaf chameleons like Brookesia superciliaris, once found, are usually grateful subjects. For these small chameleons, you need patience and a good macro lens, but they are generally less prone to “running away”.
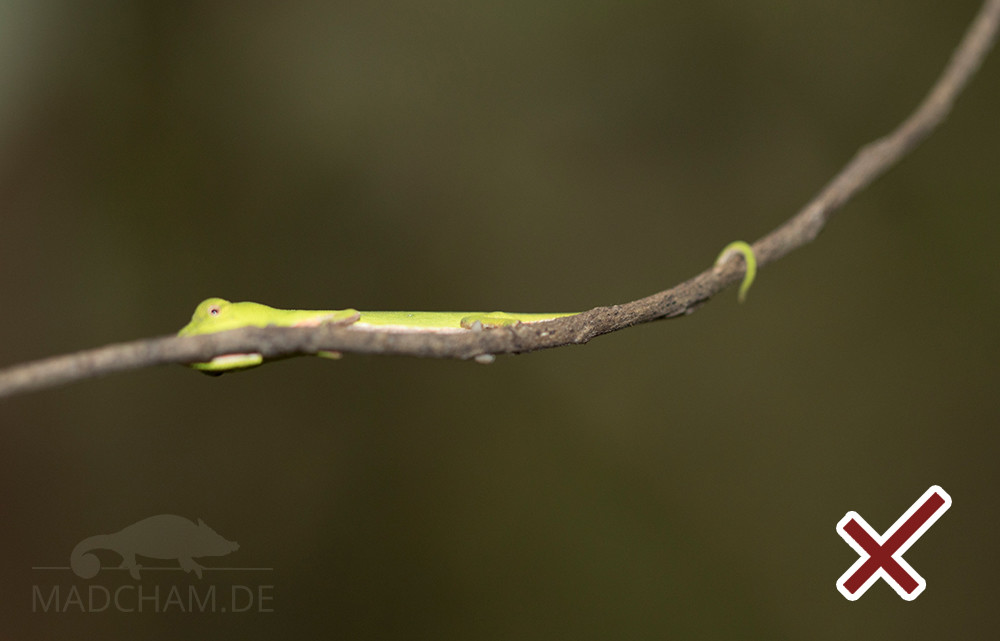
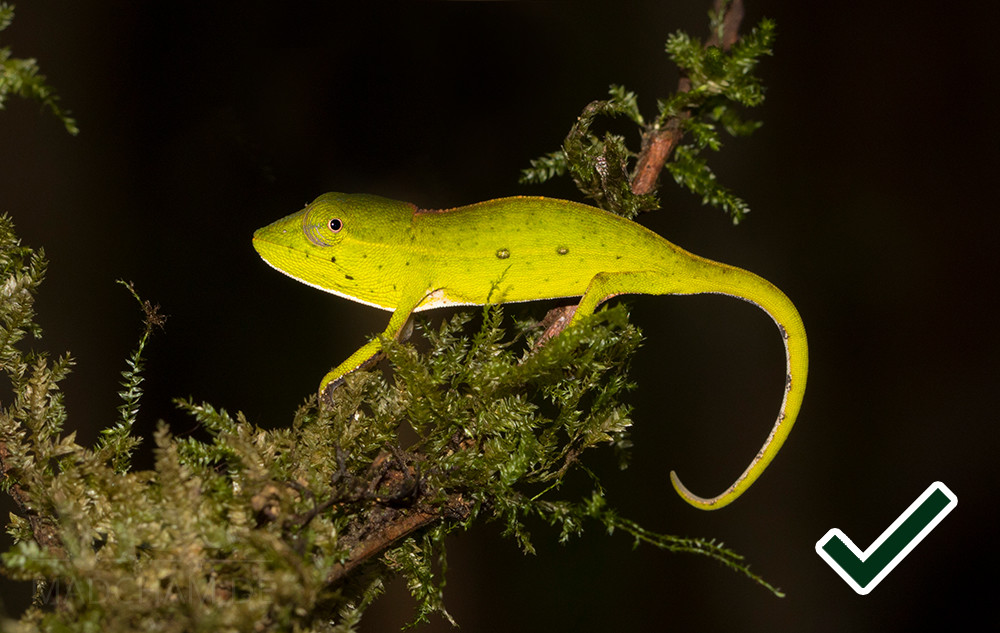
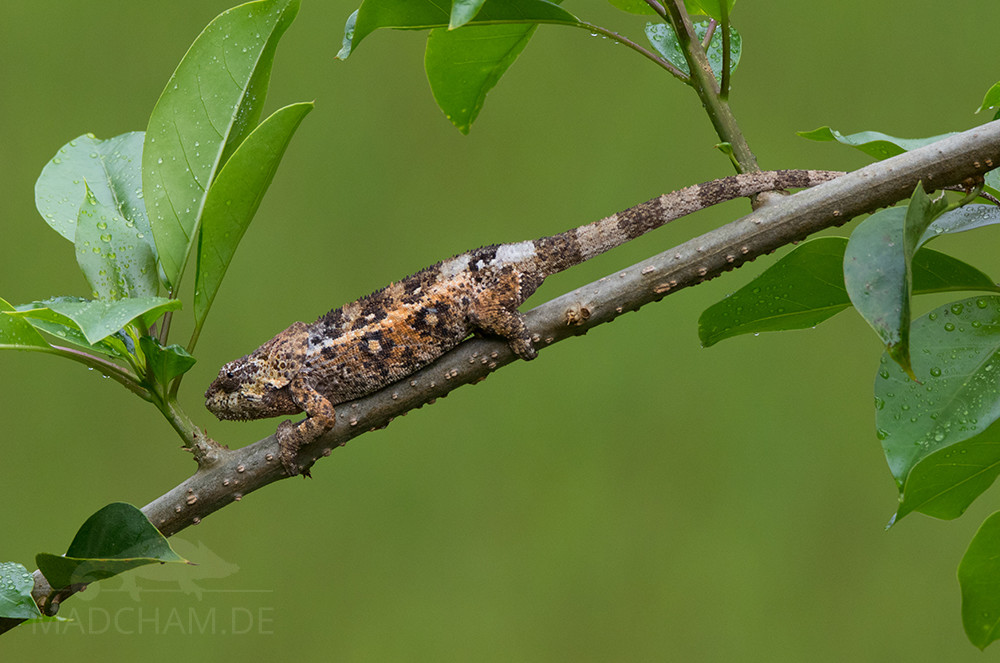
Especially small tree-dwelling chameleons like Calumma linotum, Calumma boettgeri, or Calumma gallus are more difficult to photograph. They often show defensive behavior by immediately turning behind branches if a camera or generally a human appears near them. In the photo, you see then only “a branch with eyes”. In such a case you need a lot of patience. Eventually, the animal will reappear and move on. Tip: Do not take the camera away from the face while waiting. Otherwise, the chameleon will appear, you will pick up the camera and it will be gone again due to the movement before you can release the shutter. The photos above show one and the same juvenile of Calumma gastrotaenia, on the left as found and on the right a few minutes later and a few centimeters further on a mossy branch.
So much for our tips.
By the way, you can find an example of our photo equipment and what exactly we take with us into the forest on Madagascar here. There you will also find regularly new tips for photography on Madagascar. Finally, we wish you a lot of fun photographing, be it in Madagascar or elsewhere in the world!
 Calumma gastrotaenia in Anjozorobe,Nikon D750, Nikkor 105 mm Micro, full frame, f/11, 1/125 sec, ISO 100, manual mode, hands-free, two unleashed Yongnuo YN560 III, two softboxes
Das könnte dir auch gefallen


Follow us on Instagram

Most popular articles


Your travel specialist for Madagascar